
Product list
In the admin area, under Settings > Commerce, you will find the Products section, which offers settings to display products in your storefront listing.
Default Sales Channel
In this area, you can define whether newly created products should automatically be assigned to a sales channel.

In the drop-down menu, select all sales channels to which new products are to be automatically assigned. Then activate this function. In the Visibility for selected sales channels section, you can set the default visibility of new products, just as you can in the product configuration.
Product
In the product section, you will find product-related settings for the product listing.
The settings can either be made directly for all sales channels or alternatively for individual sales channels (1).
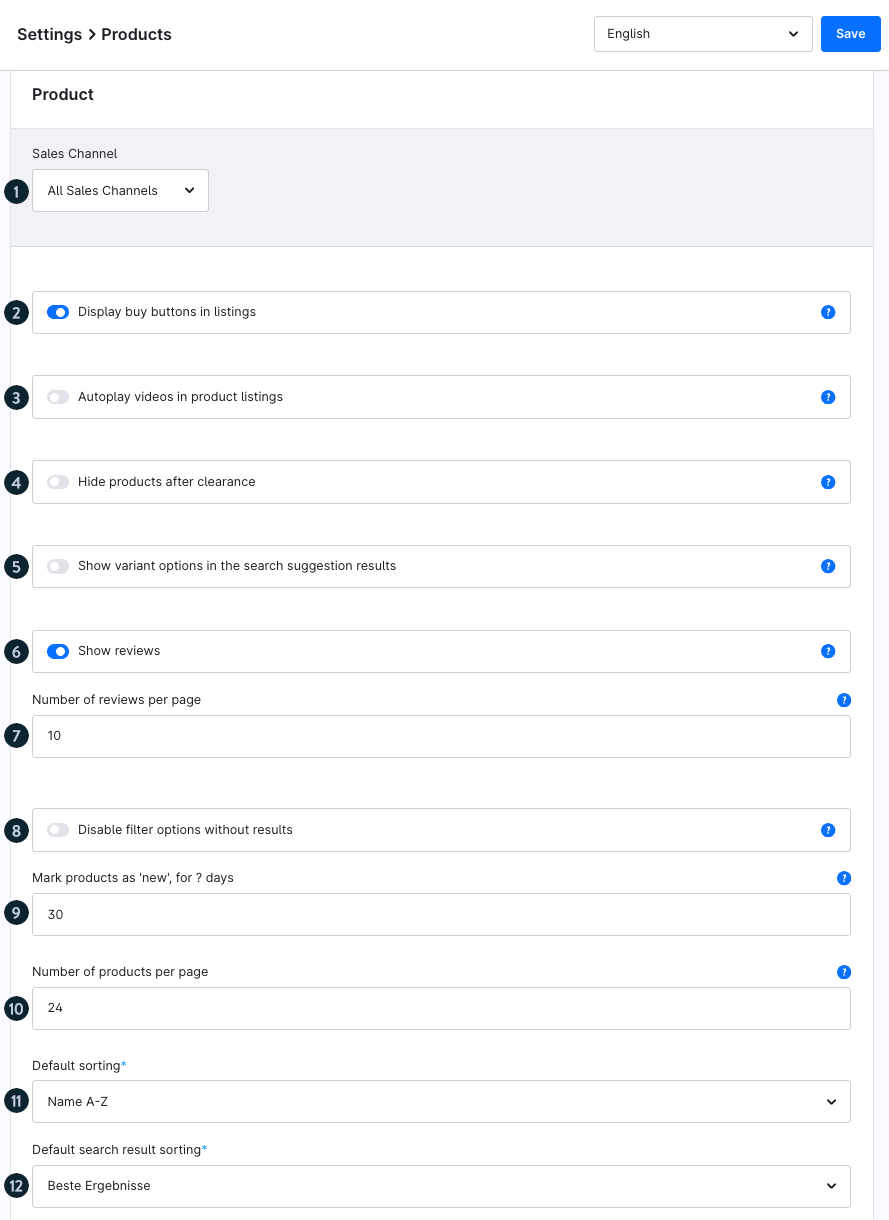
Display buy buttons in listings (2): Enables the display of the Buy button for each of your products in the product list. The Buy button is displayed as ‘Add to basket’ for your products without variants. For variant items, however, “Details” is displayed instead of ‘Add to basket’. Once this option is disabled, the Buy button is no longer displayed, and the Details button is displayed for all products.
- Autoplay videos in product listings (3): Videos in product listings that are configured as product media covers will play automatically. If disabled, only the first frame of the video will be displayed.
- Hide products after clearance (4): When activated, it ensures that your clearance items are hidden from the storefront as soon as stock reaches 0.
- Show variant options in the search suggestion results (5): Allows variant options to be displayed below the product name in search suggestions.
- Show reviews (6): If you activate this option, the current average rating will be displayed in the listing in the form of stars.
- Number of reviews per page (7): Defines the number of reviews displayed on a product page in the storefront.
- Disable filter options without results (8): If you enable this option, filter options that have no results will be disabled in the storefront and cannot be selected.
- Mark products as 'new', for ? days (9): In this field, you can specify how many days a product should be marked as new if its release date is no longer than the specified number of days, e.g. 30.
- Number of products per page (10): Here you can specify how many products are displayed per page in a category or in the search results.
- Default sorting (11): Select the sorting option here according to which the products should be sorted by default in the storefront. The sorting options can be created and edited in the Sorting Options area.
- Default search result sorting (12): Select the sorting option here according to which the products should be sorted in the search results by default. The sorting options can be created and edited in the Sorting Options area.
Sorting / Sorting options
In this section you can create and edit the sorting options according to which the products in your Product Listing should be sorted.
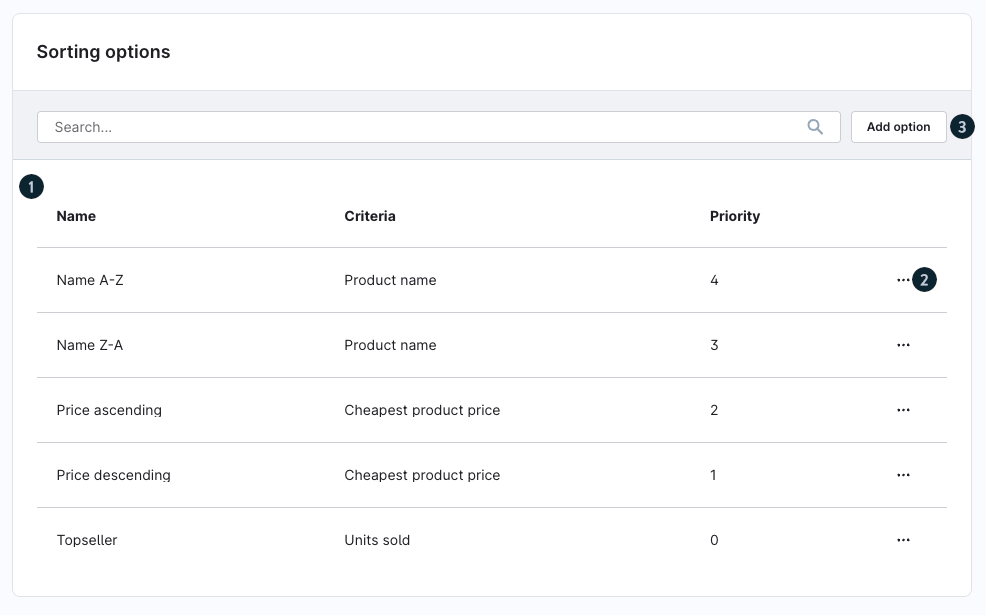
The overview (1) in this area lists all created sorting options, including an indication of the criterion by which the sorting was done and the priority, in which order the options are available in the frontend. You can adjust the priority by double-clicking on the current priority.
These sorting options are available to the customer in the frontend to sort the product listing accordingly. In the Standard Responsive Theme, the drop-down menu for selecting the sorting option is located on the right-hand side above the product listing.
On the right side, next to each sort option, you will find the context menu (2) with which you can edit or remove the sort option.
The button Add option (3) takes you to the screen for creating a new sorting option.
Add option
After you have clicked on the Add option button, you will be taken to this screen to create a new sorting option.

Name (1): Enter the name of the sorting option in this field.
- Technical Name (2): The technical name is used to identify the product sorting. It must be unique and is required for all product sorting options.
- Active (3): Use this setting to activate or deactivate the sorting option.
- Sorting Criteria (4): Use the dropdown menu to select the criteria for your sorting option. You can choose from criteria such as release date, stock level, product name, and more.
- Name (5): Displays the name of the sorting criteria.
- Order (6): Defines the order of your sorting criteria. You can choose between ascending and descending.
- Priority (7): Sets the priority of the sorting options. The higher the value, the higher the option appears in the list.
- Context Menu (8): Click the three dots ("…") to open a dialogue where you can edit or delete the sorting option.
Want to dive deeper?
You’ll find an interactive learning path on this topic in the Community Hub. Explore it step by step, try out features directly, and grow your knowledge in a playful, hands-on way.