
Basic information
In the basic information section of the admin under Settings > General > Basic Information, you can store relevant data for your respective sales channels. The settings can be defined globally or per sales channel.
Basic information
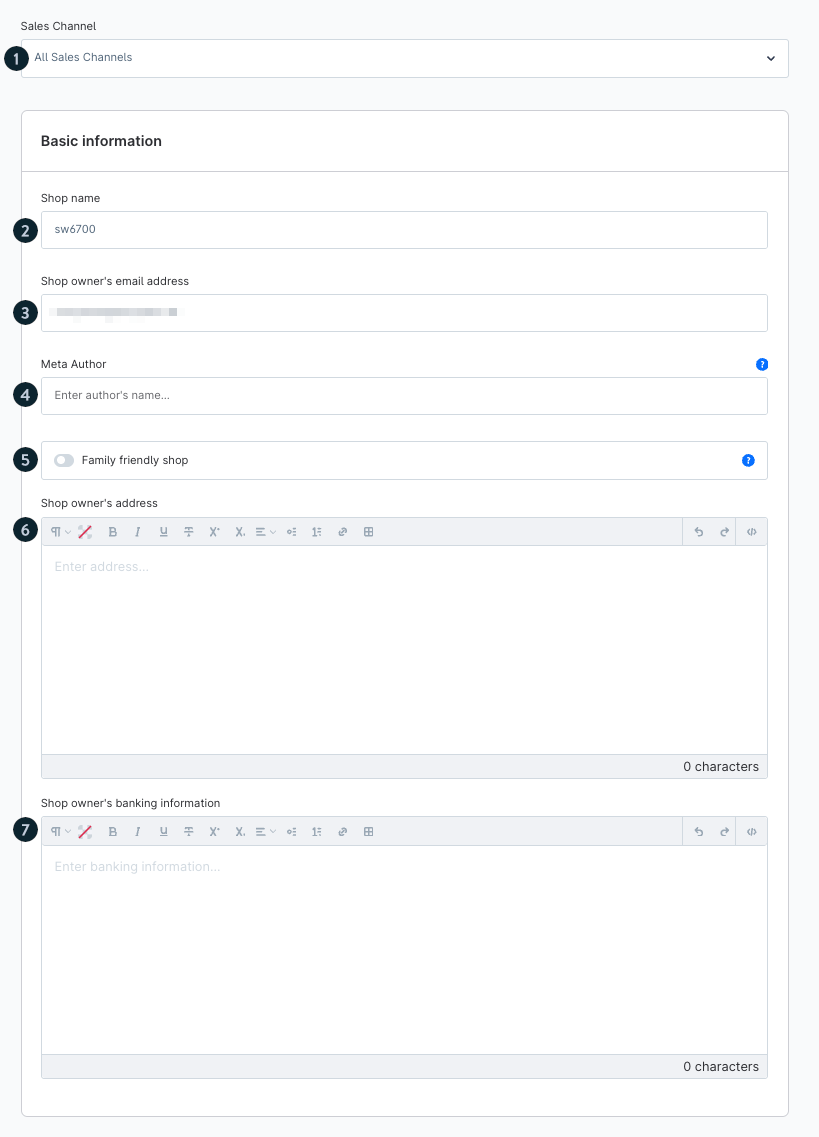
Sales Channel (1): Select which sales channel (for example: Online Store, POS, API) these settings apply to. “All Sales Channels” refers to the information being shared across all of them.
- Shop name (2): The public name of your shop - it’s displayed in the browser tab and often in the shop header.
- Shop owner’s email address (3): This is the main contact email for the shop owner. It can appear in the shop’s footer, the imprint (legal disclosure), or be used for system notifications.
- Meta Author (4): Used for SEO (Search Engine Optimisation). The author's name is added as a meta tag in your shop’s HTML source code, but isn’t visible to visitors.
- Family friendly shop (5): Marks your shop as suitable for all audiences (for example, for external filters or age-restricted services). It doesn’t directly affect the design or content.
- Shop owner’s address (6): The full business address — often displayed in the imprint or used for invoices.
- Shop owner’s banking information (7): Bank account details, such as IBAN, BIC, or account holder. This information can appear on invoices or during checkout, depending on the payment methods.
Shop pages
The ‘Shop pages’ window defines which static content pages are displayed in your shop and which layout they use. Here is an explanation of each point:
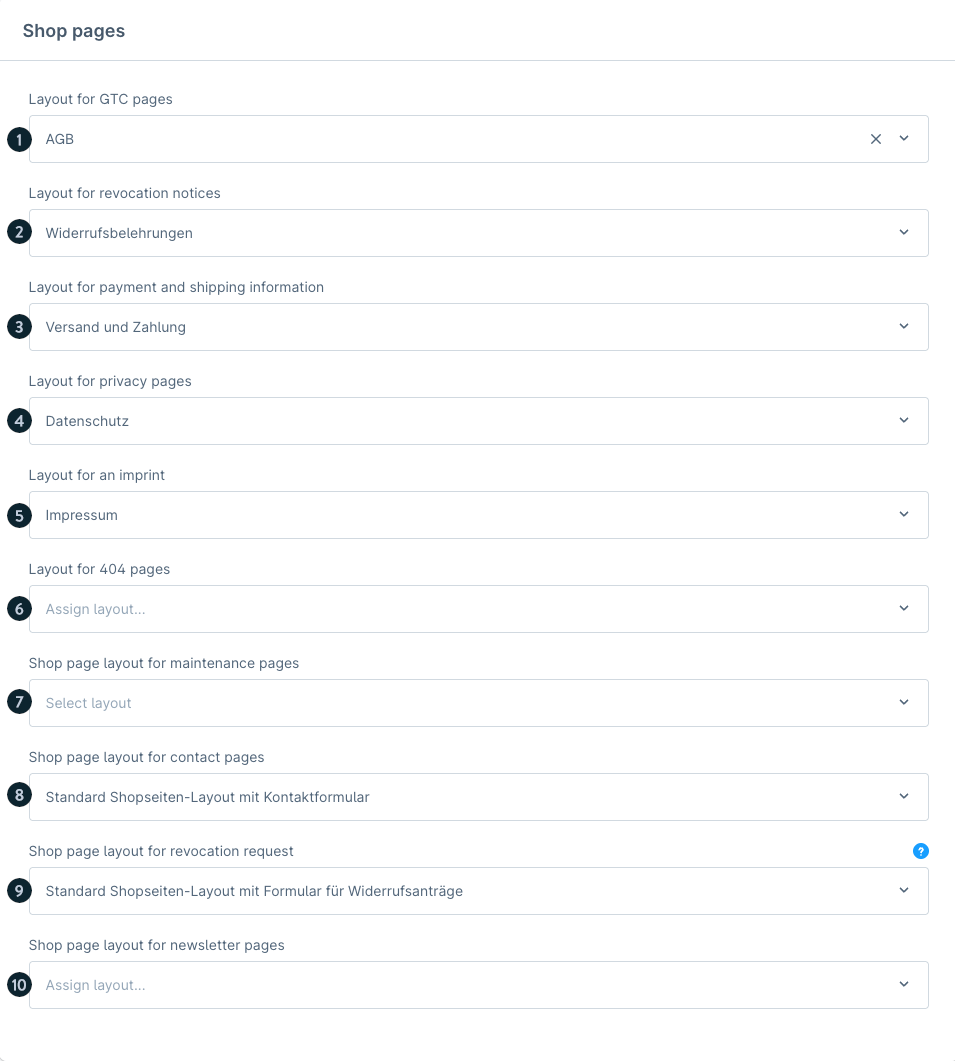
Layout for GTC pages (1): Here, you can select the page that contains the terms and conditions. This page is linked in the footer and often also displayed during checkout.
Layout for revocation notices (2): This is where the page with the cancellation policy (right of withdrawal) is defined, which is also visible in the footer and at checkout.
Layout for payment and shipping information (3): Defines the page on which shipping costs, delivery times and payment methods are described. Often, it is also accessible from the checkout or footer.
Layout for privacy pages (4): Links to the data protection page, which is mandatory under the GDPR. It is usually linked in the footer and on the newsletter registration form.
Layout for an imprint (5): Specifies the legal notice page, which is required by law. Typically displayed in the footer.
Layout for 404 pages (6): Determines which page is displayed when a visitor calls up a non-existent URL (‘page not found’).
By default, a generic 404 page is displayed, but you can store your own custom design here.
Shop page layout for maintenance pages (7): This page appears when the shop is in maintenance mode.
Useful for planned updates to show visitors a friendly notice page.
Shop pages layout for contact pages (8): Here, you define the layout of the contact page – usually with a form and address information.
Shop page layout for revocation request (9): This page defines the view for the cancellation request. To make it accessible, you must activate the option ‘Display “Cancel contract” button in footer’.
Shop page layout for newsletter pages (10): Links to the page where visitors can sign up for the newsletter.
If you do not select anything here, the default newsletter page will be used.
How to create the different shop page layouts is explained in the wiki article of Shopping Experiences.
Legal and compliance
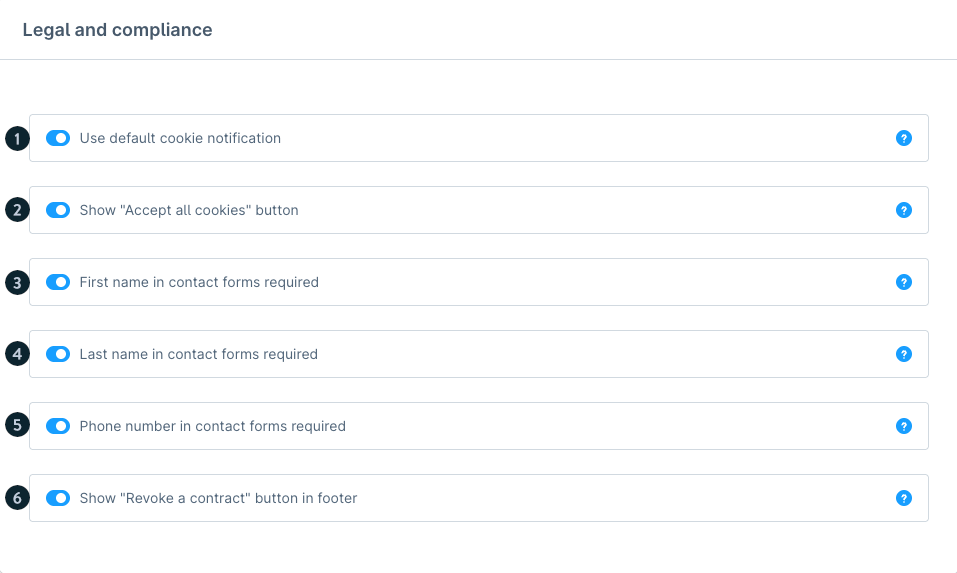
Use default cookie notification (1): Activates Shopware's built-in cookie banner. This informs visitors about the use of cookies when they first visit the site. If you deactivate it, you can integrate your own cookie consent tool.
Show "Accept all cookies" button (2): When this option is enabled, an additional button appears in the cookie banner that allows users to accept all cookies (including marketing and statistics cookies) immediately.
If it is disabled, users must make their selection manually (which is more privacy-friendly but less convenient).
First name in contact forms required (3): Makes the ‘First name’ field in the contact form mandatory. Visitors can only submit the form if they enter their first name.
Last name in contact forms required (4): The same principle as in point 3, but for the ‘Last name’ field.
Phone number in contact forms required (5): If enabled, customers must provide their phone number when filling out the contact form. You should check whether this is really necessary – according to the GDPR, you may only request data that is necessary for the purpose of the form.
Show "Revoke a contract" button in footer (6): If this option is enabled, a cancellation button will be displayed in the footer of your shop. This button opens the shop page layout of the cancellation request page.
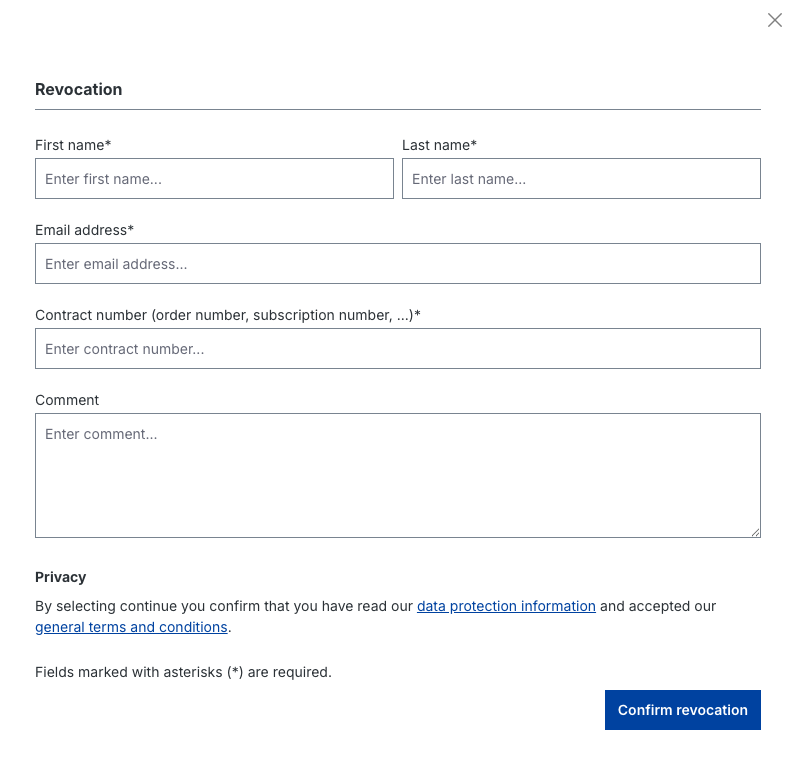
Revocation request in the storefront
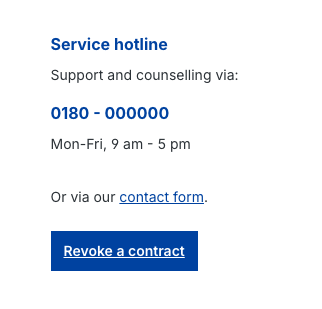
Once you have activated the option ‘Display “Cancel contract” button in footer’, the ‘Cancel contract’ button will appear in the footer of your storefront. After clicking on the button, the cancellation request will be displayed:
Rules for robots.txt
In this field, you can define domain-specific rules for the robots.txt file.
This file is read by search engine crawlers (e.g. Googlebot) to determine which parts of the website may be indexed and which should remain excluded.
The robots.txt file contains Allow and Disallow directives:
Disallow prevents specific pages or directories from being crawled.
- Allow explicitly overrides a block to make certain paths accessible to crawlers.
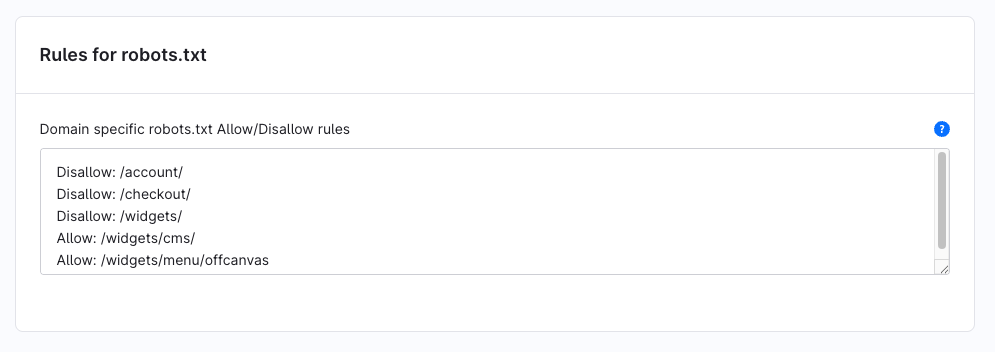
In this screenshot example, the customer account and checkout areas are excluded from indexing, while specific widgets (such as CMS or menu elements) remain accessible to search engines.
Note: The robots.txt file only controls crawling — it does not technically block access to the pages themselves.
CAPTCHA
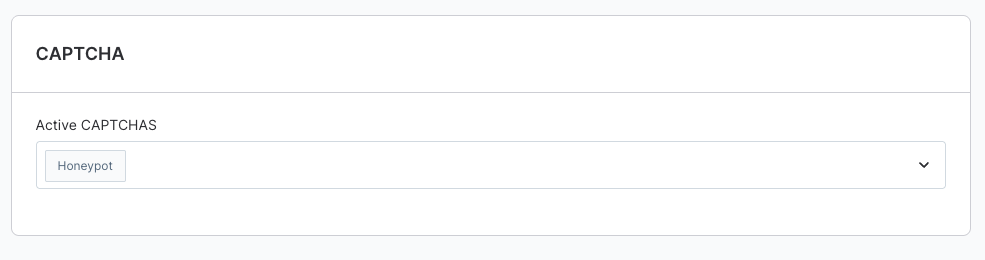
In the Captcha section, you can decide which Captchas should be used during registration and in the shop to ensure that the user is a human and not a bot or script. You can rely on a single CAPTCHA solution or select multiple solutions to be used.
If you have a store in the Shopware Cloud, Friendly Captcha is used for registration by default. Other captchas are currently not available here. You can find all the information about this captcha here.
The following captcha solutions are available to you:
Honeypot
With this solution, an additional invisible field is offered during registration, which bots and scripts fill in and are thus rejected. For normal customers, the field is not visible and can therefore not be filled in.
Basic CAPTCHA
With this solution, the user is presented with a graphic that displays a distorted combination of numbers and letters, which cannot be read by bots or scripts. The visitor must type this out without errors.

Google reCAPTCHA v2
With this solution, the user receives an "I am not a robot" checkbox that he or she must confirm. The user is then either redirected directly or has to solve a simple picture puzzle that cannot be solved by bots. For example, the user is asked to click on all pictures with buses. For this option, a Google reCAPTCHA account is required. After you have selected this captcha, the following settings are available:

- Website key (1): If you have a Google reCAPTCHA account, you will receive a website key. You enter this here for authentication.
- Secret key (2): In the Google reCAPTCHA account you will also receive a secret key for Google reCAPTCHA v2. Enter it here.
- Invisible Google reCAPTCHA v2 (2): If you activate this option, you can use Google reCAPTCHA v2 without the customer noticing. In this case, the simple picture puzzle will not be asked.
Google reCAPTCHA v3
With this solution, the customer's interaction can be verified without their intervention. Based on a score that is returned by the JavaScript API. After you have selected this captcha, the following settings are available:

Website key (1): If you have a Google reCAPTCHA account, you will receive a website key. You enter this here for authentication.
Secret key (2): In the Google reCAPTCHA account, you will also receive a secret key for Google reCAPTCHA v2. Enter it here.
Threshold score for Google reCAPTCHA v3 (2): For Google reCAPTCHA v3, a score between 0 and 1 is assigned by the JavaScript API. The closer this score is to 1, the lower the suspicion that it is a bot. With this score, you can determine from which score access is denied.
Friendly Captcha
The integration of the paid Friendly Capture is made possible in conjunction with a commercial Shopware plan.
With Friendly Captcha, you can effectively combat bots, as it is based on the fundamental mechanisms of the blockchain and reliably prevents spam and abuse. At the same time, it protects your user data and privacy, as it is data protection-friendly and GDPR-compliant, without using cookies or storing personal information. It also enhances your user experience, as it is fully automated and barrier-free, which means your customers no longer have to deal with tedious tagging tasks.

In order to use friendly Captcha, it is necessary to book a paid plan with friendly Captcha. You can do this here. There you will also receive a website key and a secret key, which you then enter here.
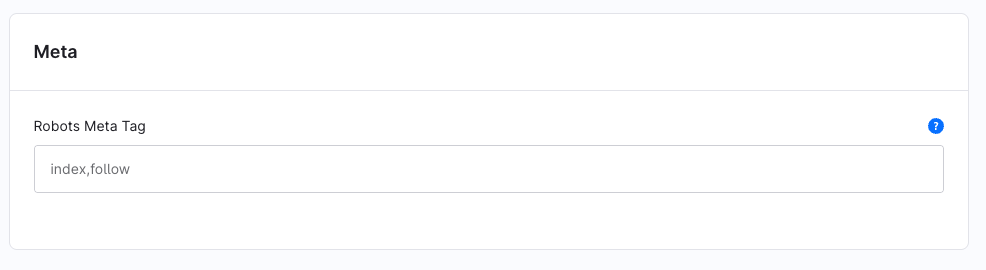
Meta
This field allows you to specify how search engines should treat individual pages of your shop.
The robots meta tag is embedded in the HTML source code and supplements the settings in robots.txt.
Note: This option sets the default value of the robot meta tag for the entire shop. CMS pages can override this value individually. Some system pages – e.g., the shopping cart or checkout – always use noindex, follow for security and privacy reasons, regardless of this setting.