
Snippets
Shopware uses snippets for the translation and customisation of texts, which can be managed here. These snippets can be used in the storefront or documents. The module for managing snippets can be found under Settings > Shop > Snippets.
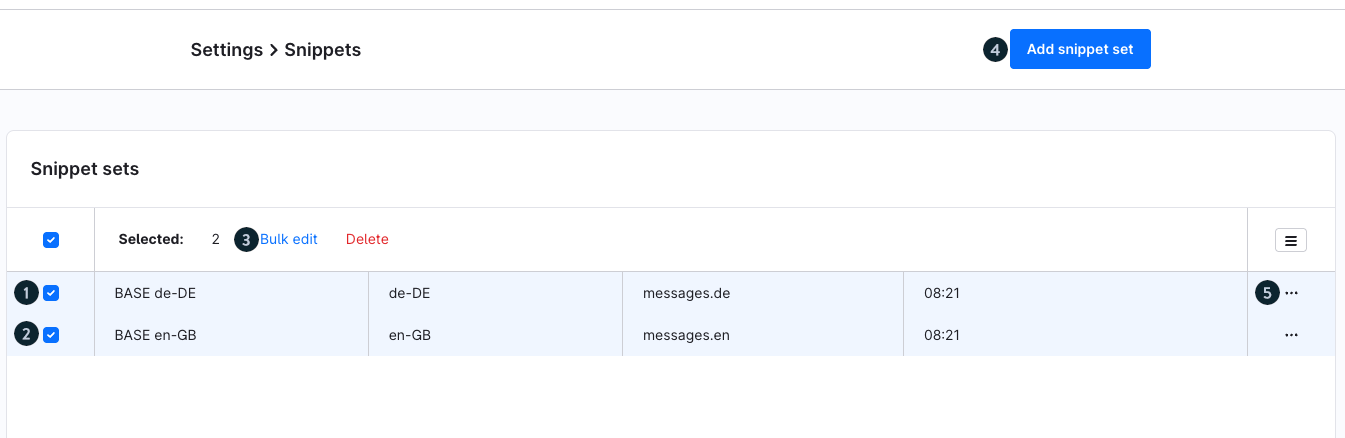
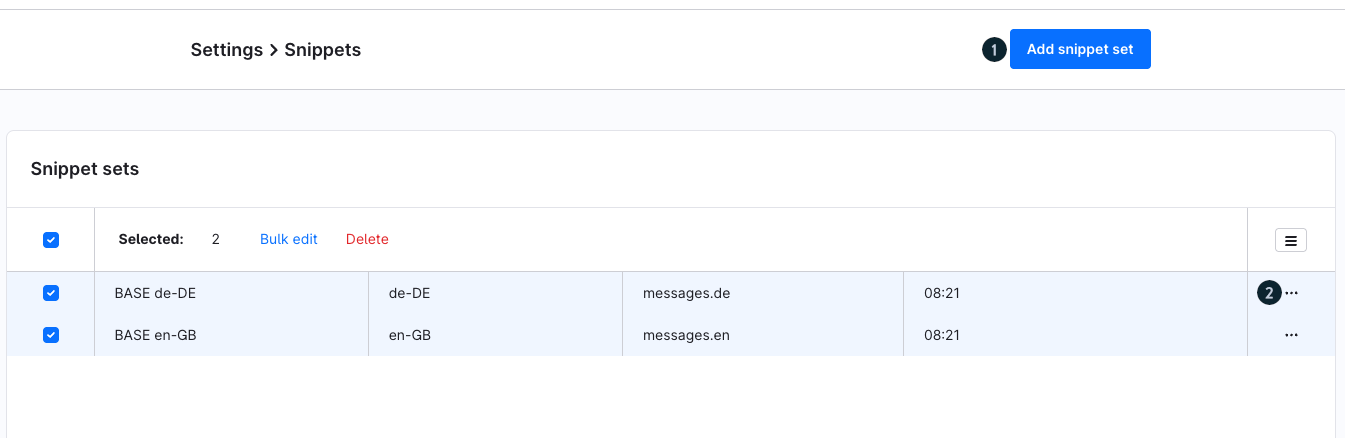
The snippets are grouped into snippet sets. By default, there are two base sets: BASE de-DE (1) and BASE en-GB (2). They provide the default Storefront translations. The core base file for German is messages.de.base.json, and Storefront-specific translations are added via storefront.de.json (analogous for English, using en). These base JSON files provide the default values so you can reset snippets to their original state when needed.
Don't edit these files manually, because they help you to reset the snippets to a basic value.
With Bulk edit (3), you can edit the selected snippet sets and adjust snippets to your needs. With Add snippet set (4), you create a new snippet set based on a base file. The context menu (5) next to a snippet set lets you edit, duplicate, or delete that set. Double‑clicking a row enables inline editing.
Edit Snippets
To edit a snippet, open by clicking the name of the snippet set that contains it. If you want to edit snippets in multiple sets, select those sets via the checkboxes and click Bulk edit.
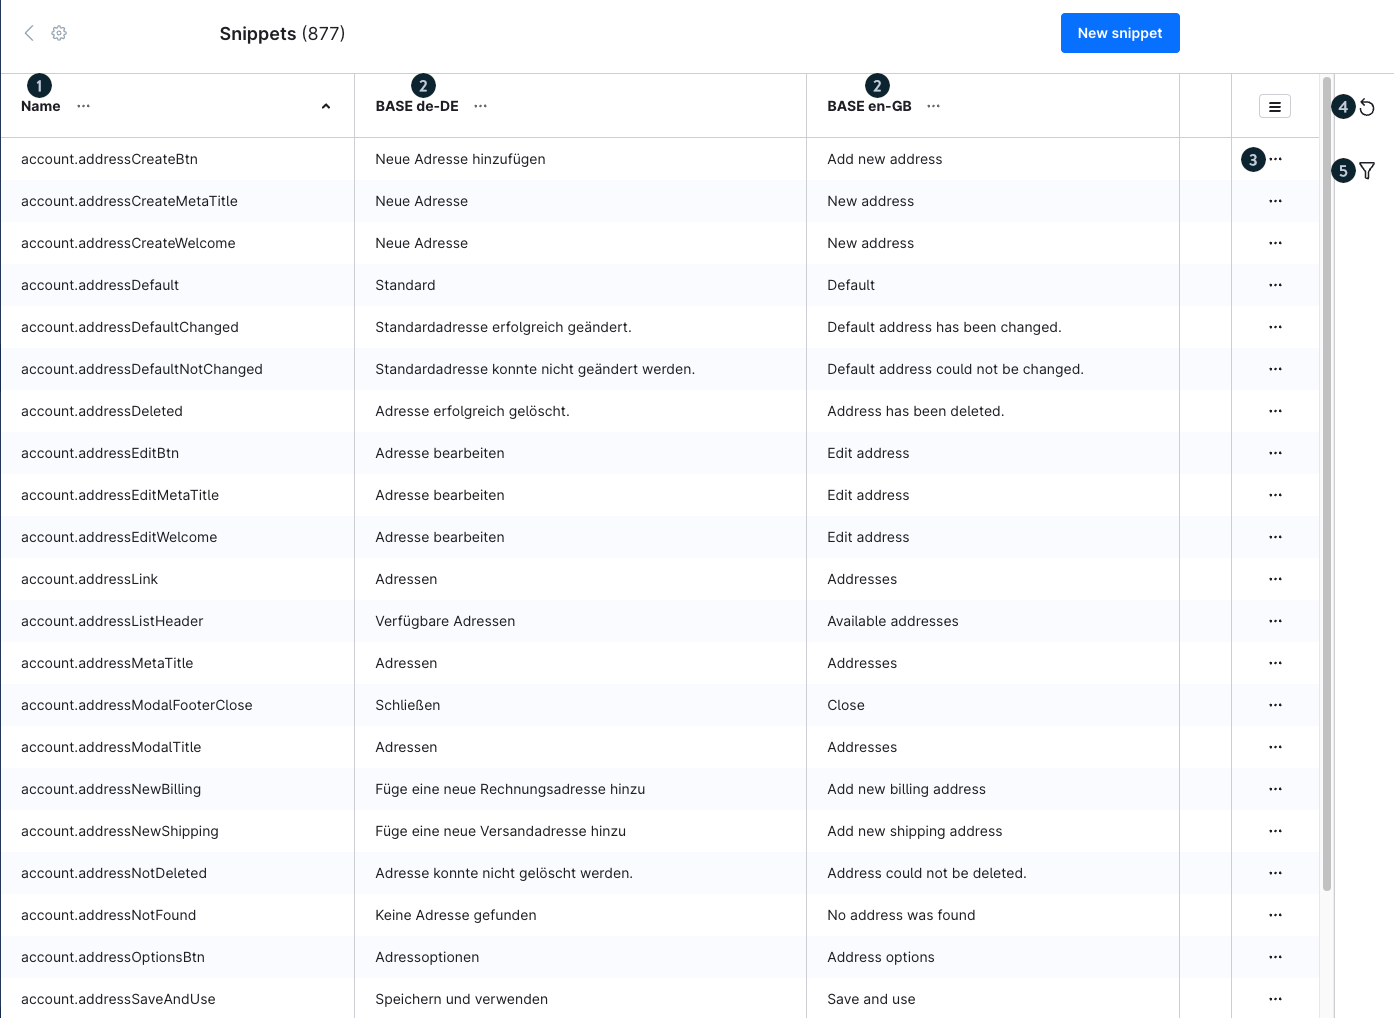
You now see a list of all snippets stored in the snippet database table. In the Name (1) column, you will find each snippet’s key. Each snippet has a translation in every snippet set (2). The context menu (3) takes you to the snippet detail page for that key or opens the reset modal. On the right, the Refresh (4) button updates the view from the snippet table. Use Filter (5) to show filtering options for the displayed snippets.
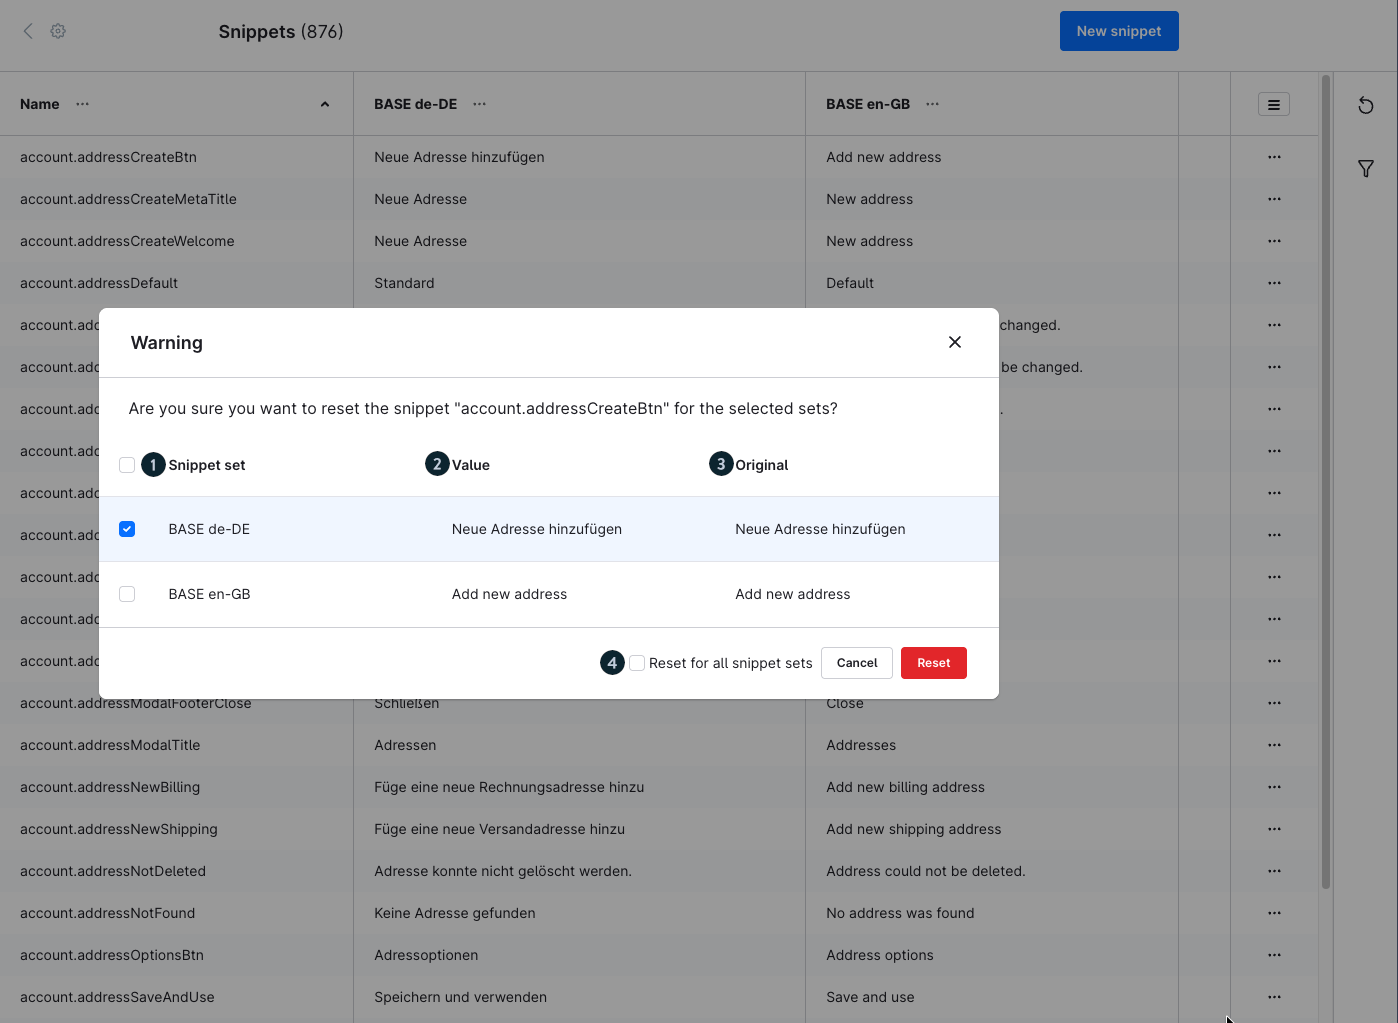
In the reset modal, you can choose which snippet sets (1) to reset the selected snippet from the currently selected list, using the checkboxes. You always see the current translation (2) and the original translation (3), you can revert to. You can also select Reset for all snippet sets (4) to reset all translations for that key, including sets not currently visible.
Edit
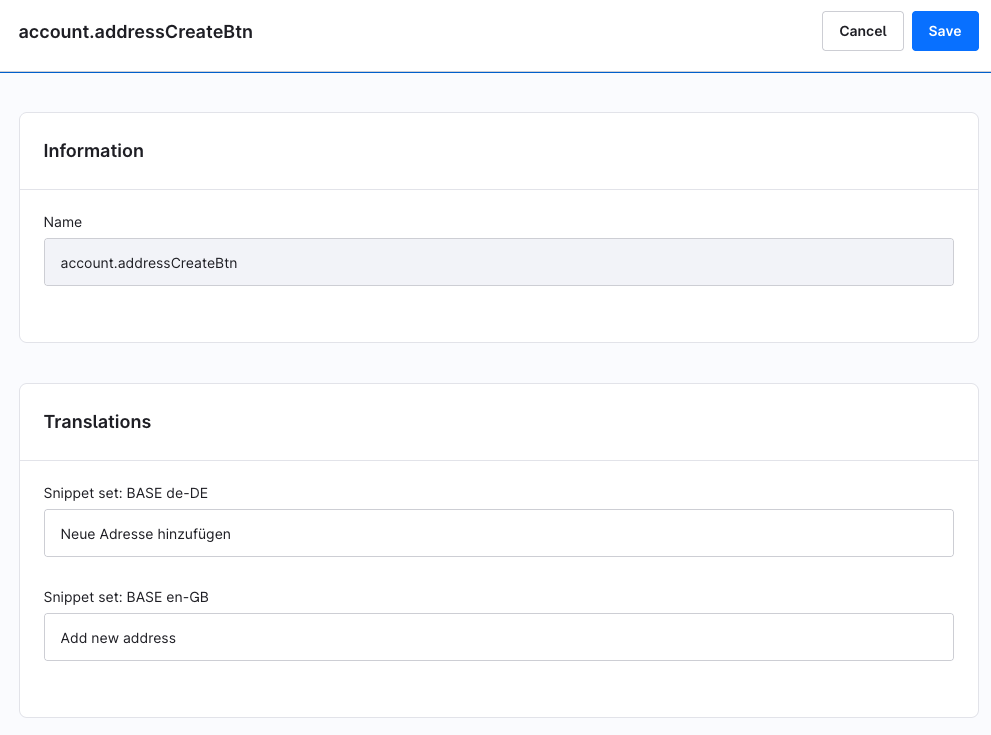
When you click on the snippet key or on edit in the context menu, the detail page opens. Here you can see the snippet key and its translations in every snippet set below. You can edit the translations for this snippet across all snippet sets.
Filter
In the filter menu you can use various filters to display the text modules more clearly.
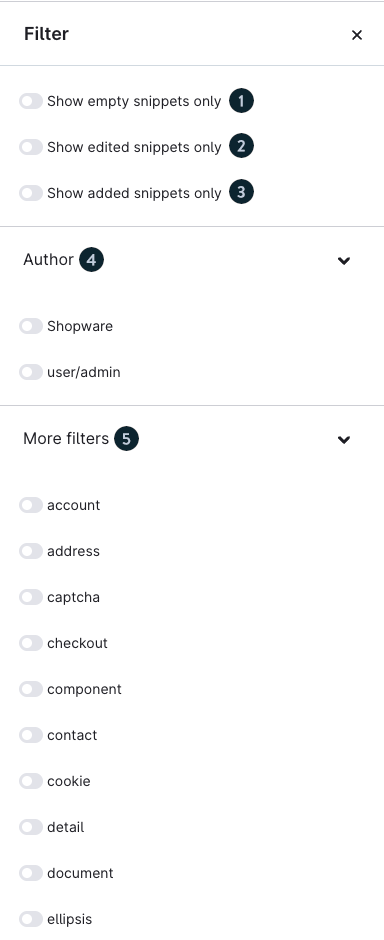
- Show empty snippets only (1): Displays only snippets with no content.
- Show edited snippets only (2): Displays only snippets that have been edited in this module.
- Show added snippets only (3): Displays only snippets created by an admin; these are not part of the base file.
- Author (4): Filters snippets by author. Default snippets from the base file have the author Shopware.
- More filters (5): Filters snippets by area or function, for example
checkout.
Creating a new snippet
If you need an additional snippet, you can create it within the snippet list. New snippets are created globally, so you don’t need to create them in each set individually. You can then maintain the snippet’s content across all snippet sets.
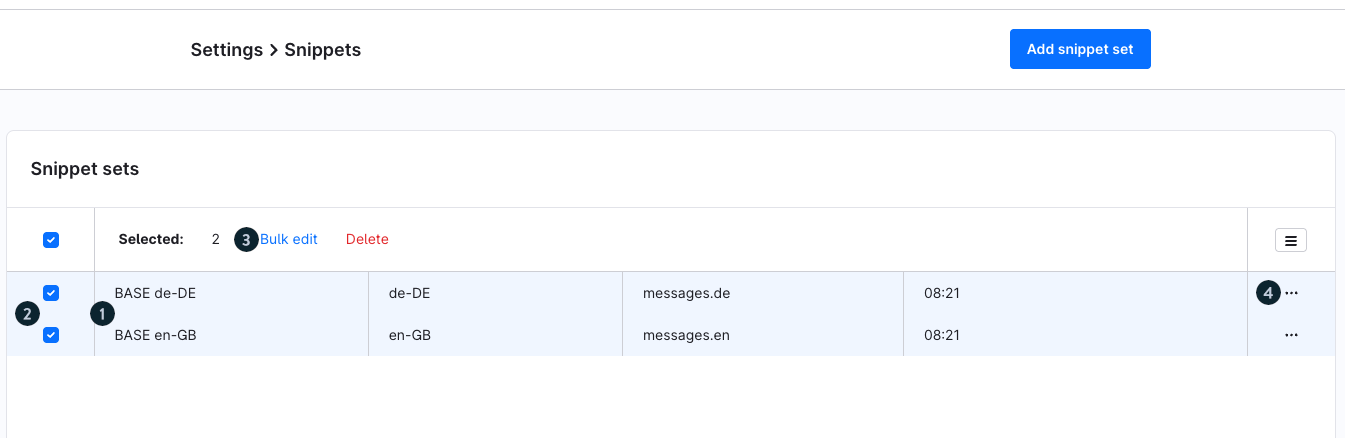
To create a new snippet, first switch to a snippet list. You can do this by clicking the set name (1) directly, by selecting one or more snippet sets (2) via the checkboxes and clicking Bulk edit (3), or by opening the context menu (4).
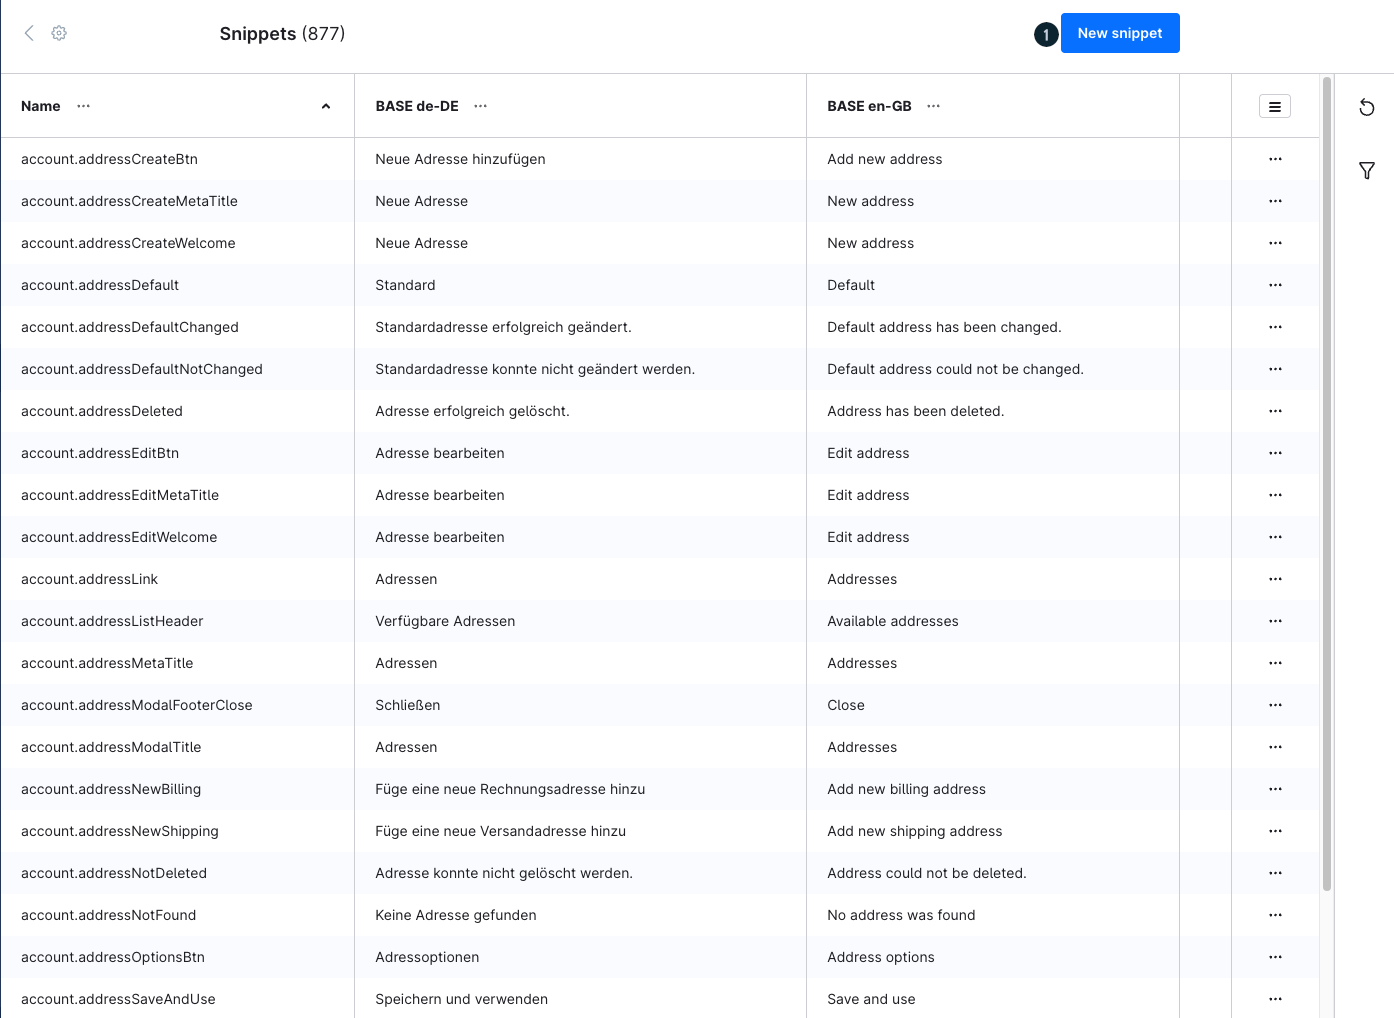
In the snippet set, use New Snippet (1) to open the form for creating a new snippet.
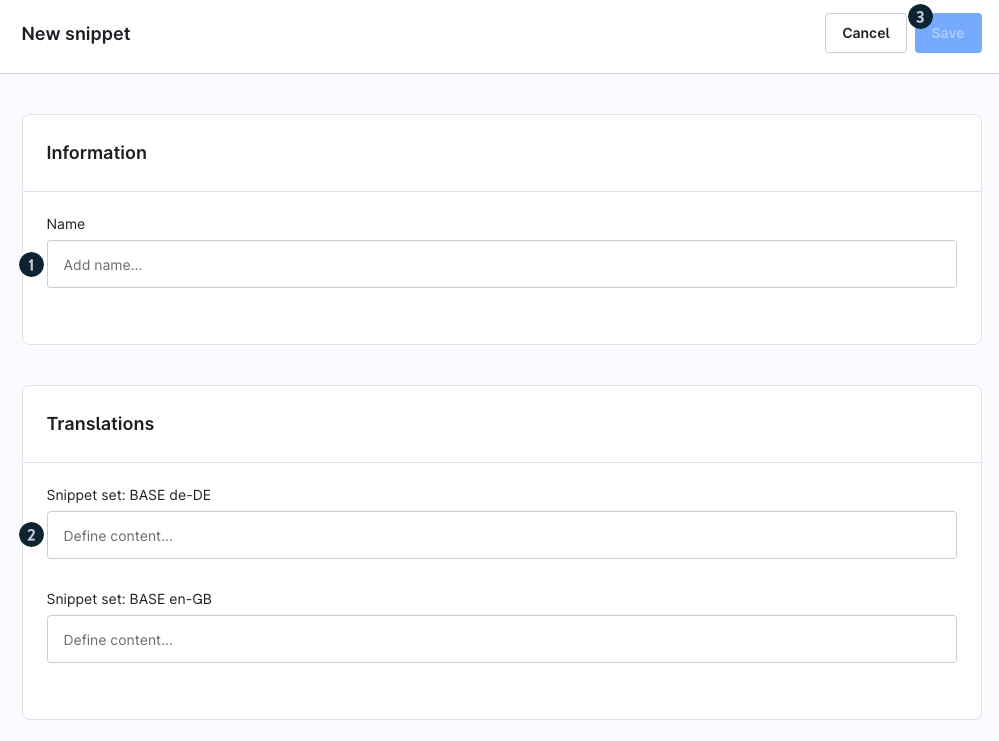
First, assign a name (1), also known as the snippet key, to the new snippet. Since this name is also used for integration purposes — for example, in the storefront — you must avoid spaces and special characters. Additionally, choose a name that clearly describes the snippet’s purpose. Example: checkout.headline is a good name for a snippet that contains the headline of the checkout page. You can now define the snippet’s content. In the translations section, separate input fields (2) are displayed for each available Snippet Set. The new snippet can only be saved (3) once a valid name has been entered. In this tutorial, you will learn how to display the snippet in the frontend.
Creating a new snippet set
If you want to use snippets in a sales channel that differs from the default configuration, you can do so by creating your own snippet set. This is especially useful if you want to keep the standard set unchanged — for example, when using different snippet sets for formal and informal speech.
You have two options for creating a new snippet set. You can create a new set based on one of the base files (German and English are included by default) by clicking Add snippet set (1). Alternatively, you can duplicate an existing snippet set. To do so, open the context menu (2) of the corresponding snippet set.
Add
After you have clicked the Add snippet set button, a new row with enabled inline edit appears directly in the overview, allowing you to enter the relevant information.
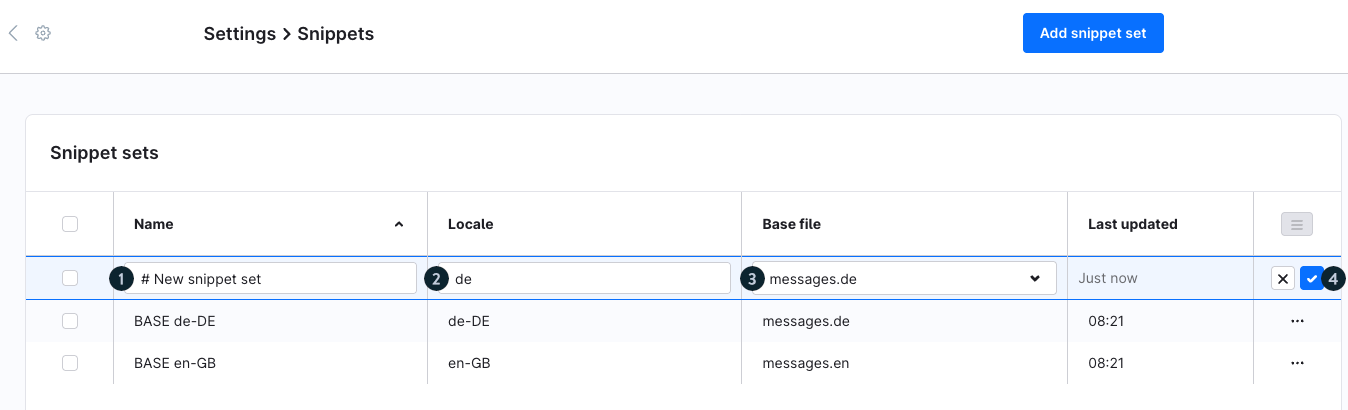
Now assign a name (1), a locale (2) to the snippet set, and select the base file (3) that will be used as its foundation. By assigning a base file, its snippets are used as fallbacks for the new set. As long as you do not add your own content to a snippet in the new set, the values from the base file will be used.
The locale must either be specified in the format en-GB or de-DE, or as a two-letter language code only, such as en or de. The format follows the BCP 47 language tag standard and is limited to ISO 639-1 language codes.
Finally, don’t forget to save (4) the new snippet set.
Duplicate
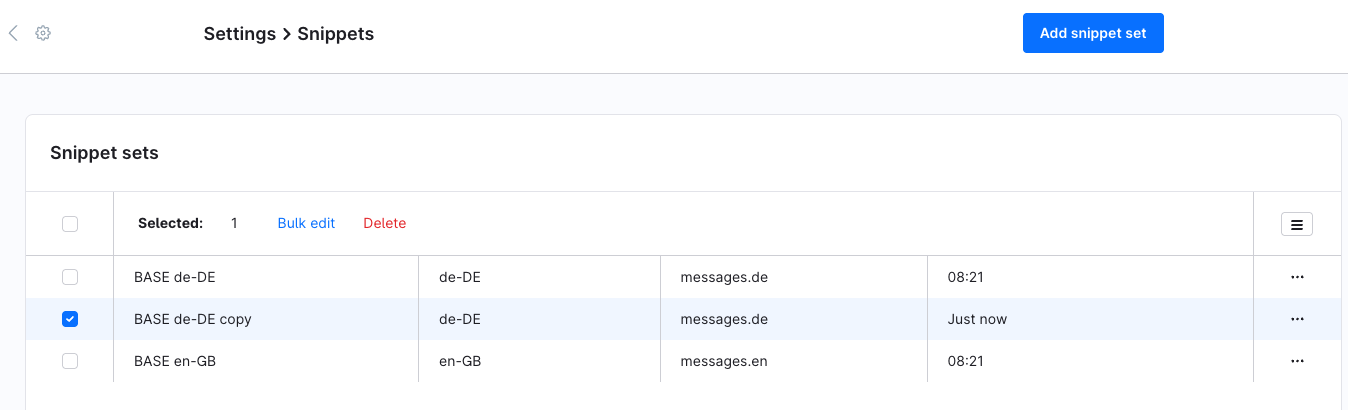
When duplicating a snippet set, you can choose from all existing sets. The duplicate is created with the same name and the suffix copy. You can change the name in the overview afterwards. To do so, double-click the row of the snippet set whose name you want to edit. Please note that clicking the name of a snippet set opens the detail page of its contained snippets. The name cannot be changed from that view.
Tips and tricks
Include links
If you want to use a link in a text module, you can do this using the HTML attribute a href.
<a href="URL">displayed text</a>This then looks for example as follows.
<a href="https://www.shopware.com">Call the Shopware homepage</a>Edit service hotline
You can change the content of the service hotline by editing the footer.serviceHotline snippet. By default, the service hotline is displayed in the footer on the storefront. If you want to edit areas of the footer, such as new links or navigation points, see the tutorial Setting footer and service menu.

To edit the service hotline content, go to Settings > Snippets, select the appropriate snippet set and search for footer.serviceHotline. When you open the snippet, you can change the text in the desired language under Translations. Then click on Save.
Insert line breaks
If you want to insert a line break within a text module, you can do this using the HTML attribute br.
After the comma,<br> there is a line break.