
Plugin: smart newsletter
Some hosters have a specific limit per day for e-mail delivery, so you should consult with your hosting partner beforehand if this limit is sufficient for your needs.
In this article we will explain the features of the premium plugin Smart Newsletter.
Installation
This extension can be found in our Shopware Store, the easiest way to find a specific plugin is the search-bar. Complete the order process and login to the backend of your store. Navigate to Configuration > Plugin manager > My purchases. You need to login and click the refresh button. Your new extension is now listed and can be installed. After installing the extension go to the menu entry installed and refresh. Activate the extension. Finally delete the cache under Settings > Cache/Performance > Clear Shop Cache and refresh the backend.
Overview

After you open the newsletter manager, you will see the newsletter overview. This table includes the main information of all newsletters, which are present in the shop and provides a couple of actions you can trigger directly from the table.
- Date (1): The date on which the newsletter was initially created.
- Shipping date (2): The date, when the newsletter sending was finished.
- Subject (3): The subject of the newsletter, which was set during the creation of the newsletter.
- Status (4): Shipping status of the newsletter. If the newsletter is ready for shipment, the percentage of already sent mails will be displayed here.
- Recipients (5): Amount of recipients for this newsletter.
- Letters read (6): Amount of newsletters, which were actually read by it's recipient.
- Clicks (7): Amount of clicks the newsletter generated; How often recipients clicked the newsletter to access the shop.
- Turnover (8): Total turnover generated by recipients, who clicked the newsletter.
- Released (9): Shows, if the newsletter is marked as "Ready for sending", important for sending the newsletter via cronjob.
- Delivery time (10): Immediately, if the newsletter is already ready for sending or Date, when sending is planned for the future.
- Edit newsletter (11): Opens the selected newsletter in the editor.
- Delete newsletter (12): Deletes the selected newsletter.
- Send newsletter (13): Immediately sends the newsletter, only available if no planned date is set and the newsletter is not marked as "ready for sending".
- Duplicate newsletter (14): Duplicates the selected newsletter.
Designer

In contrast to the Standard Newsletter, the Intelligent Newsletter has a designer (3). The elements (1) can simply be dragged into the designer or onto the work platform (2) and placed .
Available Elements
HTML element

With the HTML element you are able to add content to your newsletter. The extendable sidebar on the right of the window shows all available variables, e.g. to personalize the newsletter.
The following variables are available:
- $sUser.email: E-mail address of the recipient
- $sUser.salutation: Salutation of the recipient
- $sUser.firstname: Firstname of the recipient
- $sUser.lastname: Lastname of the recipient
- $sUser.street: Street and No. of the recipient
- $sUser.zipcode: Zipcode of the recipient
- $sUser.city: City of the recipient
Examples of use:
| Variable/Example | Explanation |
|---|---|
| {if $sUser.salutation == 'mr'}Mister{/if}{if $sUser.salutation == 'ms'}Miss{/if} | Use of the correct salutation |
| {if $sUser.city !=""}How is it going in {$sUser.city}?{/if} | Use of the city in a sentence. The sentence will only be shown, if there is a value available for the city. |
| You are registered to out newsletter with th e-mail address {$sUser.newsletter}. | Note for the registrated e-mail address, which receives the newsletter |
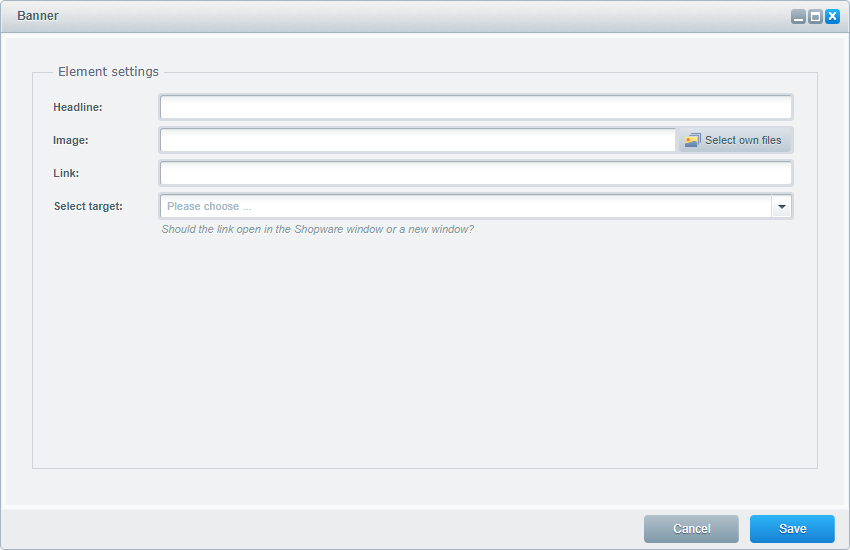
Banner
Product group

You can select from four different item types:
- Random: Shows a random item.
- Top selling product: Shows one of the topseller items.
- New product: Shows a new item (This depends on the setting, how long new items are highlighted as new).
- Chosen product: Shows the item you select.
Link

Using this element, you can use one or more links in the newsletter and set a description (1) and a link target (2) per link.
Voucher

You can add individual vouchers, which are added to the newsletter automatically. You should make sure, that your voucher has enough free codes. You can also modify the text (1) for the voucher element, add an image (2) or a link (3).
Only one voucher box can be placed in the newsletter at a time; it is not possible to send several individual vouchers to one customer.
Suggest
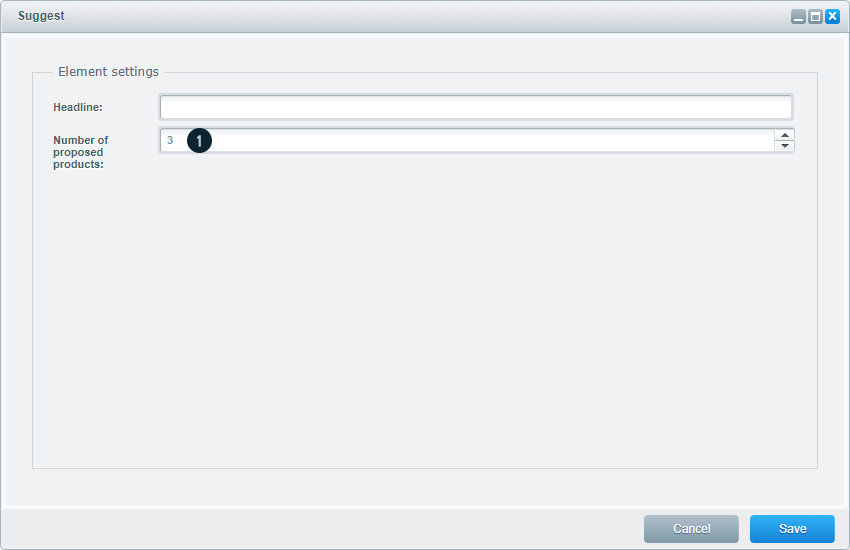
The suggest shows individual items depending on the recipient, based on their search and order history in your shop. Note that this feature only works for registered customers, not registered customers will see random items. You can define, how many products are suggested (1).
In addition you can also create your own elements for extending the newsletter.
Settings

- Subject (1): Subject of the newsletter.
- Sender (2): The e-mail-address that is used as the sender of the newsletter.
- Customer group (3): Customer group the newsletter is associated with.
- Select language (4): Select the Language of the newsletter.
- Send at (5): Planned date, when the newsletter will be send.
- Shipping type (6): Defines if the newsletter is send as plaintext or HTML and plaintext.
- Published (7): Defines, if the newsletter is listed at "yourshop.com/newsletterlisting".
- Ready for sending (8): Marks the newsletter to be available for sending via cronjob
- Select newsletter recipients (9): Used to select, who the newsletter should be send to. You can select from customer groups, custom recipient groups and Customer Streams.
Analytics
In the tab "Analytics" you find a graph and a table showing different analytics regarding the newsletters you've sent.

The graph (2) shows the following values (1) for the newsletters you've sent, so you can compare, how your different newsletters performed:
- Buy Rate: Shows the percentage of orders in comparison to the amount of sent newsletters.
- Read Rate: Shows the percentage of newsletters, which were read by the recipients in comparison to the amount of sent newsletters.
- Click to Order Rate: Shows the percentage of orders resulting from clicks.
- Click Rate: Shows the percentage of newsletters, which were clicked by the recipients in comparison to the amount of sent newsletters.
Please note that the date always refers to the date on which the newsletter was sent. This is not the date on which orders were placed.
More details can be found in the lower section (3).
- Subject: Subject of the respective newsletter.
- Date: Date on which the newsletter was sent.
- Recipients: Number of newsletter recipients.
- Revenue: Revenue generated by purchases from the newsletter. These refer to the net value of the items purchased. Any shipping costs included in the order are not taken into account.
- Orders: Number of orders from the newsletter.
- Conversion: Conversation calculated in the ratio of orders placed to newsletters read.
- Read: Number of newsletters read. Please note that this tracking is only counted if the customer loads the images in the newsletter. Some mail programs require the user to load the images manually. If this does not happen, the newsletter is not counted as read.
- Clicked: Number of links clicked by recipients in the newsletter.
Administration
The administration tabs contains three tabs, which contain useful settings and information regarding the newsletters in Shopware.
Sender

Here you can create, edit and delete newsletter senders, which can be selected when creating a newsletter. You can set, which e-mail address is shown as the sender and which name will be displayed for this sender.
Recipient groups

In this tab you can create (1) and delete (2) custom recipient groups for your newsletters. Only custom recipient groups will be shown here, but not the recipient groups based on the customer groups.
Recipients

This lists every newsletter recipient of your shop. You can add (1) and delete (2) recipients or search for specific recipients. You can see, when the recipient confirmed the double opt-in and which newsletter is the last one the recipient received. By double clicking a recipient you can modify the e-mail address and recipient group. If you change the recipient group, you can only select the custom recipient groups.
Alternating smtp emailing
You can configure a separate emailing using a differing smtp server by using this change in the cofig.php:
'newsletterMail' => array (
    'name' => '',
    'type' => 'smtp',
    'auth' => 'login',
    'username' => '',
    'password' => '',
    'host' => '',
    'port' => '',
    'ssl' => ''
),
Here a complete example:
<?php
return array(
    'db' => array(
        'username' => 'root',
        'password' => 'root',
        'dbname' => 'shopware',
        'host' => 'localhost',
        'port' => ''
    ),
    'newsletterMail' => array (
        'name' => '',
        'type' => 'smtp',
        'auth' => 'login',
        'username' => '',
        'password' => '',
        'host' => '',
        'port' => '',
        'ssl' => ''
    ),
);
Please mind that you must not do empty elements in this because those will not automatically be changed to "NULL". You must either fill all elements or just leave out the option that does not get a value.
This setting only changes the emailing of the intelligent newsletter. All other components of the shops ware using the basic mailer settings.
Time managed newsletter sending
The plugin allows you a time manages sending of your newsletter.

In the newsletter settings you find an option Send at (1). There you can easily define a time when you want to send the newsletter. For this you also have to activate ready for sending (2) for the newsletter to be send when calling myshop.de/backend/Newsletter/cron.
The newsletter will only be send when the defined date and time have been reached. If the date or time is in the future this newsletter will not be used by the cronjob.