
Install Shopware 6
These instructions will explain what you need to consider before installing Shopware 6 and guide you through the installation process.
Prior to installation
Before you install Shopware, you should pay attention to some requirements. Below we explain to you which ones they are.
You can generally run Shopware on a self-hosted server, but for optimal performance we recommend installing Shopware on a server of one of our hosting partners.
Htaccess adjustments
The htaccess file is a configuration file on your web server. Among other things, it specifies which users have access to the shared files and folders. With a htaccess file you have the possibility to allow access to your store only for selected users.
During the installation you should do without the htaccess protection or use the following solution.
Note that a .htaccess protection may result in the admin not being able to open it.
A short term solution is to not authenticate requests to the URL "/api" in the .htaccess:
AuthType Basic

AuthName "Please login."

AuthUserFile /path/to/.htpasswd


<RequireAny>

    Require expr %{THE_REQUEST} =~ m#.*?\s+\/api.*?#

    Require valid-user

</RequireAny>
System requirements
Prior to installing, you should make sure that your system meets the system requirements for Shopware 6.
If you are unsure about any of the requirements, we recommend that you consult with the server hoster to ensure these requirements are met.
Routing settings
In addition, it is recommended to adjust the routing settings of your web server if necessary.
A corresponding example in the form of a vHost for Apache2 is listed below.
<VirtualHost *:80>
 ServerName "_HOST_NAME_"
 DocumentRoot _SHOPWARE_DIR_

 <Directory _SHOPWARE_DIR_>
  Options Indexes FollowSymLinks MultiViews
  AllowOverride All
  Order allow,deny
  allow from all
 </Directory>

 ErrorLog ${APACHE_LOG_DIR}/shopware-platform.error.log
 CustomLog ${APACHE_LOG_DIR}/shopware-platform.access.log combined
 LogLevel debug
</VirtualHost>
Please keep in mind to replace _SHOPWARE_DIR_ and _HOST_NAME_ with your settings.
You may also notice that the DocumentRoot in the above example does not point to the /public folder in the Shopware 6 installation directory. Behind the public folder is the storefront and the admin interface, but these are only available after installation. So after the installation you have to route to DocumentRoot _SHOPWARE_DIR_/public. This is necessary so that your customers do not have to call the store via https://shopware-shop.de/public for example.
Shopware 6 will point this out to you after the installation.
Contact your hosting partner if you have any questions about routing.
Shopware Installer
Please be aware that it is not safe to store the file for installing Shopware via the web installer on an open domain, especially if you haven't completed the installation yet. It is recommended to store the file only in a secure, protected environment to avoid security risks. Make sure to finish the installation to ensure the security of your shop.
With the Shopware Installer you can install and update Shopware in a few steps. The same PHP file is used for both. This way an automated installation or update is performed.
If the file is saved in an empty public directory and called, the installation process is started.
For an already existing Shopware installation, the update process is started.
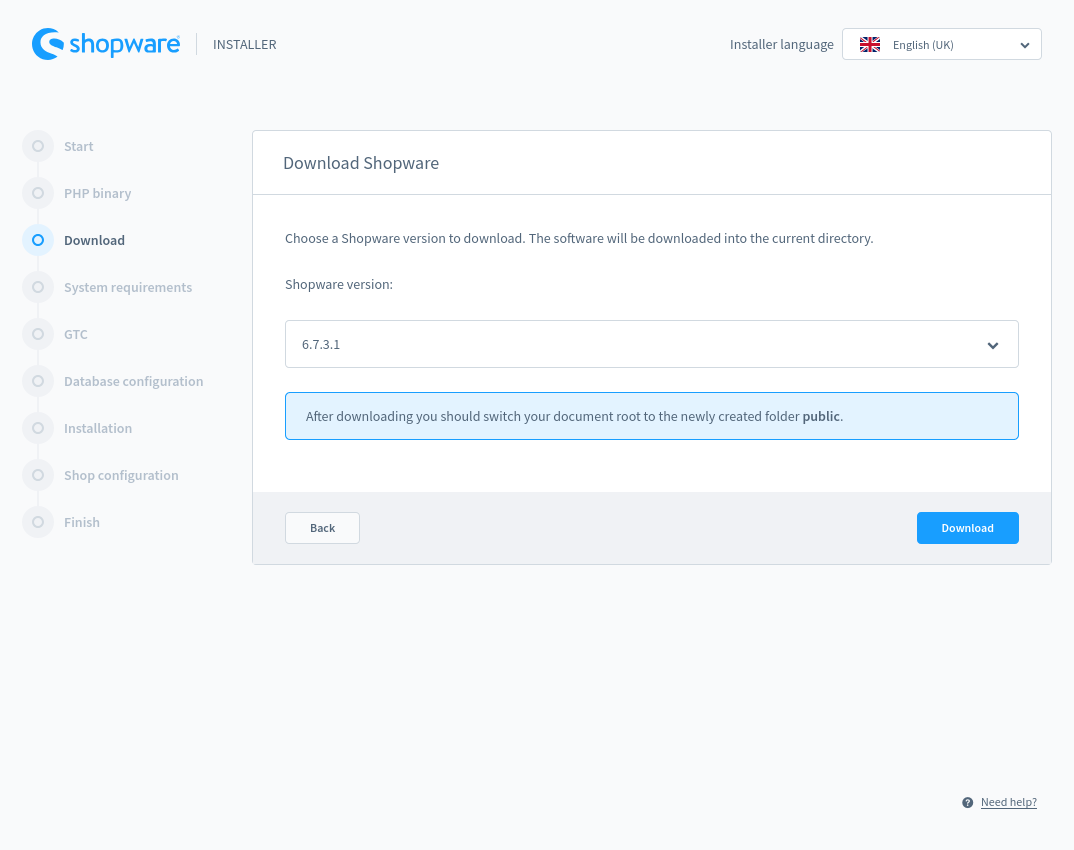
Download Shopware
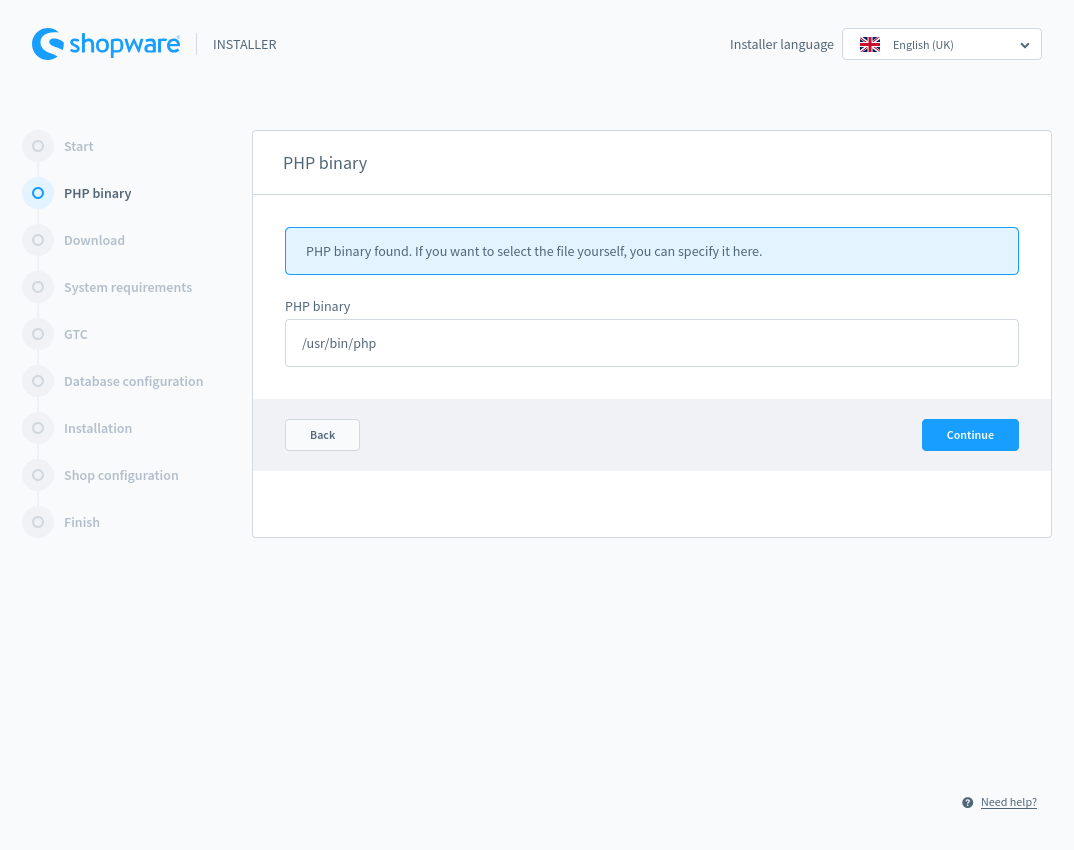
After you have made sure that the system requirements for Shopware 6 are met and the routing settings of your web server are configured correctly, you can download Shopware 6. Also make sure that the unzipped files and directories have write permissions.
Step 1: Download the PHP file from the download area.
Step 2: Afterwards you create a folder on your webserver for your Shopware installation and move the PHP file into this folder.
Step 3: Then open the file in your web browser:
www.my-url.com/ShopwareFolder/shopware-installer.phar.phpThe installation will now start.
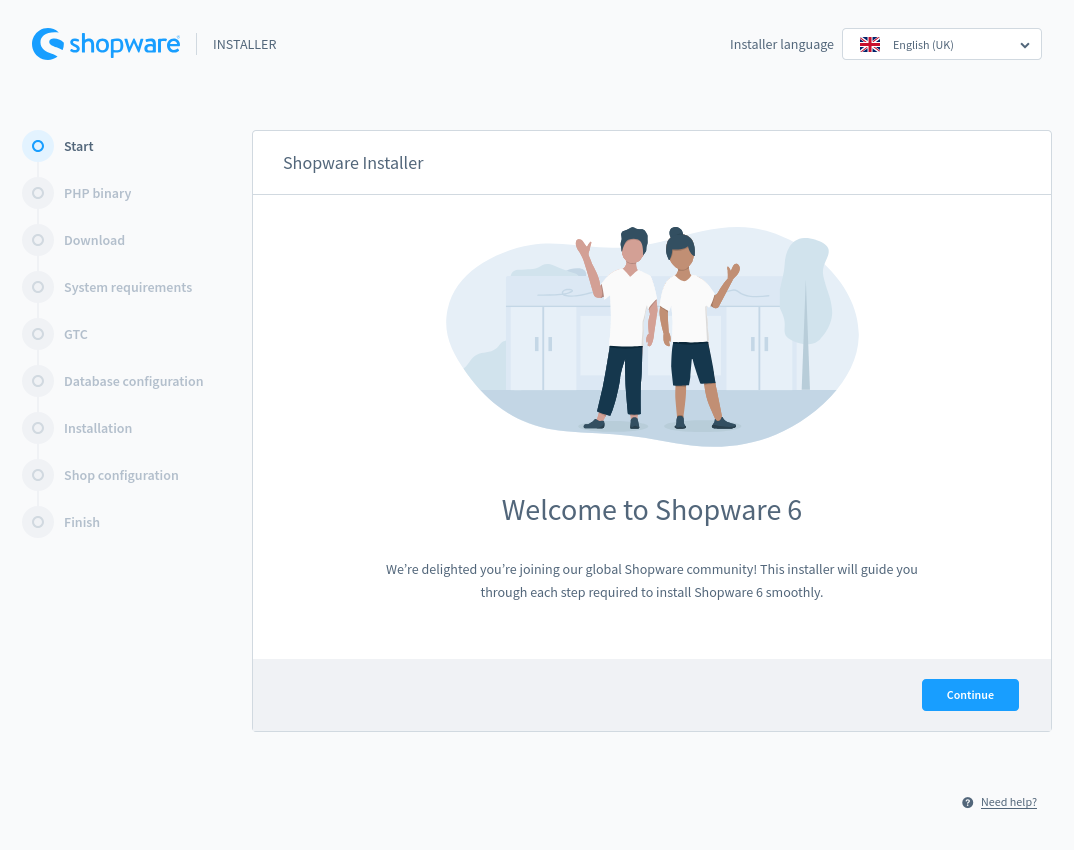
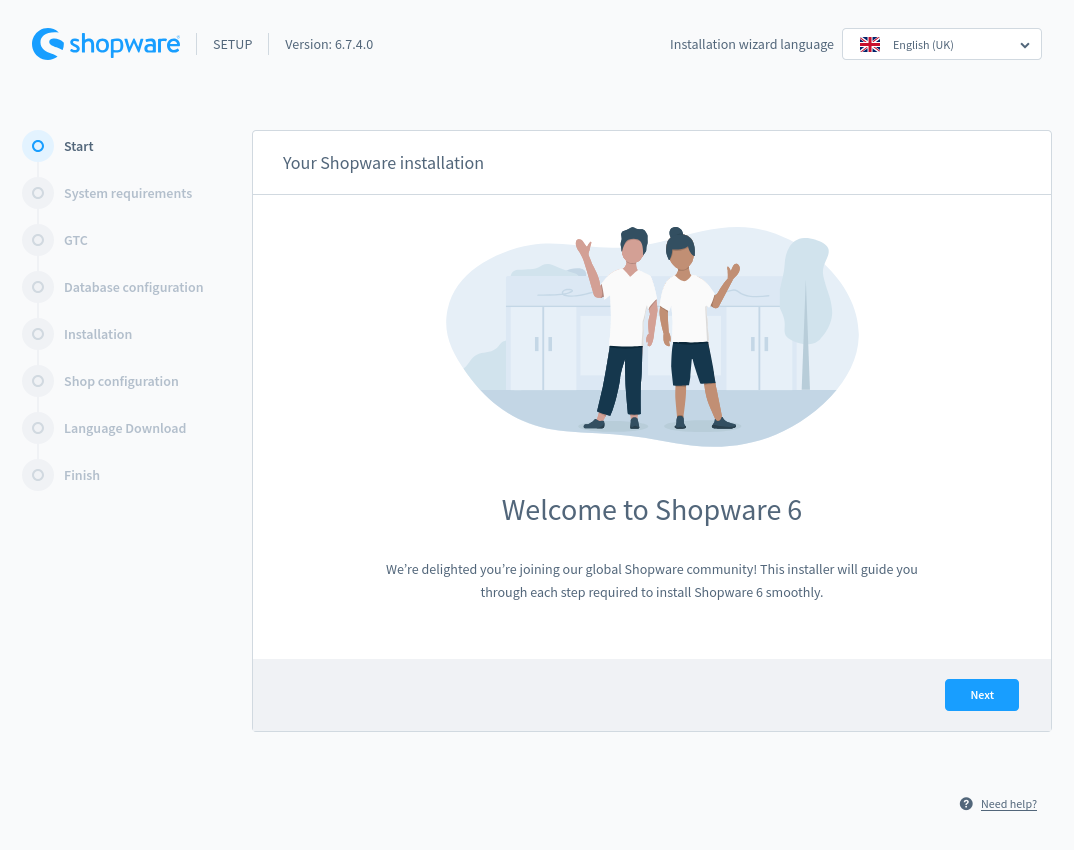
The installation begins with the installation wizard. Select your language from 13 different languages in the top right-hand corner.
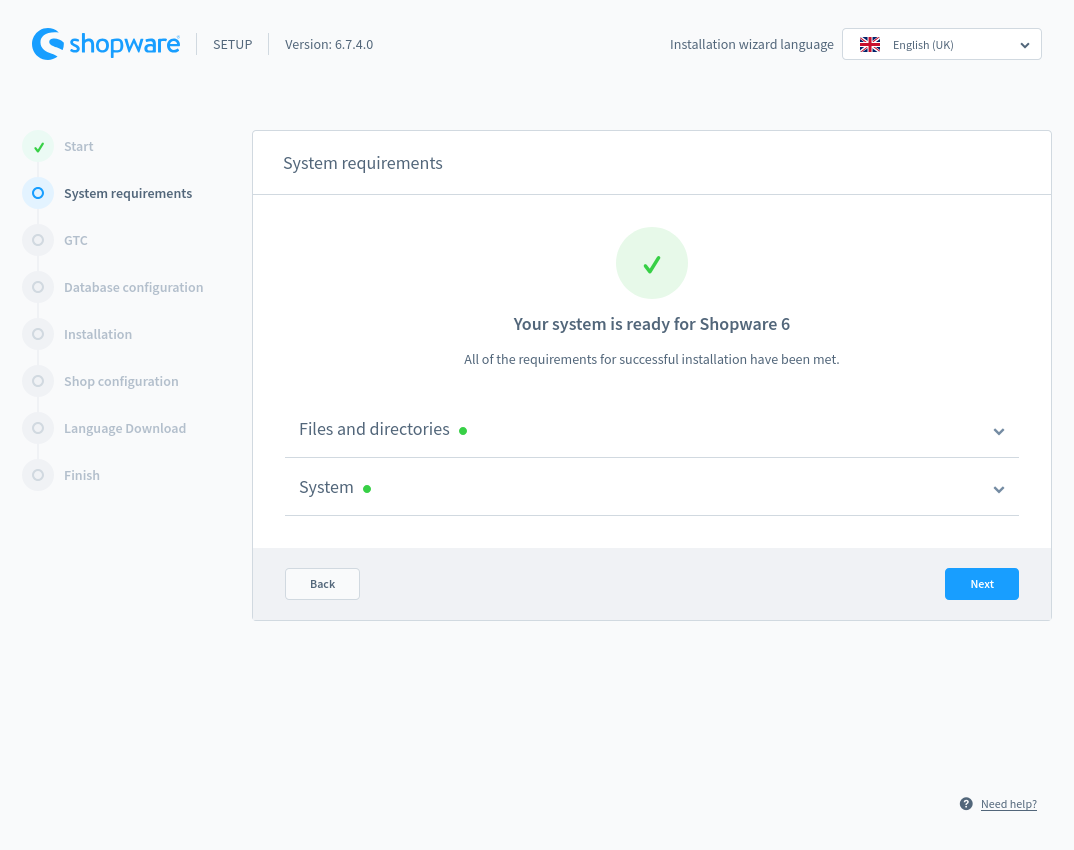
Checking the system requirements
In the second step of the installation, the system requirements are verified to ensure they are met. The arrowbuttons list the requirements, and the folded-out menu shows which requirements are not met or which settings can be optimised.
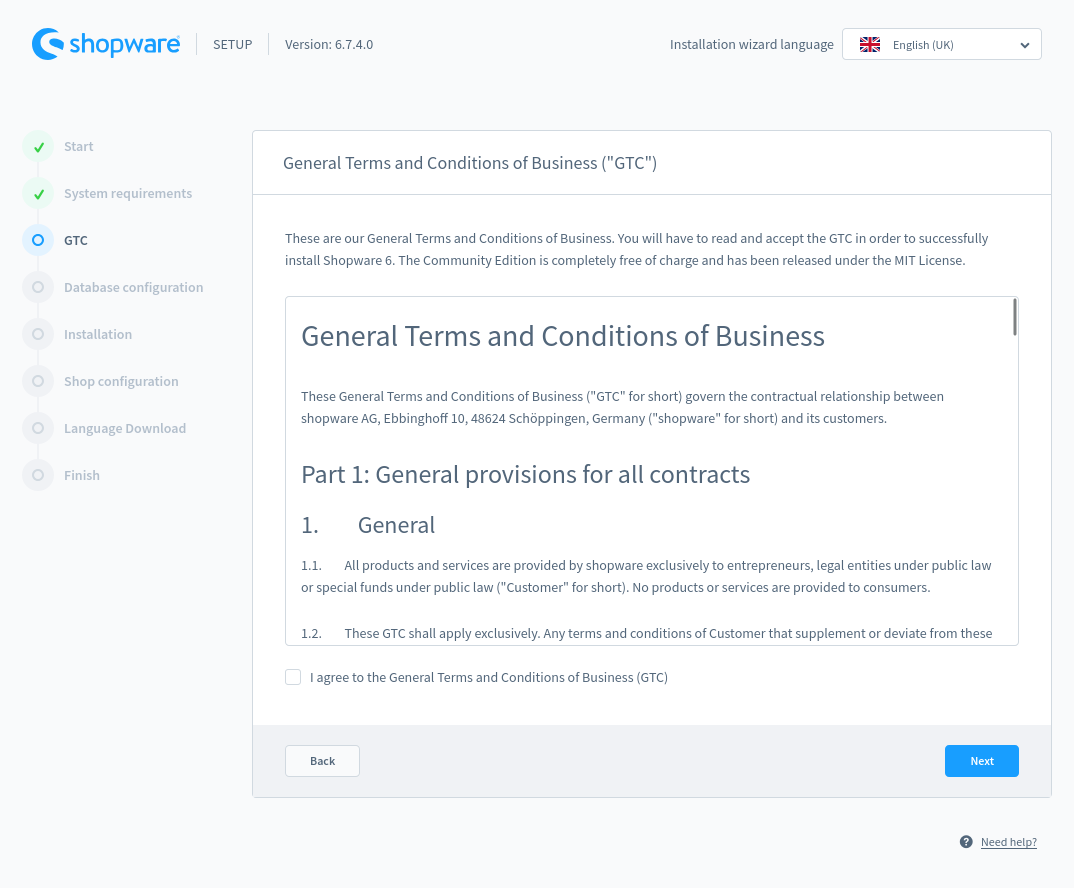
General terms and conditions
In the next step, you can read the license under which Shopware is licensed. In order to continue the installation, you must agree to the license terms.
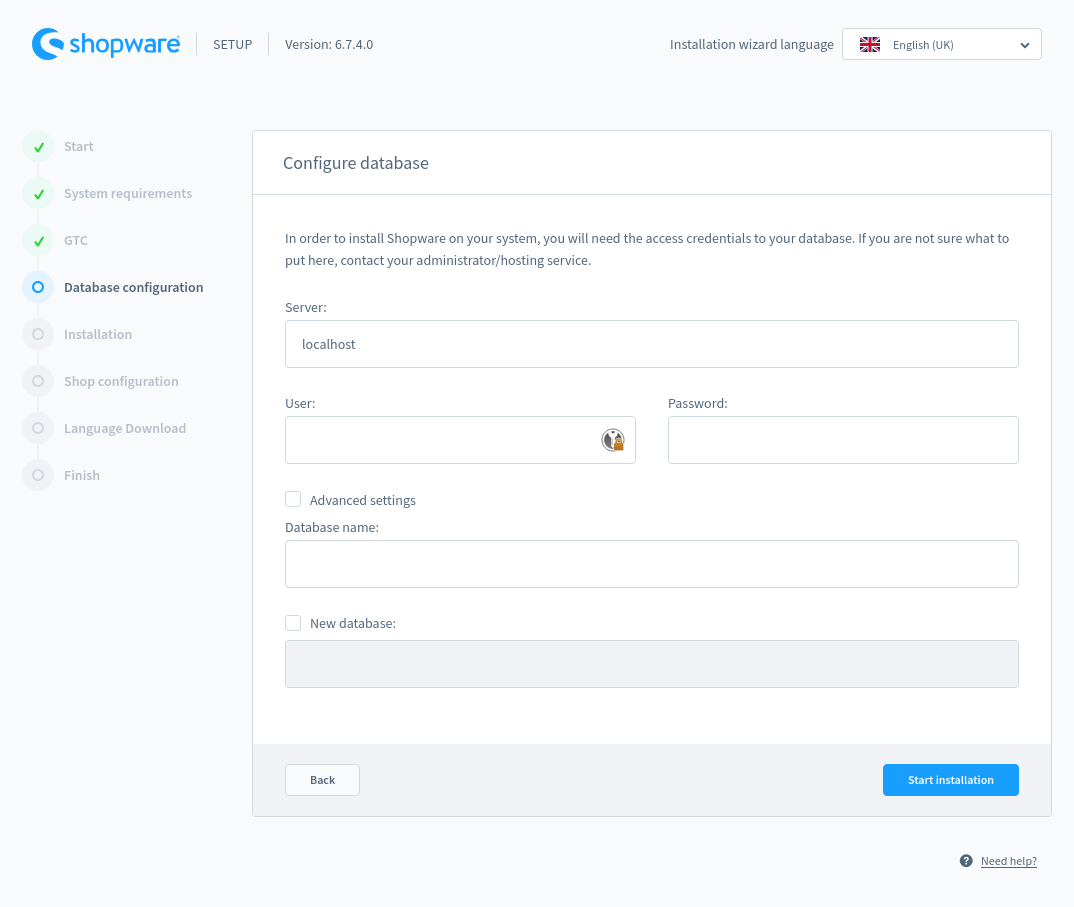
Database configuration
Once the Shopware licence has been accepted, the access data for the database is stored in Shopware. An empty database for the Shopware installation can be created in advance, or a new database can be created by the installer during the installation process.
To create a new database, select the "New database" box and assign a name to the database.
If one or more databases already exist, they will be listed in the Database Name field after the user and the corresponding password have been stored. Select the database intended for Shopware here.
Please note that existing databases must be empty in order to import the required Shopware tables.
If you display the advanced settings, you can also specify the database port and (optionally) store a socket.
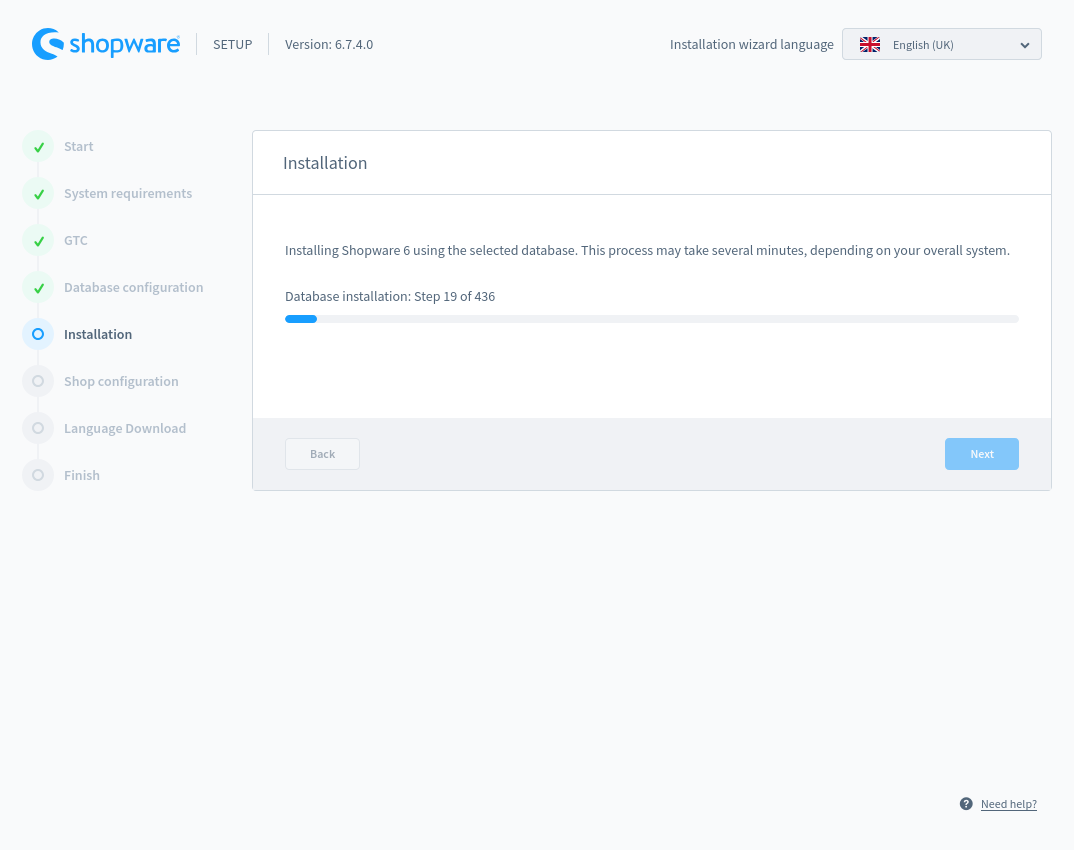
Database import
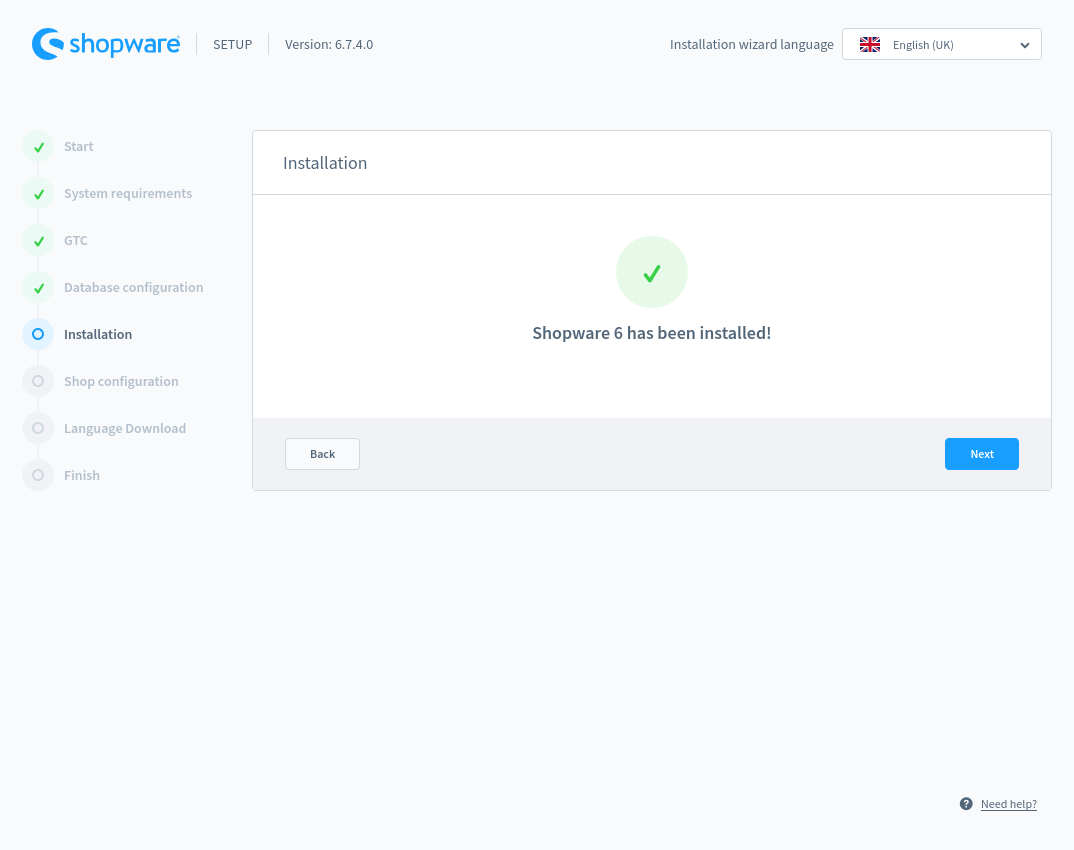
In this step, the Shopware database is imported. Click "Start Installation" to initiate the database import.
The installation wizard will inform you that the installation is completed. Click next to proceed to the configuration.
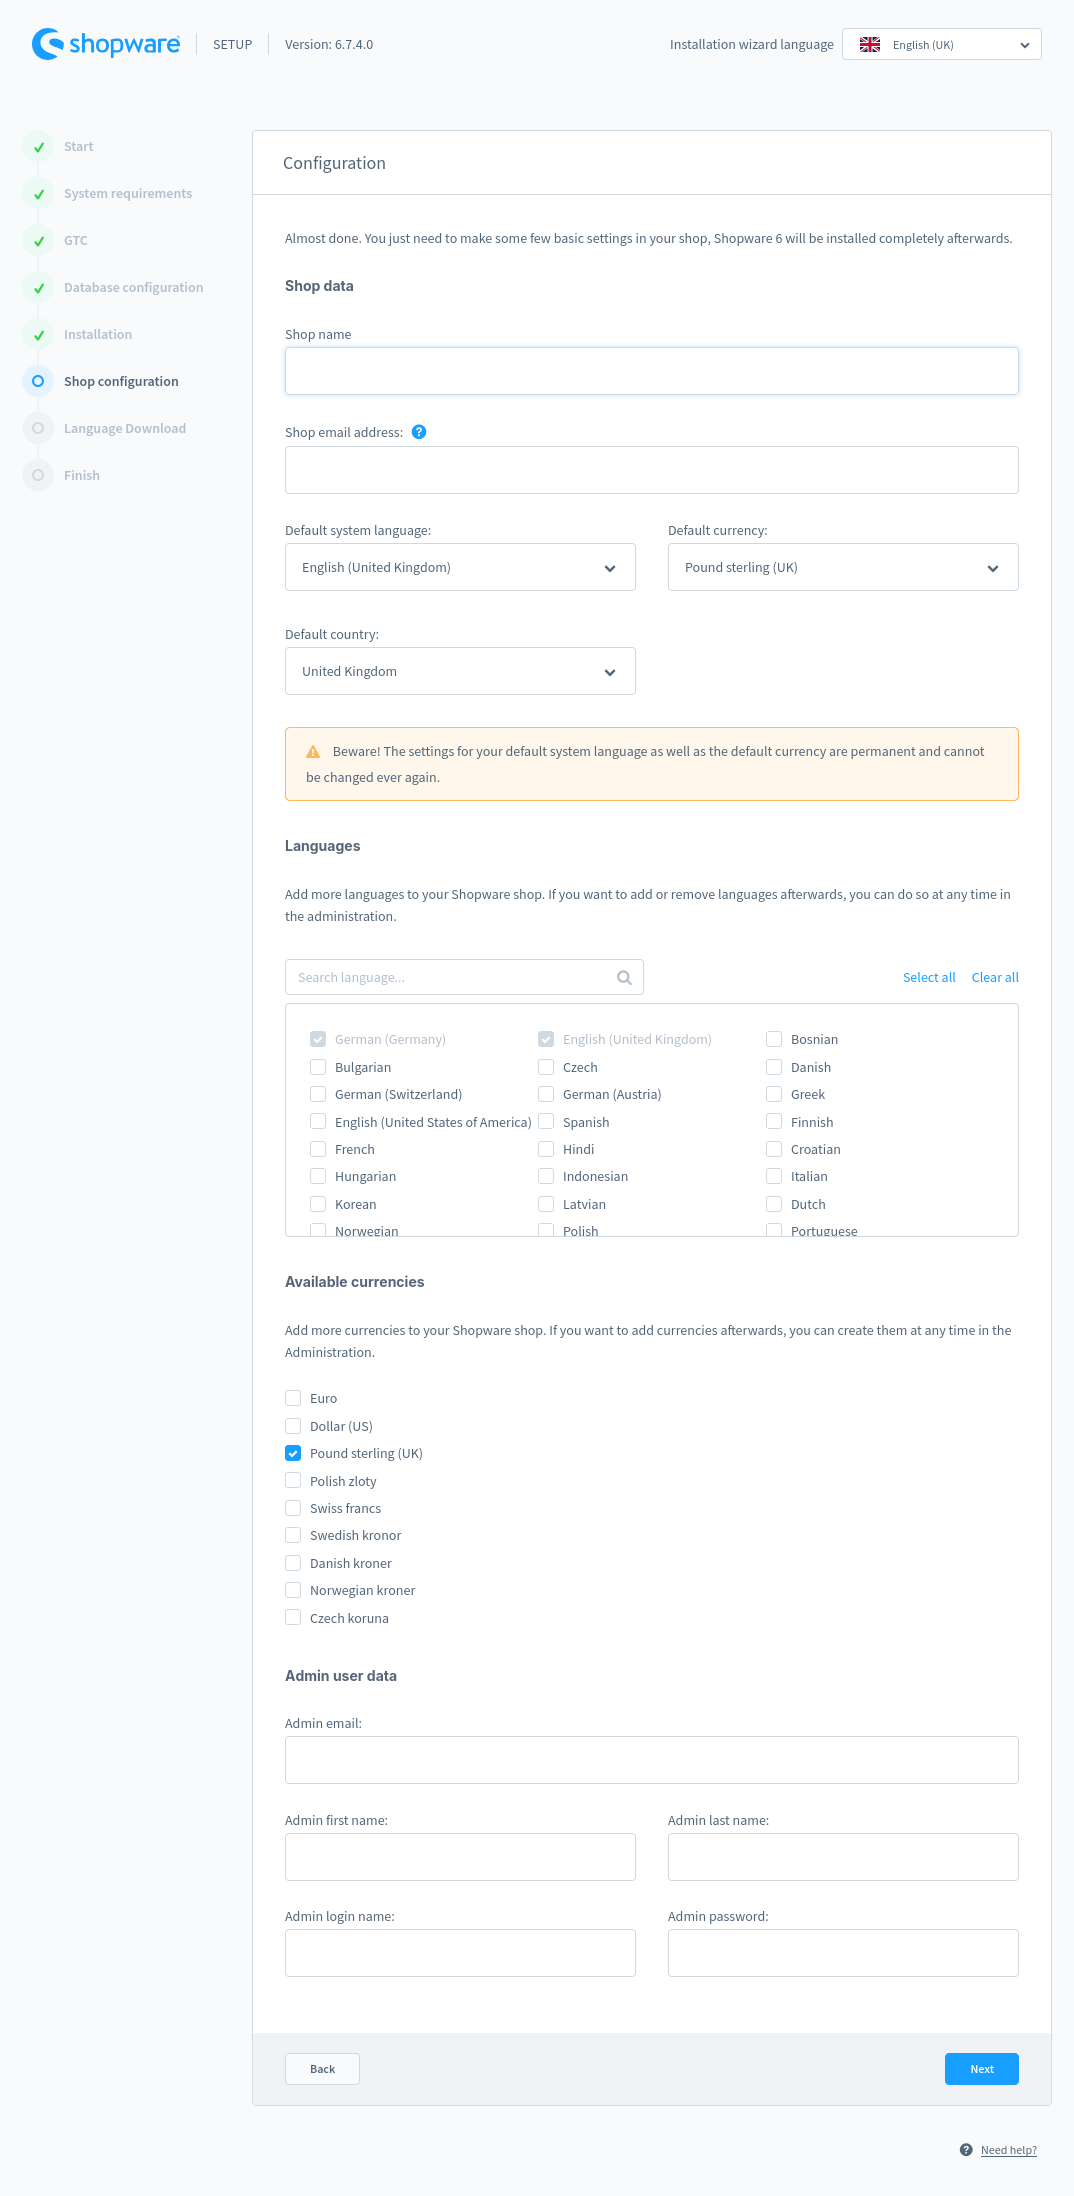
Configuration
In the last step, you specify the basic settings for your shop:
- The shop email address will later be the global email address from which all emails are sent.
The default system language specifies which language this installation will use as the default. This affects both the frontend and the administration area.
er, Norwegian kroner and Czech kroneYou have the following default currencies to choose from: Euro, British Pound, US Dollar, Polish zloty, Swiss francs, Swedish kronor, Danish kronor, Norwegian kronor and czech kronor. The currency you select here will be set as the default in the shop with a currency factor of 1. You can add more currencies directly or add more currencies with corresponding conversion factors afterwards.
- The area starting from the admin email address field defines the administrator user for the administration interface of Shopware 6. Enter his or her relevant data here. If necessary, you can create and manage additional users in the admin interface after installation.
Please note that the default language and currency cannot be changed at a later date.
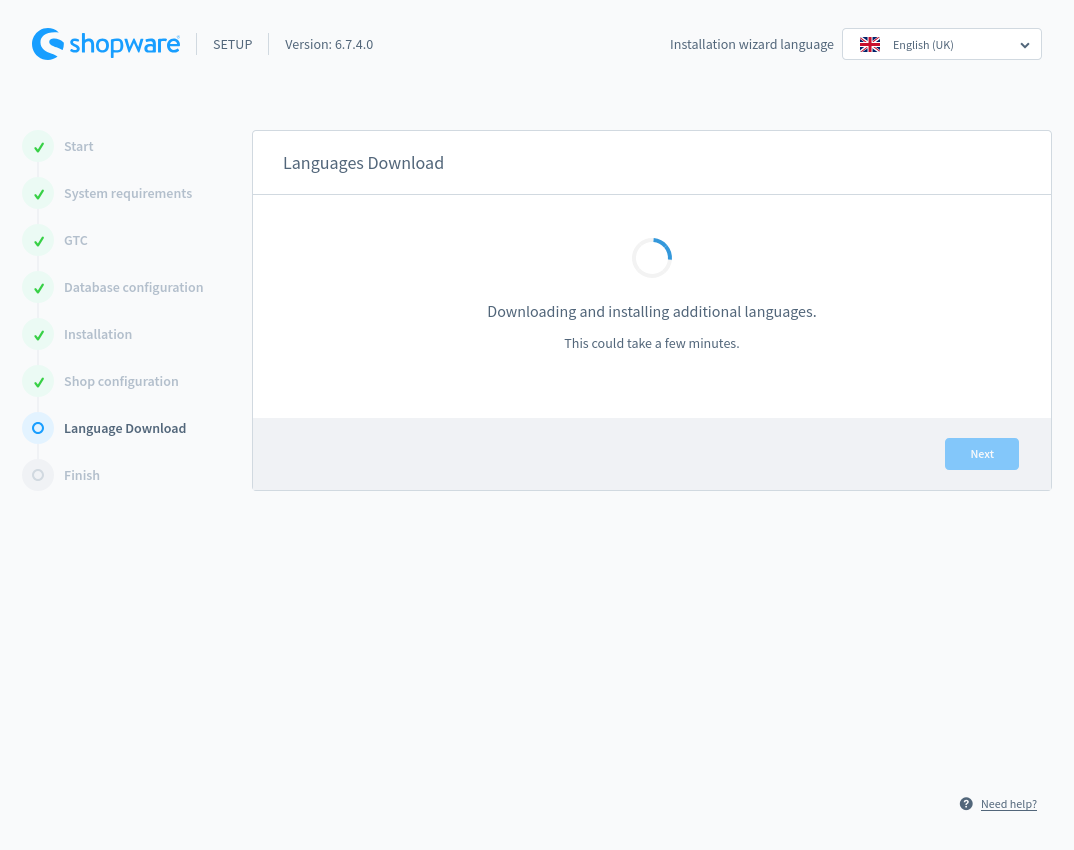
Languages download
In the installer, you can now directly select the languages that were previously included in the language pack. These languages are automatically installed during setup. After installation, you’ll find all the languages you selected in the Admin. These languages are then available in the administration for further configuration. For the storefront, you can individually activate or deactivate each language, depending on which ones you want to make available in your shop.
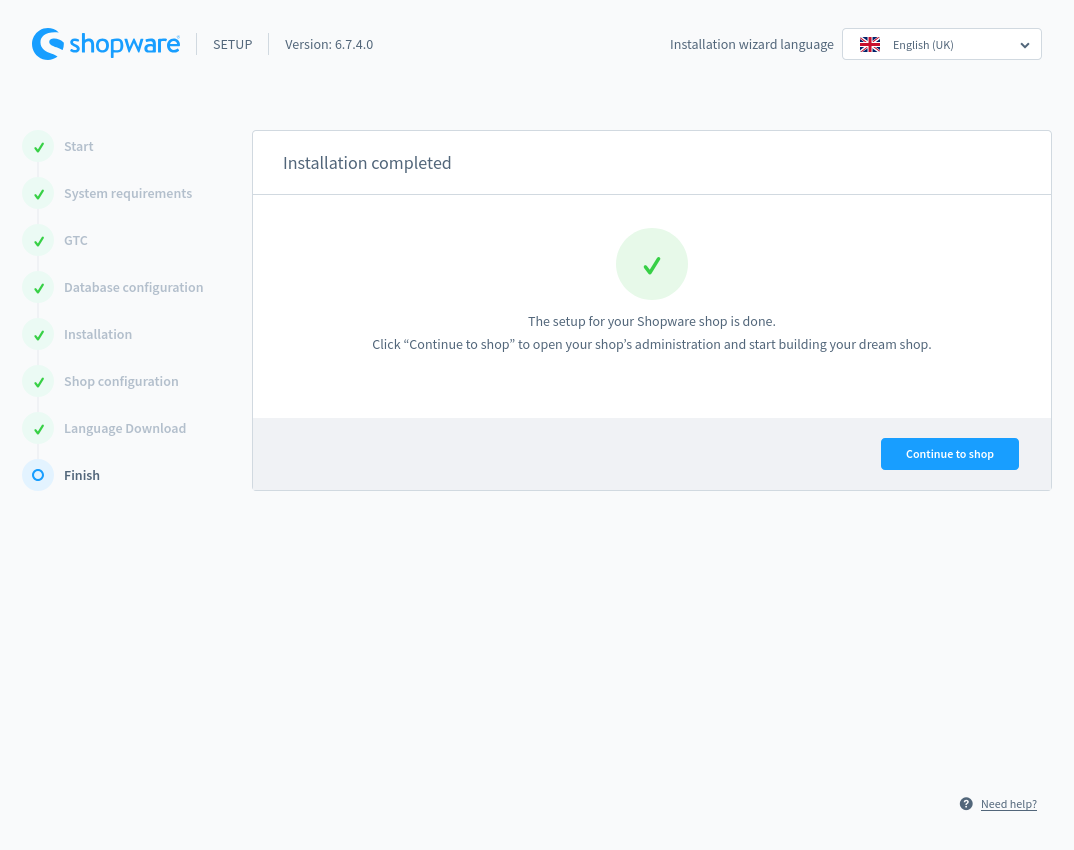
Done
The installation is now complete and you will be automatically redirected by the installer to the admin interface and logged in with the admin user you just created to set up your Shopware 6 shop.
Finally, please note that you must set the routing of your URL to the /public/ directory of your Shopware directory, as this is where the front end that should be accessible to customers is located.
Installation via Composer
As an alternative to the installation with the installer, Shopware 6 can also be installed via Composer. You can find information about this in our developer documentation.