
Digital Sales Rooms
Digital Sales Rooms is available to you as an extension of the Shopware Beyond plan.
The Sales Agent is not an extension that can be installed in the Shopware admin or activated with a single click; it is a separate frontend application.
The source code is provided to agencies or administrators via a GitLab repository. Based on this, experienced developers (e.g. agencies or internal developers) can create their own app, configure it, and integrate it into the existing Shopware environment. Further information about the Digital Sales Rooms can be found here in the developer documentation.
Digital Sales Rooms give you the opportunity to present a shopping event designed by you to the selected customers.
It doesn't matter whether you want to interact with the customer in real-time or the customer navigates independently and at any time through the shopping event. Both is possible without any problems.

You find the Digital Sales Rooms module in the Administration within Marketing > Digital Sales Rooms.
Configuration
To be able to use the Digital Sales Rooms, you need a daily.co account (API key) and a set-up Mercure service. These two services are set up by your developer/administrator with the help of our developer documentation.
You can access the configuration settings in 2 ways. The easiest way is via the menu Marketing > Digital Sales Rooms > Configuration(1).

A second way is to go to Extensions > My Extensions > Digital Sales Rooms you will find some basic configuration options.

The following window opens.

(1) Sales channel: Here you can set the settings for "All sales channels" or dedicated to a specific one. If you have only one sales channel, the setting for "All sales channels" is sufficient. Of course, you can also use the inheritance to make the settings for specific sales channels, which may differ from the others.
(2) API Base Url: This url is provided by an external video service provider.
(3) API Key: Here you can find the corresponding API Key for the url.

In this area, you add the layouts you have defined. You can add these in the Experience worlds area and set them accordingly here.
These layouts can then be used as standard for presentations.
(1) Product detail page: Here you assign the product detail page that you can show to your customers.
(2) Quick view: Under Quick view, you can determine which layout your customer sees when they click on a product. This layout will make your products stand out better.
(3) Product list page: You can assign a product list page via this drop-down menu.
(4) Finished presentation page: This layout is the most frequently seen of all the other four, as this layout will be seen every time the presentation is called up once you have finished your presentation. If chosen correctly, it will allow you to recall the impressions of the live presentation and thus maintain the enthusiasm for your products.
Guide

This feature enables guides to perform actions for the customer. This can be, for example, adding items to the shopping cart or liking products. The customer must explicitly agree to this before the guided presentation starts. In addition, you as a guide always have the option to request this authorization during the presentation.
Appointments

(1) Specify here after how many hours the appointment will end if there is no more interaction.
(2) Select the domain for Digital Sales Rooms here. You can find more details about this in the developer documentation.
Presentations
Overview

New presentation

First of all, you should enter a name and then save the presentation to get further editing options.
Once you have saved the presentation, you can access the editing module. This is basically divided into three areas.

(1) Information: Here you can see the name of the presentation and the status (active/inactive).
(2) Layouts: In this area, you configure how the presentation should be displayed. You will find out exactly how to do this in the next section.
(3) Appointments: After you have created a presentation, you will get the settings for the event here. You will also find out which settings these are below.
Layouts

(1) Create a new layout: This button takes you directly to the designer of the Shopping Experiences.
(2) Insert existing layout: Hereyou can assign layouts that you have already created. You can also select multiple layouts.
(3) Preview presentation: This shows you a preview in the storefront as soon as a layout has been added.
Layouts that are added in the "layouts" area are always standard templates. They can be used for multiple presentations. You can use special presentation layouts and regular layouts as well. If you open the layout by clicking on the name, you will be taken directly to the designer of the Shopping Experiences. You always change the standard template here. To adapt layouts individually for a presentation, use the function "Overwrite content". You can learn more about this in the following paragraph.
It is not possible to start the presentation here, as this function is only there to provide you with a quick and easy way to adjust your configuration.

As you can see above, three different layout types were used for the presentation.
(1) Landing page: An element of the landing page type does not contain any products, which is why you will not see any product options here.
(2) Product page: The "Add products" button opens a dropdown from which you can select products quickly and easily.
(3) Category page: By clicking on the button "Add products" a new pop-up window appears. There you can add the appropriate products using a manual selection or a dynamic product group.
(4) Overwrite content: This button takes you to the Layout tab. There you can quickly make changes for the respective layout, which will then be saved for your presentation. In the Layout tab paragraph, you will learn which adjustments you can make.
Layout tab
As mentioned in the previous paragraph, you can use the Layout tab to quickly make changes to the layout of the respective presentation. Here you only change the layout for the selected presentation and not the default template.

(1) Layout: The layout tab is displayed as soon as you open a presentation.
(2) Select Layout: Here you can select the layout you want to overwrite with changes.
(3) Content: In this tab you can set the type of the "new" layout. You have the choice between Standard, Large Image and Minimal Content.
(4) Sorting: Specify here if you want the default product sort to be displayed or if you want to use your own sort. If you select your own sorting, another dropdown will appear. There you can set the sorting you want.
(5) Filter: You can choose here, by which properties the products can be filtered from the customer. If the standard filters are not sufficient for you, you can also add further filterable properties here.
(6) Content: This field allows you to quickly add text to the layout.
(7) Settings: Define here how the text should be aligned. You can choose between vertical alignment, top, middle and bottom.
All elements (Content, Listing, Product) are designed using the usual designer of the Shopping Experiences. The difference after creating the layout is that each element has a different type, which provides different options.
Designing the layout with the Shopping Experiences
There are two ways to create a layout for Digital Sales Rooms. Either directly from a presentation or via the Shopping Experiences. In both cases, you can design the layout with the Shopping Experiences Designer.
In the presentation
When you create a presentation and add a new layout, you will be taken directly to the Shopping Experience Designer. There you can directly create a layout, which will be automatically added to the presentation.
In the Shopping Experiences

Within Contents > Shopping Experience you can access your Shopping Experiences as usual. You will now find presentations on the left side of the overview. There you can call up all layouts that can be used for Digital Sales Rooms. You can filter by landing pages, category pages and product pages.
Create new layout

If you want to create a new presentation page, you also select one of the layout variants here.
You can use presentation layouts aswell as regular shopping experiences in the presentation.

Within the designer, you now have elements available that can be used exclusively for presentations. For instance, you can insert the notes element into the layout and fill it with text. Notes are only displayed for the guide and are not visible to the customer.
Creating an appointment in a presentation
As soon as you have created a presentation by saving it for the first time, it will automatically appear as a non-guided appointment in the last menu item "Appointments". More information about appointments can be found in the next section.

Appointments
You can create a new appointment when creating a presentation (Marketing > Digital Sales Rooms > Presentations) or via the "Appointments" menu (Marketing > Digital Sales Rooms > Appointments). We distinguish between two types of appointments. A non-guided appointment is generated by default when creating a presentation, as already mentioned.
With a non-guided appointment, the customer can navigate through the presentation on their own. With a guided appointment, the customer is guided through the presentation in real time.
In the following, we will show you where you can view all appointments at a glance and what the differences are between creating a non-guided and guided appointment.
Overview

The overview shows you all guided and non-guided dates. You will find the most important information there and you can also directly copy the participant and guide link.
The participant link is always given to the customer and the guided link is given to the corresponding guide who leads and presents the customer through the appointment.
This allows the new invitation management, which is available within the appointments and can also inform about changes to the appointment.
Create Appointment

(1) Presentation: Select an existing presentation here. (Note: This option is not available if you create an appointment via the Presentation menu).
(2) Guide / Sender: Here you can set which user should be assigned to the presentation.
(3) Mode: Select between a non-guided or guided presentation.
(4) Name: Enter a name for the event here.
(5) Participants / Receivers: At this point, you can either enter individual e-mail addresses or select from the list of your existing shop customers.
(6) Date from/ Date to: Here you can individually define from when and for how long the presentation should be accessible.
(7) Message: Enter a message here that will later be included in the e-mail. Below, you can see how your email will look like later.
(8) Domain: Select the domain here. Individual link: Here you can enter an individual suffix & overwrite the automatically generated participant & guide links. Participans / Guide Link: This is automatically generated & can be copied directly if needed.
Your domain determines the language of the presentation. Use the domains you have previously stored and their assigned language as a guide.
(9) Audio and Video availability: Here you can set whether the video function of the customers is activated at the beginning of an appointment. (Note: This option is omitted for a non-guided mode).
Invitation management
The invitation e-mail can then look like the following at the recipient's, depending on the note stored, and is created within the respective appointment. The template for this e-mail can be changed via the e-mail templates.

The status (Yes / No / Maybe) that can be assigned by the recipient can be viewed later in the appointment in the Admin.

Under the item Already Invited, the respective status is displayed if this has been returned by the recipient via the invitation email.
If changes are made to an appointment, for example, additional participants are added, then when the appointment is saved or sent again, a request appears asking whether all or only the new participants should be informed about the changes.
This also makes it possible to send e-mails about changes.

Guide view
To start as a guide you can use the link from the invitation mail or from the appointment.
A login is opened.

After you are logged in, you are presented with the guide view.

On the right side, you find the presentation tools (1). The guide can start the presentation (2). Also, you can add additional slides with product listings (3) that are not in the preparation.
The point saved products (4) can be used to add products into the presentation on the fly if an attendee asks for it.
If the presentation is started, the guide is presented with the following page in which he can use the menu at the bottom to manage the presentation.
To start click on the link from the invitation Email or use the button Guide in the Appointments view.
Presentation
Video & Audio

After you logged in, a pop-up appears to set up your audio and video settings.
Start presentation

You can start the presentation here.
All participants with an invitation link will only land in a waiting screen, until the presentation is started.
As soon as a participant joins the started presentation, you will be notified of this at the bottom right of the Guide view.
Many functions, such as the video & audio settings, are only visible and possible while the presentation is running.
Tools in the guide view

Instant product listing
Instant product listing take you to the overview of product lists that you can compile before and during a presentation.
Creating a instant product listing

With Filter

(1) Create instant product listing: Press this button to start filling the product list.
(2) Discard changes: All changes made will be discarded.
(3) Add Products: As soon as you press this button, the pop-up window opens with all the products that you have previously assigned to the presentation.
(4) Search: Search for products from your list or from the range using the search function.
(5) Notes: Here you can see whether and how many notes were made in advance for this slide.
(6) Show: If you press this button, you can open your notes.
(7) Filters: Here you can filter the products displayed if, for example, the customer has specified requirements in advance.
(8) Add all: With the Add all button you can add all products displayed in the current filter to the list, for example if your customer wants to test all your products or those of a specific manufacturer.
(9) Remove all: The Remove all button removes all added products so that you can quickly clean up your list.
(10) Remove from list: This button only removes the products affected by the filter. If, for example, the customer sets a price limit or does not want anything from certain manufacturers, you can easily and specifically clean up your listing.
Settings
Broadcast mode

Here you can turn the presentation from a meeting into a tour, just like during the appointment creation. All the participants' cameras and microphones are switched off and cannot be switched on again until you authorize it with the switch. During the tour, customers will be able to concentrate more on your products, and you can present your product range smoothly.
Participants are allowed to share their screen
You can use the switch (1) to grant permission for participants to share their screen during the presentation.
If, as a guide, you want to share your own screen, you need to click the share button (2). A pop-up window (3) will then appear at the top of the window, where you can specify exactly which view you want to share. You can choose between Tab, Window, and Entire Screen. Once you have selected the view to be shared, click on Share (4) to finalize.

After you click on Share, you will see a notification (1) in the top left corner indicating that you are currently sharing your screen. If you click on the Share button (2) again, you can either stop presenting (3) or present something else (3). If you click on Share something else, you will again have the option to select in the pop-up which tab or window you want to share. You can also stop sharing your own screen or that of a participant by clicking the Stop Screen Sharing button (4).

Finish presentation

Once the presentation has ended, it cannot be started again without a new appointment.
Even after you end the presentation, your customers can still access the presentation via the link, continue viewing it, edit their shopping cart and continue browsing the slides. This is possible as often as required until the presentation ends.
As soon as the date until which the presentation should finally run has passed, the invitation link leads to a blank page. Therefore, think carefully in advance about how long your customers should have access to the presentation.
Notes
When notes for the guide were added in the shopping expericence they will appear in the left bottom left corner.These Notes can be used to give additional information to the guide.

If you open the Guide tools in the bottom left, you will find the notes in the bottom part of the tools page. At first, the notes are hidden and can be shown with the button Show(1).

Navigation menu

Here you can switch between the individual pages of the presentation for you and your customers. Customers can see in real time when you switch from one page to the next, and are thus led by the hand according to your needs. This dynamic allows you to capture the attention of the participants and keep them with you during a longer presentation.
Customers do not see the navigation bar in guided mode.
List of Attendees

In the list of attendees, all active and inactive users are listed. Next to the names of the attendees, you can see the symbols of video and audio if available but deactivated by the attendee.
You can open the list by clicking on the attendee (1) button in the navigation bar and the list appears on the righthand side of your screen. In the upper part of the list, there is a field to search (2) specific attendees. You can also remove participants who can no longer join the presentation.
Recently viewed products

During the presentation, you can recognize an eye icon (1) in real-time next to the products that customers are currently viewing. This helps you understand what your current target audience is interested in. Additionally, you can view the history of all viewed products through the Recently Viewed button (2).

In the Recently viewed Products view, you can, as the moderator, see the history of the products you have opened and even filter the view by individual participants.

In the details of each product, you can see who else is currently viewing that product.
Wishlist Overview

In the Wishlist view, you as the guide have the opportunity to view, which products your attendees put in their Wishlist. You can open it with the wishlist (1) button. The list appears on the right side of your screen. The initial view shows the accumulated wishlists of all attendees. With the dropdown Participant (2) you can filter to a specific attendee. The search field (3) offers you a filter for a specific product.

With the Sort (4) Button you can sort the List of products by Qantity(default), Revenue, and Name.
If you cannot view a customer's wish list, it is possible that your customer has not authorized this. You can request the necessary authorization from the customer from the list of participants.

Shopping cart overview
The guide has a connection to all shopping carts of the attendees. He can see, which products within the presentation are added the most. Also, he can pick a cart from an attendee to view its contents.

To open the shopping cart view, click on the shopping cart (1) button.
It opens the list of products that are currently stored in the shopping carts of the attendees. You can see the number of products, that are added to the cart, in every product line.
With the drop-down Participant (2) you can switch between the accumulated list of all attendees or a cart of a specific attendee.
With the search field (3), you can search a specific product within the carts.
The Sort (4) Button is used to sort all products by quantity, revenue or name

Real-time Discounts
The real-time discounts allow you as a guide to give absolute or percentage discounts on the products in the shopping cart in real time during a guided presentation.
As soon as your customers have products in their shopping cart and you click on the shopping cart symbol at the bottom right, you will see the Offcanvas shopping cart.

In this Offcanvas shopping cart, you should now select a participant (1) to display only their current shopping cart.
Now you can click on Show/hide details (2) to get a detailed view of the individual shopping cart totals. Here you now also have the option of applying discounts in real time. On the one hand, you can apply either a percentage (% symbol) or absolute (currency symbol) real-time discount to the subtotal of the products in the shopping cart by simply entering this in the Discounts field (4). Secondly, you can click on the Discounted products button (3) to display a pop-up in which you can apply discounts to individual products, all products or product groups.

To discount individual products individually, enter a numerical value for the relevant products and choose between percentage (% symbol) or absolute (currency symbol). If you would like to apply a discount to all the products listed there, click on Select all (5). This will mark all products in the shopping cart and you can apply the same discount to all products.
If you want to discount a certain selection of products in the shopping cart, select the individual boxes of the desired products by clicking on them (6) and you now have the option of entering the same discount for all selected products (7). To actually apply the discount to the shopping cart and make it visible to the customer, the Apply button (8) must be pressed. You can also temporarily close the pop-up at this point. Once entered, the discounts are retained and can be applied to the shopping cart at a later date.
After you have confirmed the discount, your customer will see the given discount directly in their shopping cart and can purchase these products including the discount.
Customer view
Unguided Session
Your participants assigned to the presentation will receive an email containing the link to the presentation if they are already registered as existing customers. For new customers, you can send the link as a newsletter, for example.
If the customer clicks on the link, they will be taken to a notification page if the time slot for the presentation has not yet been reached.

Once the time slot for the presentation has been reached, the participant is taken directly to the presentation.
Presentation sequence
In the unguided presentation, the customer can click freely through the individual pages.

The participant can use the navigation (1) to jump directly to a specific page of the presentation, in this case a landing page is displayed first.
Clicking on the arrows (2) takes the customer to the next or previous page.
By clicking the Recently viewed products button(3), the participant can access the history of the products they have viewed.
By clicking on the Whishlist (4), the participant can access the list of products that they have entered as favorites.
The shopping cart button (5) takes the participant to their shopping cart.
Navigation

Product view

If an attendee clicks on a product from the list, it is opened in fullscreen. This view can be used to add the product to the shopping cart or the watchlist.
Attendee functions
These appear as a list on the right-hand side of the screen.
Last viewed products

The list of recently viewed products is created automatically as soon as the participant opens individual products.
Wishlist

The participant can add products to the wishlist (3). To do this, the participant can click on the Add to list (1) button in the product list or within the product. They can also remove the product by clicking on the Remove (2) button in the product list or on the X (4) button in the wishlist. However, the whislist is independent of the shopping cart and should not be confused with it.
Shopping cart

The shopping cart (1) button takes the participant to their shopping cart. This appears as a list on the right-hand side of the screen.
To add a product to the shopping cart, the participant clicks on the Add to cart button (2) either in the product list or within the product.
If a product is already in the shopping cart, the order quantity can be changed using the + and - buttons (3).
Behind the button, there is a further button to add the corresponding product to the whishlist (4) or to remove it.
The X (5) button can be used to remove a product from the shopping cart.
To order the products in the shopping cart, you can start the checkout by clicking the Checkout button (6) at the bottom
Checkout

At the checkout of the store, the attendee can either log in with an existing customer account or create a customer account.
With all the required data, the order can be created and is now managed like a regular order.
Share screen

Participants can share their screens, provided that the guide has enabled this feature (see the section Participants are allowed to share their screen). To do this, participants must click the Share button (1), then select the tab, window, or entire screen they want to share in the pop-up (2), and confirm by clicking Share (3).
Login as a customer
With version 4.2.0, guest users can log in to an existing customer account during a presentation. To do this, your customer can click on the customer account icon (1) at the bottom right.

Then, they need to click on Login as customer (2) to open a pop-up where the login details can be entered.

Products from the guest session's cart will be retained. If there were products in the customer account's cart beforehand, the carts from the customer account and the guest account will be merged.
Guided Session
In guided mode, attendees are led through a presentation by the guide in a targeted and personalized manner.
The links to the events can be found directly in the presentations or in the general event overview:
Marketing > Digital Sales Rooms > Presentation > "Presentation XY" > Appointments.
Marketing > Digital Sales Rooms > Appointments.
All participants invited by you will receive the link via an invitation email.
If the attendee uses the link from his e-mail, he will be taken to a landing page if the time slot specified in the presentation has not yet been reached.

Once the time slot for the presentation has been reached, the participant is taken to a login page.

Via this login page, the attendee can now decide whether he wants to participate as a guest(1) or log in with his existing customer account(2).
The guest session can follow the presentation and use all functions, but to order the shopping cart, if filled, the participant must complete the checkout at the end of the presentation by registering a customer account.
An attendee with an existing customer account can log in with their data, use the shopping cart, and simply order it without entering any further data.
If an attendee without an existing customer account decides to create a customer account directly, the link Create an account(3) is available.
Guest session
If the attendee decides on a guest session, the next step is to enter a name and the option to release the shopping cart for the guide.

Attendees must also agree to daily.co's privacy policy to participate.
Should the participant nevertheless wish to register with an existing customer account, he/she can switch to regular registration via the link at the bottom.
Login with existing account
If an existing customer logs in, an intermediate window first appears to allow the guide to access the customer's shopping cart.

The existing customer joins the presentation by clicking on the Join button.
Attendance at the presentation
After the attendee has logged in, a configuration page appears for setting the audio and video connection.

The microphone, loudspeaker and camera can be selected and activated here.
You can also select a filter or virtual background for the camera image.
All registered participants are first taken to the waiting room if the guide has not yet started the presentation.

When the guide starts the presentation, the attendees are taken to the following view. In contrast to the unguided presentation, the attendee cannot move freely through the pages of the presentation but follows the guide.

(1) Show video: The attendee can use this button to show and hide the camera image of the guide.
(2) Jump to guide: Takes the attendee to the part of the page that is currently being discussed by the guide.
(3) Deactivate microphone: The attendee can use this button to deactivate and activate their microphone.
(4) Deactivate camera: This button deactivates the transmission of the camera image. If the camera is deactivated, it can be reactivated.
(5) Leave presentation: You can leave the presentation by using the hang-up button, and after you have left, you can rejoin the presentation through a new button.
(6) Audio-video settings: This is where the attendee accesses the configuration of the camera and audio connection. The participant can select the devices for video and sound transmission here. The participant can also set up a blur mode for their camera image to protect their privacy, which blurs the background.
(7) Subscriber list: Opens the list of active attendees.
(8) List of recently opened products: The attendees can access the history of their most recently opened products here.
(9) Watch list: The attendee can access the wishlist with their products here.
(10) Shopping cart: Opens the attendee's shopping cart. The order can be completed via the shopping cart.
Request for quotation
When you activate the Quote Management (2) from the B2B Components via the Edit button (1) in the customer data (Customers > Overview), your customers can request quotations within presentations.

Once the presentation has started and your customers are in it, the Request quote button (2) will appear when they open the shopping cart (1). Using this button, they can send you a request for quotation.

After clicking Request quote (2), a pop-up will appear where the customer can send you a message.

Once the request has been submitted, the customer has the option to go directly to the quotation requests in the storefront via a button in the pop-up. When clicked, the Quotes menu item and the quotation requests within it will be displayed in the customer's account.

In the admin area, you can view the quotation request under the menu Orders > Quotes once it has been received.

There, you can either Send quote (1) or send message only (2). Further details about the quotation function can be found in the article on B2B Components.
Shopping Lists
If you activate the shopping list (2) from the B2B components for your customers in the customer data (Customers > Overview) via the Edit button (1), your customers can create and use shopping lists in the presentations.

As soon as you have activated the shopping lists, you will find the appropriate button (1) at the bottom right of the presentation - and your logged-in customers will also see it there.
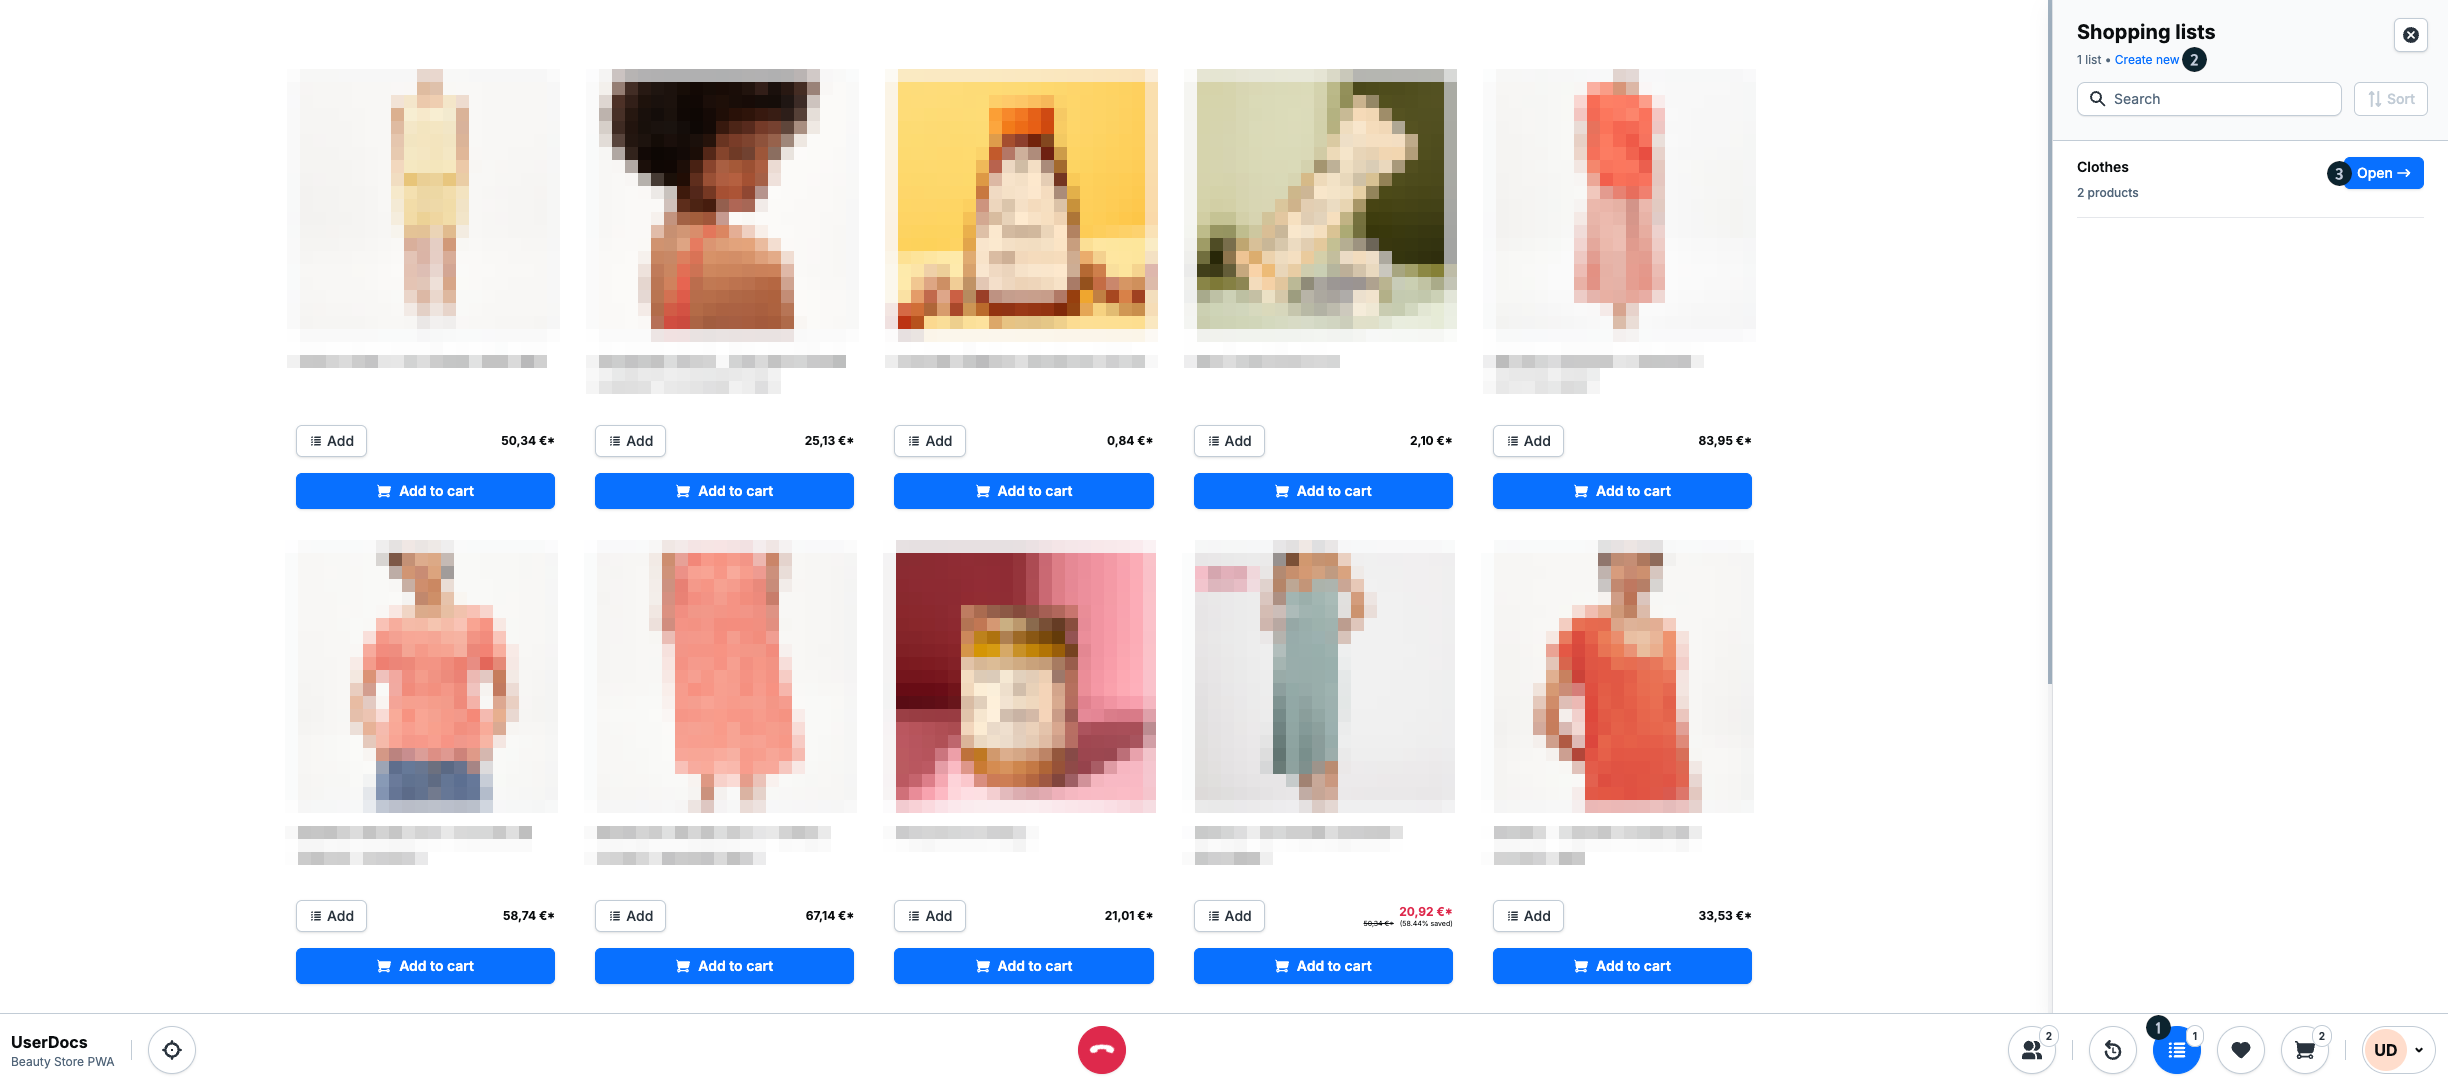
Click on the shopping list button (1) to open the shopping list overview on the right-hand side of the window. Your customers can create a new (2) shopping list here or open (3) and edit an existing shopping list.

As soon as a shopping list has been opened, your customers can view the individual products(1) and edit them if necessary. The minus or plus symbol can be used to easily reduce or increase the number of products. Click on the shopping cart symbol to add the respective product to the shopping cart. The X symbol can be used to remove a product from the shopping list.
Using the buttons at the bottom, your customers can either add further products (2) to the shopping list or add all existing products to the shopping cart (3).
Click on Add products (2) to open an overlay with all store products on the left-hand side. These can be searched using filters, so your customers can find exactly what they need more quickly.
Shared use of shopping lists by several employees
If several users from the same company take part in a guided presentation at the same time, they access the same shopping list.
All logged-in employees see the identical content - and changes are synchronized in real time. This means that if one person adds, edits or removes a product, everyone else sees this immediately. Parallel editing by several people is also possible without any problems.
View as guide

If you log in to a guided presentation as a guide, you can also act on behalf of your customers: To do this, first show the shopping lists (1) and then select the desired customer from the drop-down menu (2). Once you have made your selection, you will be notified that you are now active for this customer - and can easily open (3) and edit their shopping list. All changes are synchronized in real time - your customer sees immediately which products you add, edit or remove, and you also see their adjustments.
Appointment Booking
In the admin, under Marketing > Digital Sales Rooms > Configurations, you can enable the option Allow participants to book a new appointments (1) to give your customers the possibility to send you appointment requests for presentations. These are available to your customers in both the unguided and guided modes. However, in guided mode, your customer can only select the appointment booking request once the guide has finished the presentation appointment.

Your customers can send you these appointment requests in unguided mode when you have scheduled a presentation and invited the customers. To schedule a new appointment, go to Admin > Marketing > Digital Sales Rooms > Appointments and click Create Appointment. Afterwards, in addition to the usual settings, which are explained in more detail in the Create Appointment section, you can enable the following options under Advanced settings:
(1) Allow attendees to send emails from within presentations: Enabling this option allows your customers to send requests via email directly from the presentation.
(2) Allow customers to request appointments: Once this switch is activated, your customers can send appointment requests from the presentation. In the required field for this option, your booking link(3) must be entered. Microsoft Bookings has been used as an example here, which manages appointments via an Outlook calendar.

Once your customer is within the unguided presentation, they can submit a request by clicking on the speech bubble icon (1) and then clicking on Book an appointment (2).

After clicking on Book an appointment (2), your customer will be redirected to the booking service you have provided. In this example, to Microsoft Bookings.

Your customer can book an available appointment there, which is then confirmed to your customer by e-mail:
