
Sales Agent
With the new Sales Agent feature, administrators can set up a user management system for sales staff via Shopware Administration. This feature allows sales users (sales staff) to be created and assigned specific customers. This enables the sales team to work more efficiently and provides them with direct access to customer data relevant to their needs.
The Sales Agent feature was released with version 6.5.0.0. It is available to you from the Evolve Plan onwards.
The Sales Agent is not an extension that can be installed in the Shopware admin or activated with a single click; it is a separate frontend application.
The source code is provided to agencies or administrators via a GitLab repository. Based on this, experienced developers (e.g. agencies or internal developers) can create their own app, configure it, and integrate it into the existing Shopware environment. Further information about the Sales Agent can be found here in the developer documentation.
You can find the sales agent management in your admin under Settings > System > Sales Agent - Users & Permissions.
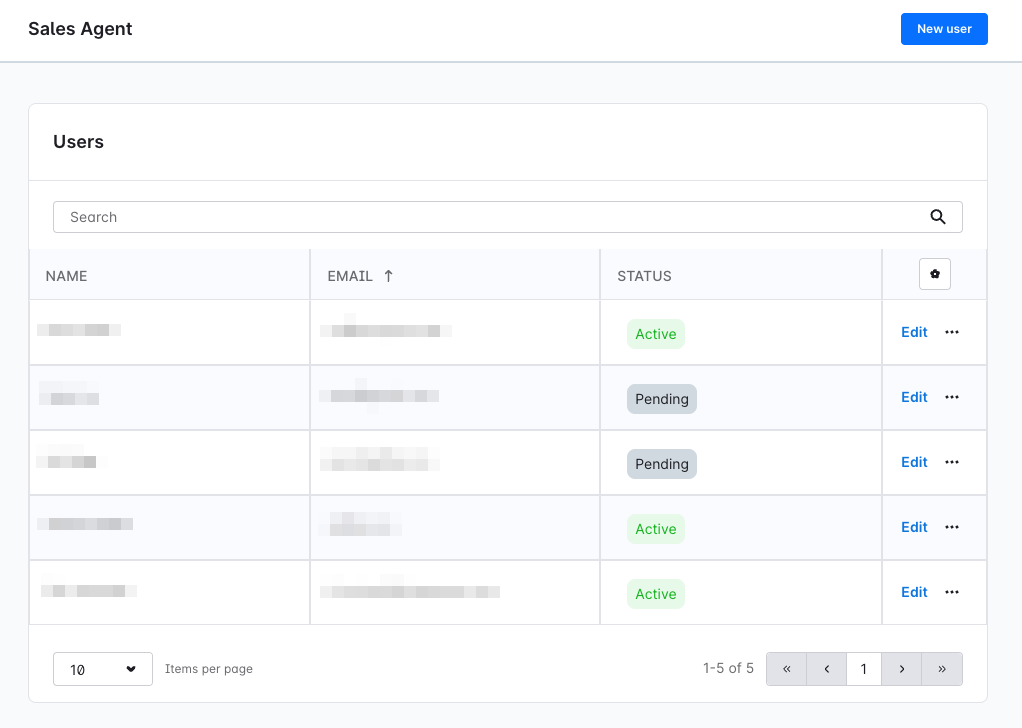
Sales representative administration
Create Sales Representative
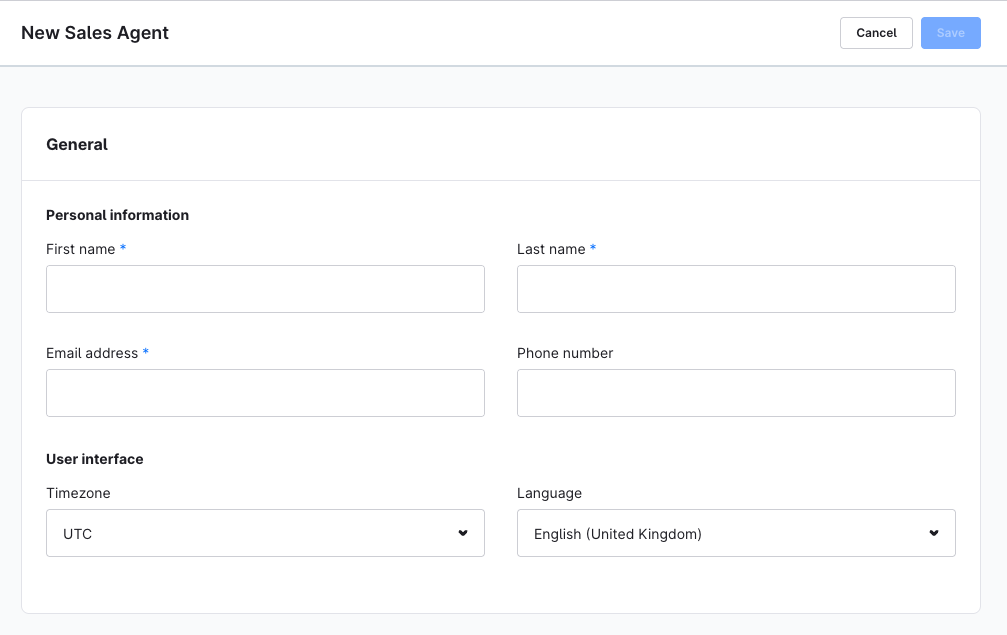
Open the Sales Agent > User Management section. Click on “New User”. Enter the necessary user data (name, email, language, etc.). Save the new user.
Assign customers
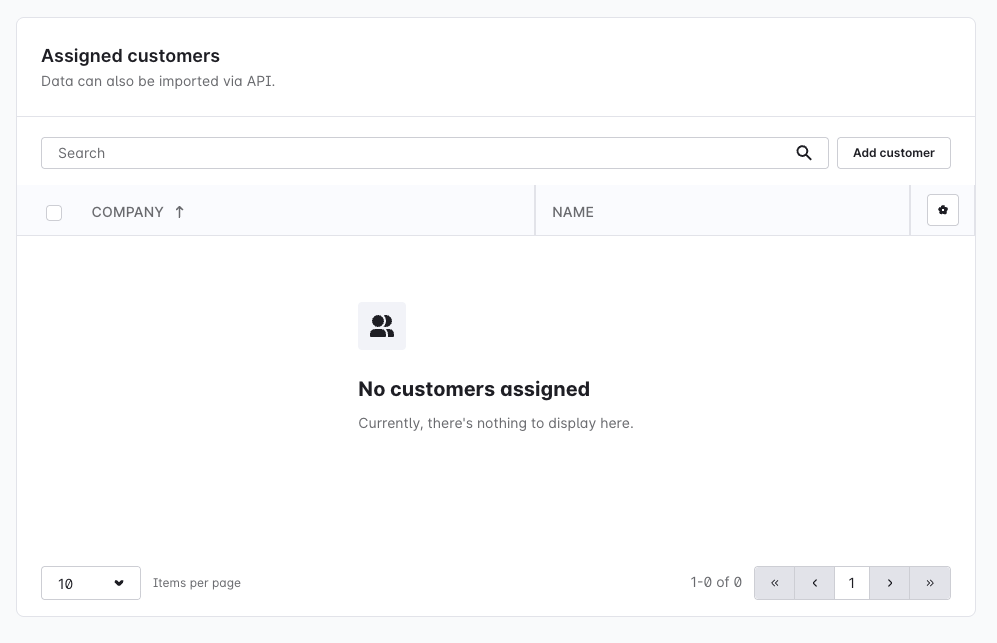
After creating a sales representative, the administrator can assign customers:
To do this, open the desired sales representative in the user overview.
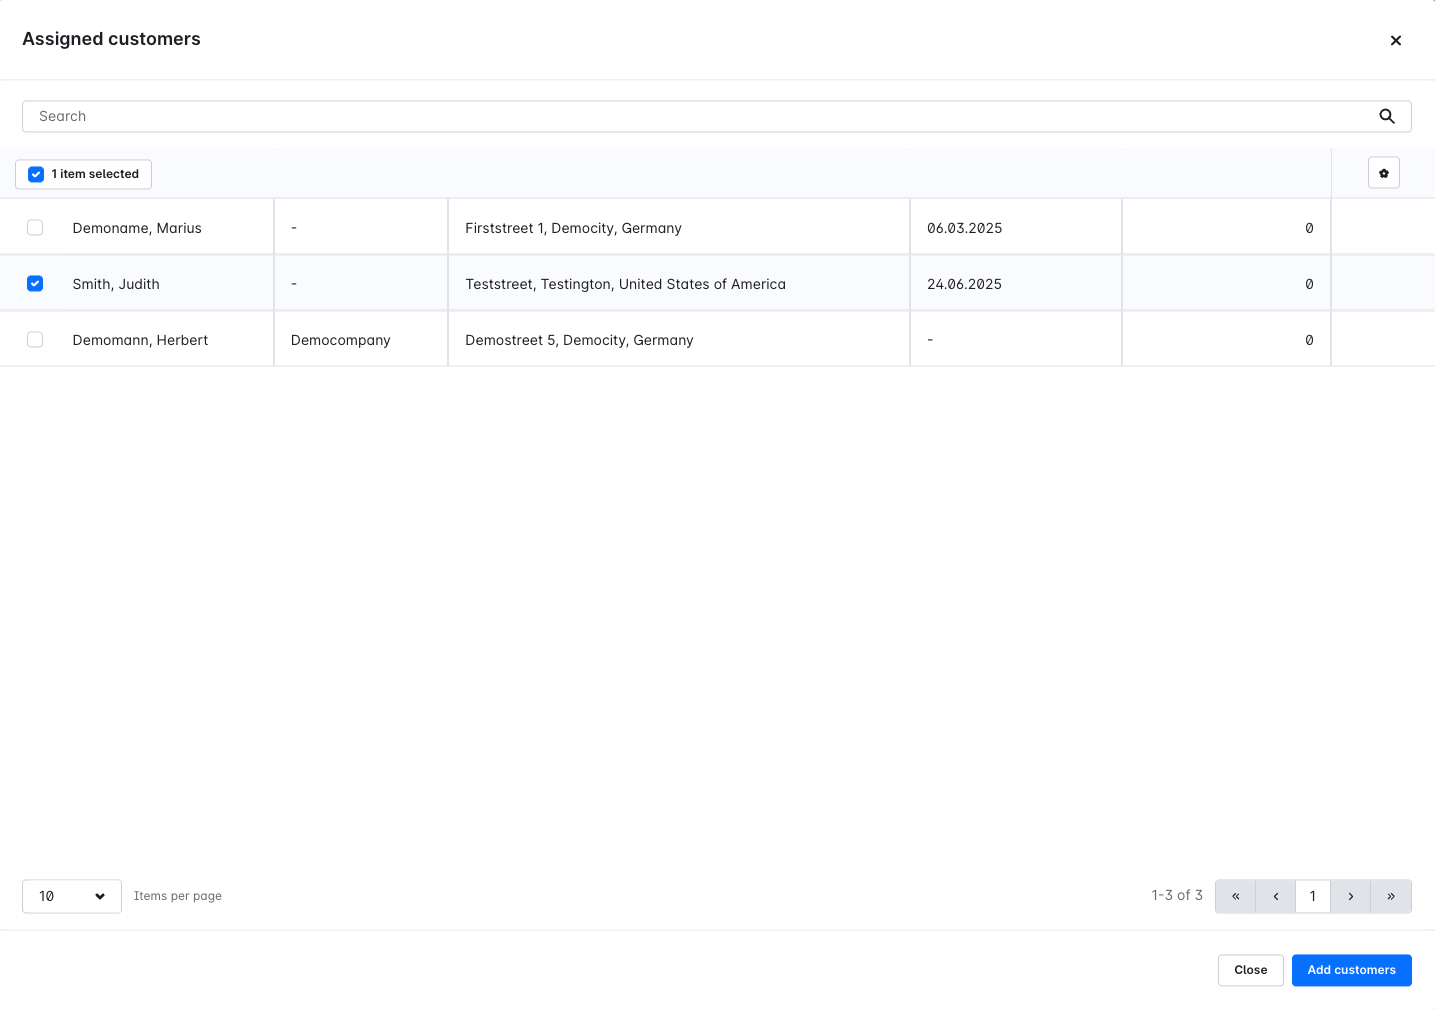
Then click on Add customers. In the new modal window ‘Assigned customers’, you can select individual customers or several customers at once and assign them to your sales representative. Simply tick one or more boxes in the selection field. Once you have selected all the desired customers, click "Add customers".
Only administrators can assign customers to a sales representative or change these assignments.
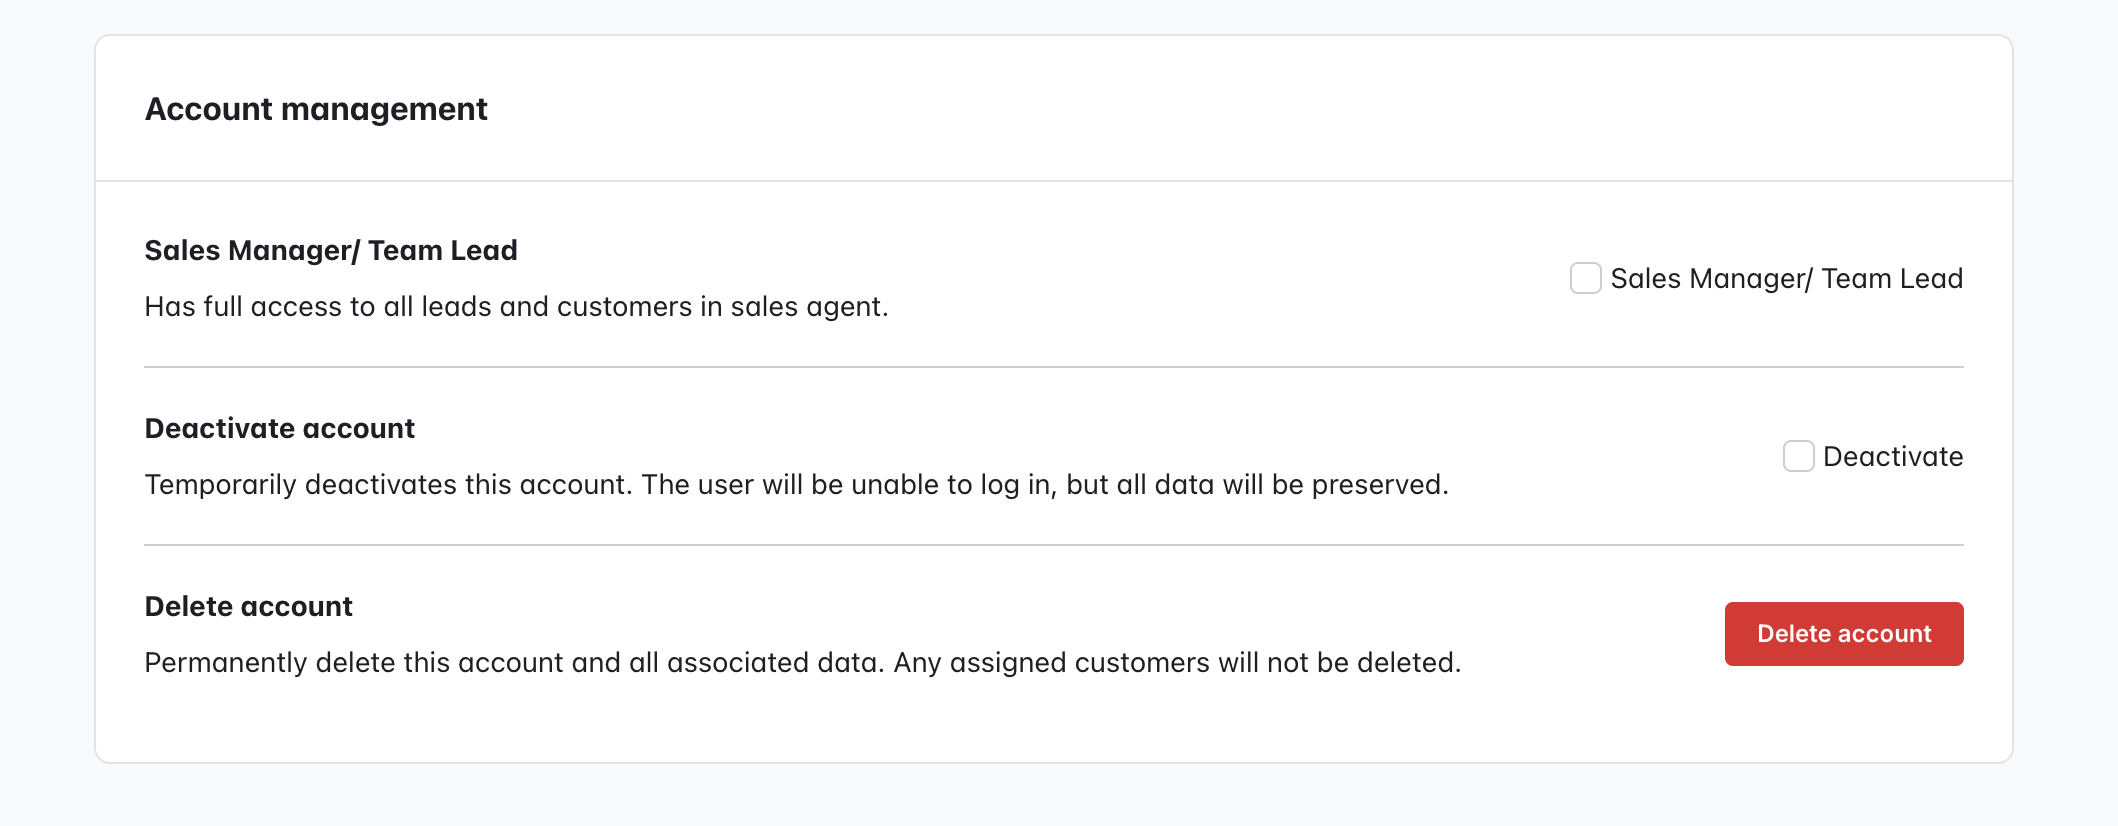
Account management
In account management, you have the following options for each of your sales representatives:
Administrator: Grants the sales representative full administrative access to customers and user management
Deactivate account: You can temporarily deactivate the sales representative. The data will not be deleted, but the sales representative will no longer be able to log in
Delete account: Use this button to permanently delete the sales representative. All associated data will be permanently deleted
Sales Agent Area
Automatic account creation & password setup
As soon as a new sales representative is created, they automatically receive an email with an invitation link.
This link takes the user to a landing page where they can:
Set their own password
Then gain access to the sales agent area
View of the sales agent area
In the Sales Agent interface, sales staff can access their own user accounts and change settings.
User account & settings
After logging in, sales representatives can configure their personal settings in their account:
User-side customisations: language, time zone, name (first name & surname), telephone number, password
- Changes only possible by admin: email address, assigned customers
These restrictions ensure that assignments and account data remain consistent.
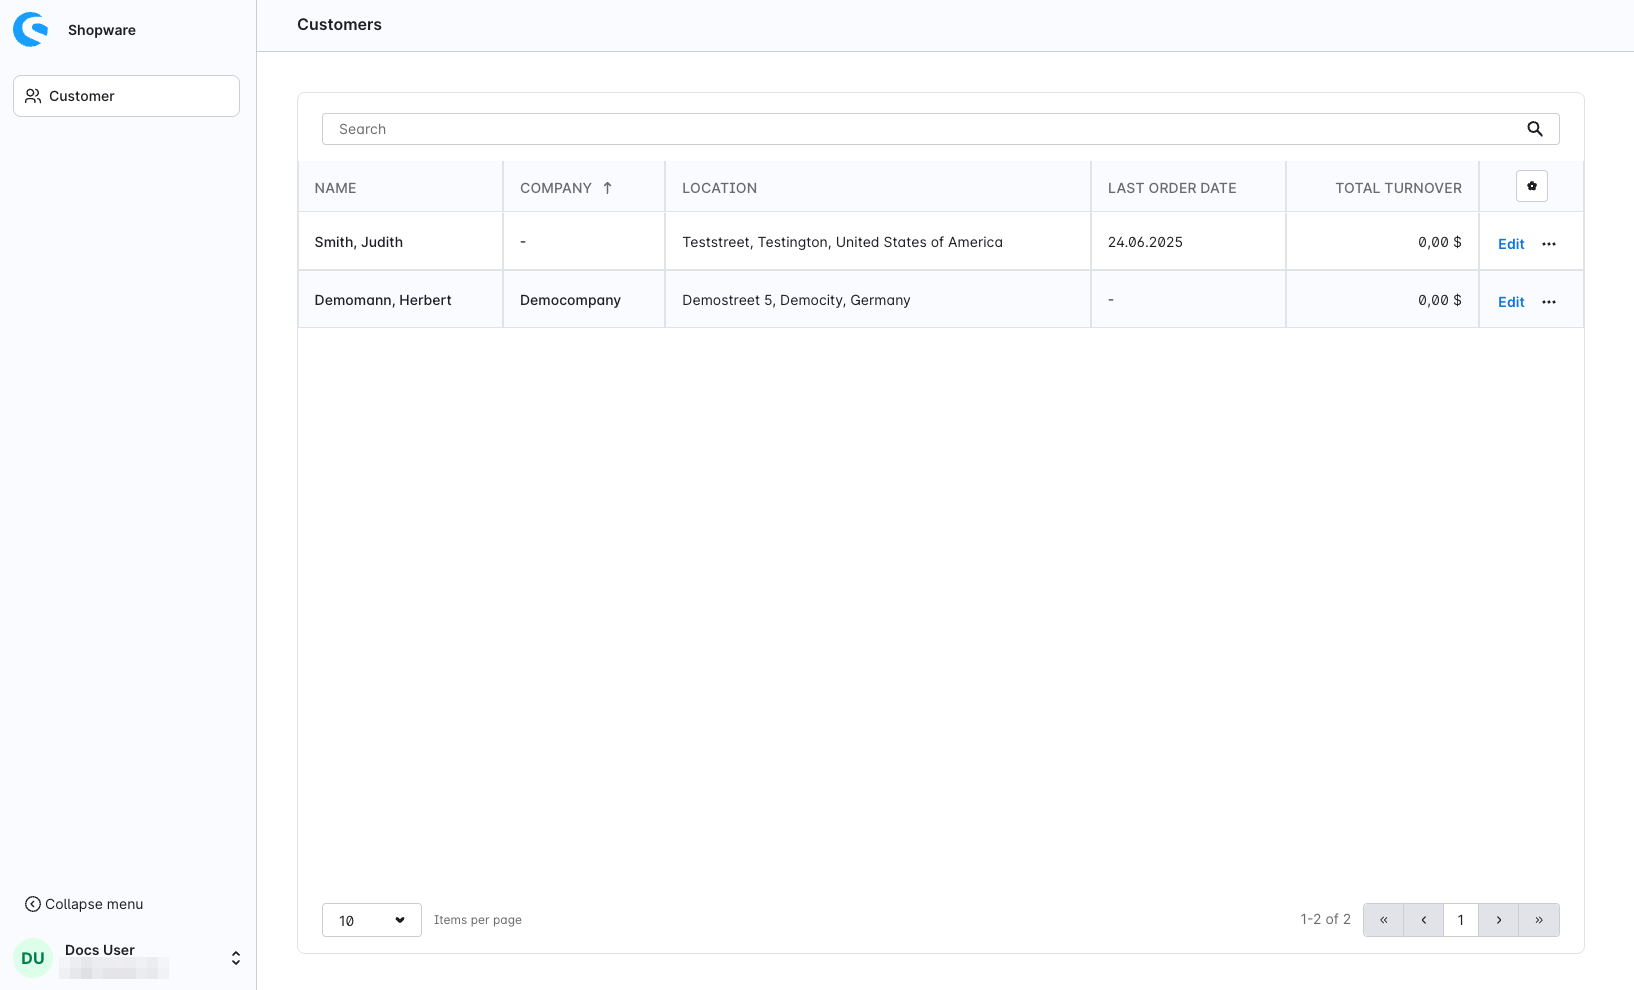
Customers
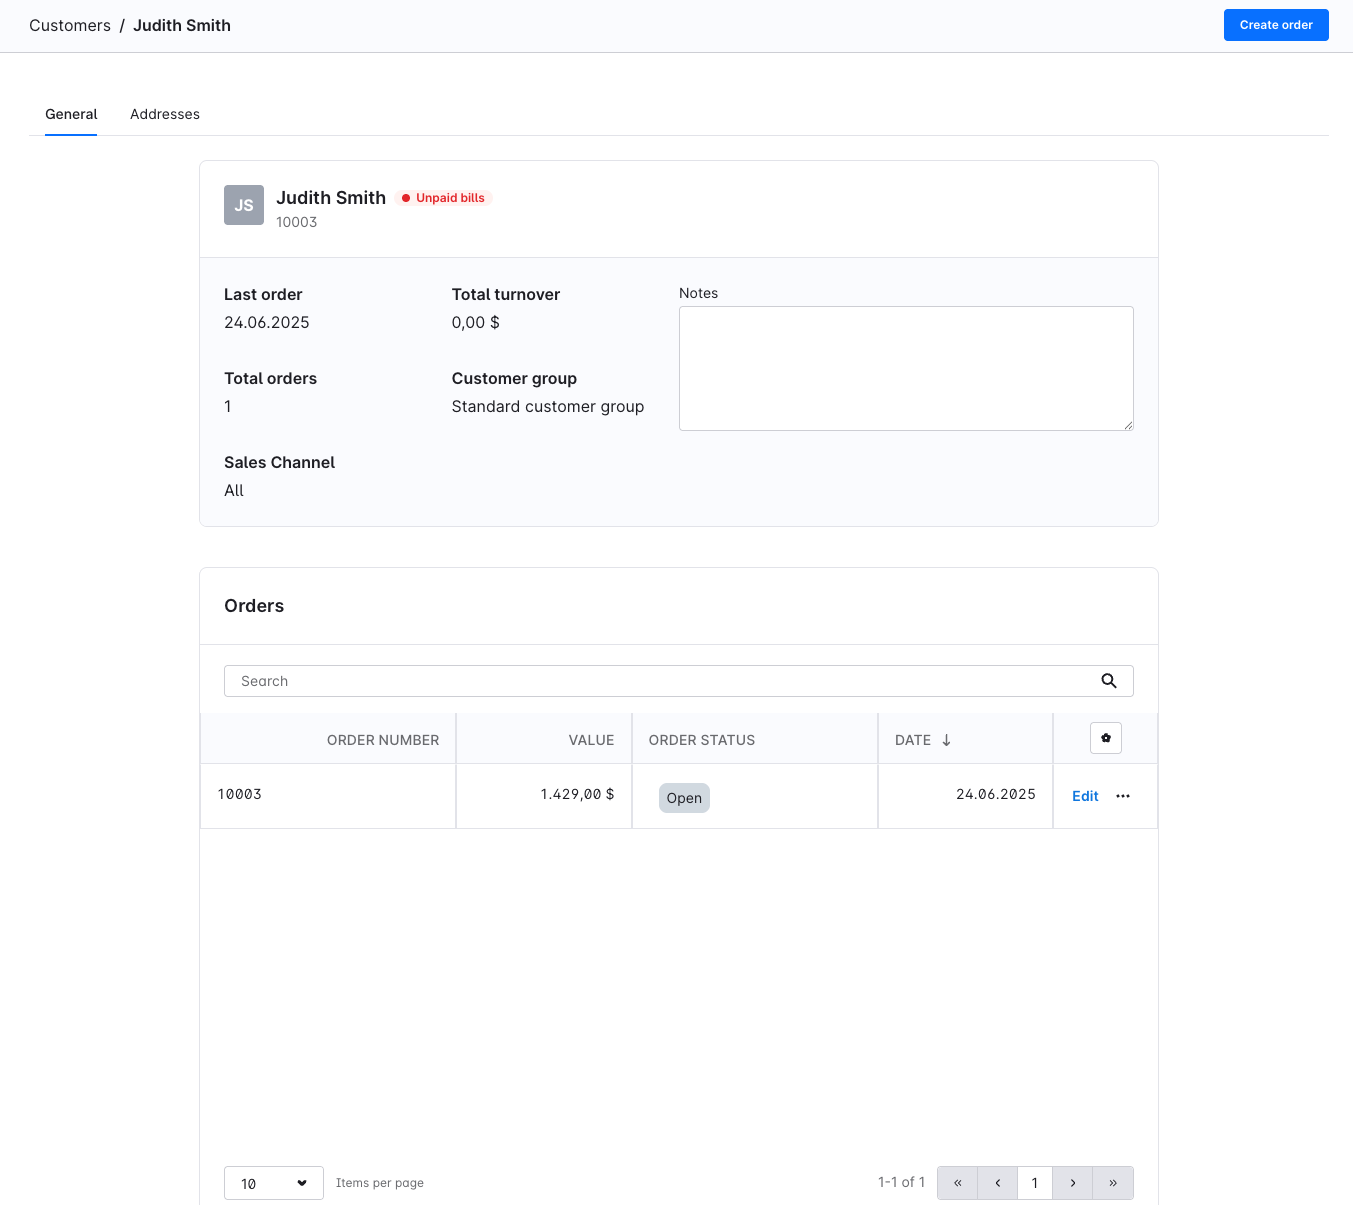
The ‘Customers’ section displays all customers assigned to the sales representative currently logged in. Clicking on a customer opens a detailed view that displays the customer's personal data and orders. The sales representative can also create new orders here by clicking on the ‘Create order’ button.
Quotes
Via the left-hand main navigation, you can access the Quotes (1) section. In the offer overview, you can view a comprehensive summary of all the quotes you have created. This view serves as the starting point for managing, tracking, and editing your offers in the Sales Agent.
In the top right corner, the primary action, Create quote (2), is available, allowing you to create a new offer at any time. At the top of the page, you will find a search field that lets you search for quotes based on relevant information.

The quote list (3) is displayed in a table and contains the following information:
Status: Shows the current processing status of the quote. The status is visually highlighted with colored labels, for example, Open, Answered, or Expired.
- Quote number: A unique number used to identify the quote.
- Created on: The date on which the quote was created. The list can be sorted by this value.
- Customer: The name of the customer to whom the quote is assigned.
- Email address: The contact email address provided by the customer.
- Actions: Using the context menu, you can perform additional actions for a quote.
At the bottom of the page, you can define the number of entries per page and use the pagination controls to navigate between multiple quote pages.
Create a new quote
In this view, you create a new quote in the Sales Agent. The quote is initially in Draft status and can be saved or discarded at any time. In the top area, you will find the actions Save as draft and Discard (3), allowing you to stay in control of the current editing status at all times.

General information
In the General information section, you enter the basic details for the quote:
Customer (1): Select the desired customer. You can search by contact person, email address, or company name. This field is mandatory.
- Sales channel (2): Define the sales channel through which the quote is created. This field is also mandatory.
As soon as you select a customer, additional information is filled in automatically:
Contact person: The assigned contact person for the customer.
Email address: The contact person’s email address.
Company: The customer’s company name.
Customer number: The internal customer number used for clear identification.
These automatic entries reduce manual effort and ensure that the quote data remains consistent. After entering the general information, you can save the quote (3) and continue editing it in the next step.
Quote details
As soon as you open a quote from the quote overview that has not yet been sent, it is in Draft mode. When the quote is ready to be sent, you can send it using the Send quote button (1). To edit the quote, you must first click the Edit quote button (2).

In this view, you edit the line items of a quote, including the contained products as well as prices and discounts. At the top, you see the quote name, including the quote number and the current status, for example, Open. In the top right corner, the actions Save, Discard, and Send quote (4) are available, allowing you to save your changes, discard them, or send the quote directly to the customer.

Manage line items
In the Line items section, you see all products that have been added to the quote. Using the search field (1), you can quickly find existing line items. With the Add product button (2), you can add additional products to the quote.
Each line item is displayed in a table row and contains:
Product information: Product number, product image, and product name.
- Price (net): The standard price of the product.
- Quote price (net): The price that applies to this quote and can be adjusted if needed.
- Actions: Using the context menu, you can perform additional actions for the respective line item.
Below the list of line items, the price summary is displayed:
Subtotal (net): The sum of all quote line items before discounts.
Total discounts: Here, you can apply a discount to the entire quote. You can choose between an absolute and a relative discount amount (3).
Quote subtotal (net): The subtotal after all discounts have been deducted.
plus X% VAT: The calculated value-added tax based on the quote subtotal.
Total (gross): The final quote amount including value-added tax.
Documents
In this section, you manage the documents of a quote.

In the Documents section, all files related to the quote are displayed, for example, the automatically generated quote PDF. Using the search field, you can find documents quickly. In the table, you can see the document’s creation date and file name.
Using the context menu (1) of a document, the following actions are available:
Open document (2): Opens the document directly in the browser.
- Download document (3): Downloads the document to your device.
Delete quote
Below the document list, you will find the Delete quote section. Deleting a quote draft is permanent and cannot be undone. By clicking the Delete quote button (4), you permanently remove the quote draft from the system.
Send quote

In this dialog, you prepare the sending of a quote to the customer. Here, you review the most important quote details, define the validity period, and can optionally add a message and documents.
On the left side, you see a summary of the quote:
Company and customer for whom the quote was created
- Number of line items included in the quote
- A detailed price overview including subtotal, discounts, VAT, and the final total amount (gross)
This information is intended for a final review before sending.
On the right side, you configure the quote sending settings:
Expiration date (2): Define the date until which the quote is valid. This field is mandatory.
- Message (3): Optionally, you can add a custom message to the customer that will be sent together with the quote.
- Attach documents (4): Choose whether a document should be attached to the quote:
- None: The quote is sent without an attachment.
- Generate document: A quote document is generated automatically and sent.
Upload custom document: You can upload and send your own document.
In the bottom right corner, you complete the process: With Cancel (5), you leave the dialog without sending the quote. With Send quote (5), the quote is sent to the customer permanently.