
Scene Editor
Utilise the full potential of your 3D models by using them to create your product images. With the Scene Editor, you can create various 3D scenes, place your products and easily generate images. Render unlimited images of your scenes, perfectly matched to your products.
You can find the Scene Editor via Content > Scene Editor.
If you are using Shopware in a version between 6.6.8.1 and 6.6.10.5, you need to activate the Scene Editor via the Insider Previews module first.
For more details, refer to the corresponding documentation.
Scene Editor (Beta) is currently available to all customers with a Shopware Rise plan (or higher) from Shopware 6.6.8.1 onwards.
Note: This feature is currently in beta status. The range of functions is still limited in this version and may be expanded in future updates. Its behaviour and scope may still change.
We look forward to your feedback, which will enable us to continue developing the function in a targeted manner.
Overview
In the Overview, you can find all your already created scenes. You can also display your scenes in a list overview (1). In the Dropdown menu Sort by: (2) you can choose to list your scenes by Name, Creation date or Modification date. Every scene also has a context menu (3), where you can either Edit, Duplicate or Delete the scene.
A new scene can be created via the button Create new scene (4).
If you just want to edit a scene, it is also enough to just click into the desired entry.

Create a new scene
When creating a new scene, you will first be asked to name the new scene. Afterwards, you will be directly transferred to the scene editor of the new scene.
Overview of the controls
The most important areas of the Scene Editor are described below.
In the Scene Editor, you can create new scenes, but you can also open existing scenes and customise them.

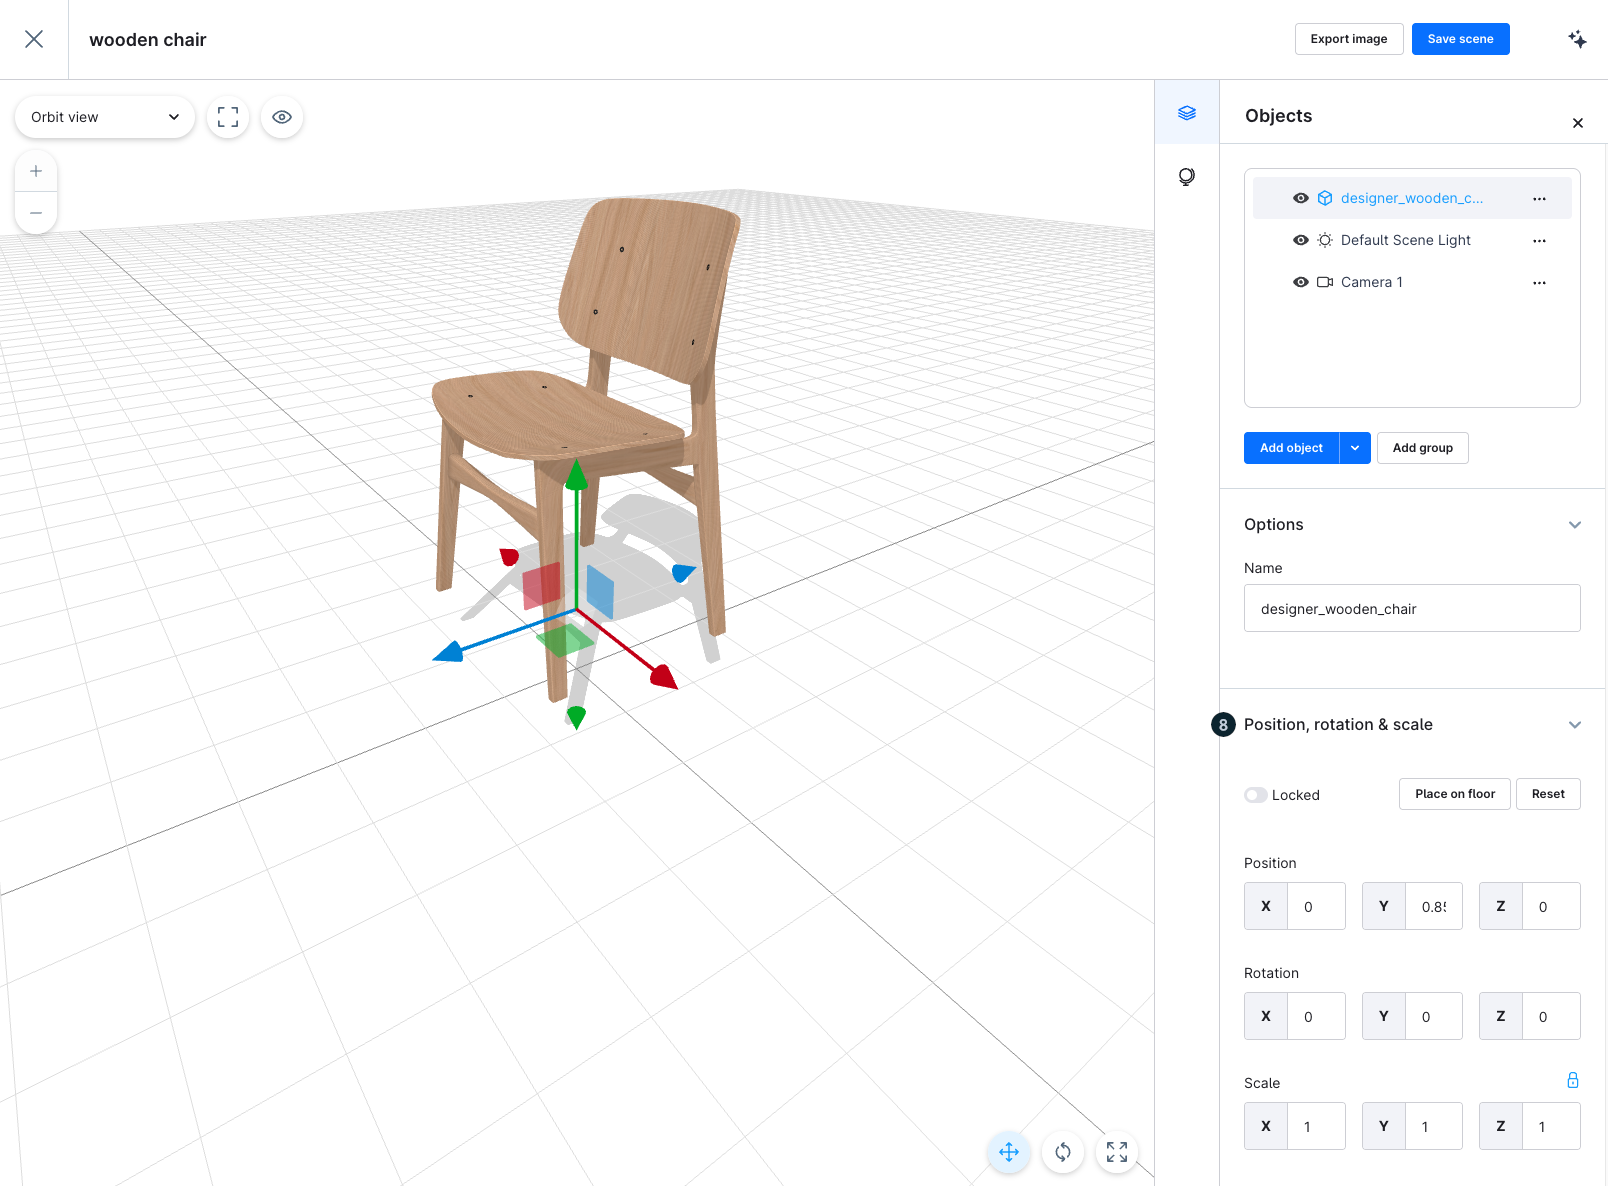
3D Objects
In the object settings, you can upload 3D objects of your products and set them into the desired position.
Object in the workspace (1): The main window displays the currently selected 3D object (e.g. ‘wooden chair’). It is located in the freely rotatable workspace, on a grid for better orientation.
Add 3D object (2): Use this button to insert a new 3D object into the scene. Various object types are available for selection via the drop-down menu.
Add group (3): Here you can combine several objects into a group. This makes it easier to move, transform or apply effects to them together.
View selection (4): This menu offers various camera and view settings (e.g. ‘Free view’). This allows you to quickly switch between preset perspectives.
Move tool (5): Activates the Move tool, which you can use to move objects in 3D space. To change the position of an object, use the arrows:
Blue arrow = movement along the Z axis (forward/backward)
Green arrow = movement along the Y-axis (up/down)
Red arrow = movement along the X-axis (left/right)
Use the coloured squares to move the object along combined planes.
The middle square allows you to move it freely in all directions.
Rotate tool (6): Activates the Rotate tool, which allows you to rotate objects around the three spatial axes.
To change the orientation of an object, use the rings:Red = tilt forwards/backwards
Blue = tilt left/right
Green = rotate (around its own axis)
Yellow outer ring = rotation from the camera perspective
Scale tool (7): This allows you to enlarge or reduce the size of an object.
By default, objects are scaled evenly to maintain their proportions. If you deactivate this option, you can stretch or compress an object along a single axis:Green square = height
Red square = width
Blue square = depth
Light Settings (8): In this area, you can set the light parameters.
Type: Select whether the light applies to the entire scene or only to a specific object.
Settings: Predefined presets or custom adjustments.
Light colour: Defines the light colour using a colour code (e.g. #ffffff for white).
Light intensity: Controls the intensity of the light (0–100%).
(The view may change depending on the selected object, see the second screenshot.)
Export image (9): Exports the current scene as an image file.
When you are satisfied with your scene, click Export image in the top right corner.Select a template or a custom size.
Select a camera (or the orbit view).
Save the rendered image.
Save scene (10): Saves the entire 3D scene, including all objects, lighting settings and camera perspectives.
Scene
In the scene settings, you can set the general configuration of the scene.
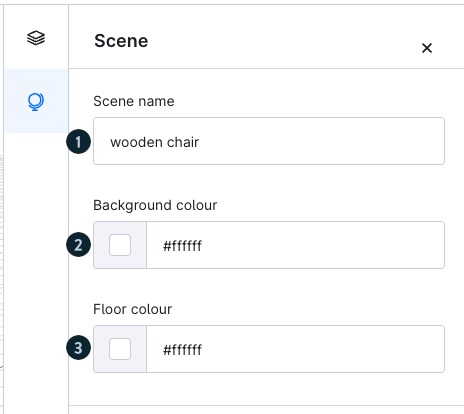
Scene name (1): Here, the name of the scene can be set.
Background colour (2): Here, the background colour of the scene can be configured.
Floor colour (3): Here, you can configure the colour of the floor.
Export image to media
With this button, you can now generate an image out of the scene.
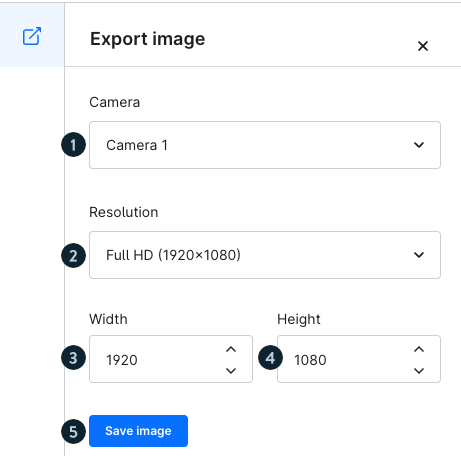
First, select the desired camera (1) that should be used for the image. Next, you can configure the resolution (2) as well as the width (3) and height (4) of the image. By clicking Save Image (5), the image will be exported and automatically stored in the Scene Editor Media folder.
Shapes
If you want to create shapes (platforms or walls), you can do this via the Add 3D Object button. In the Select Media window, click on the Primitives tab.
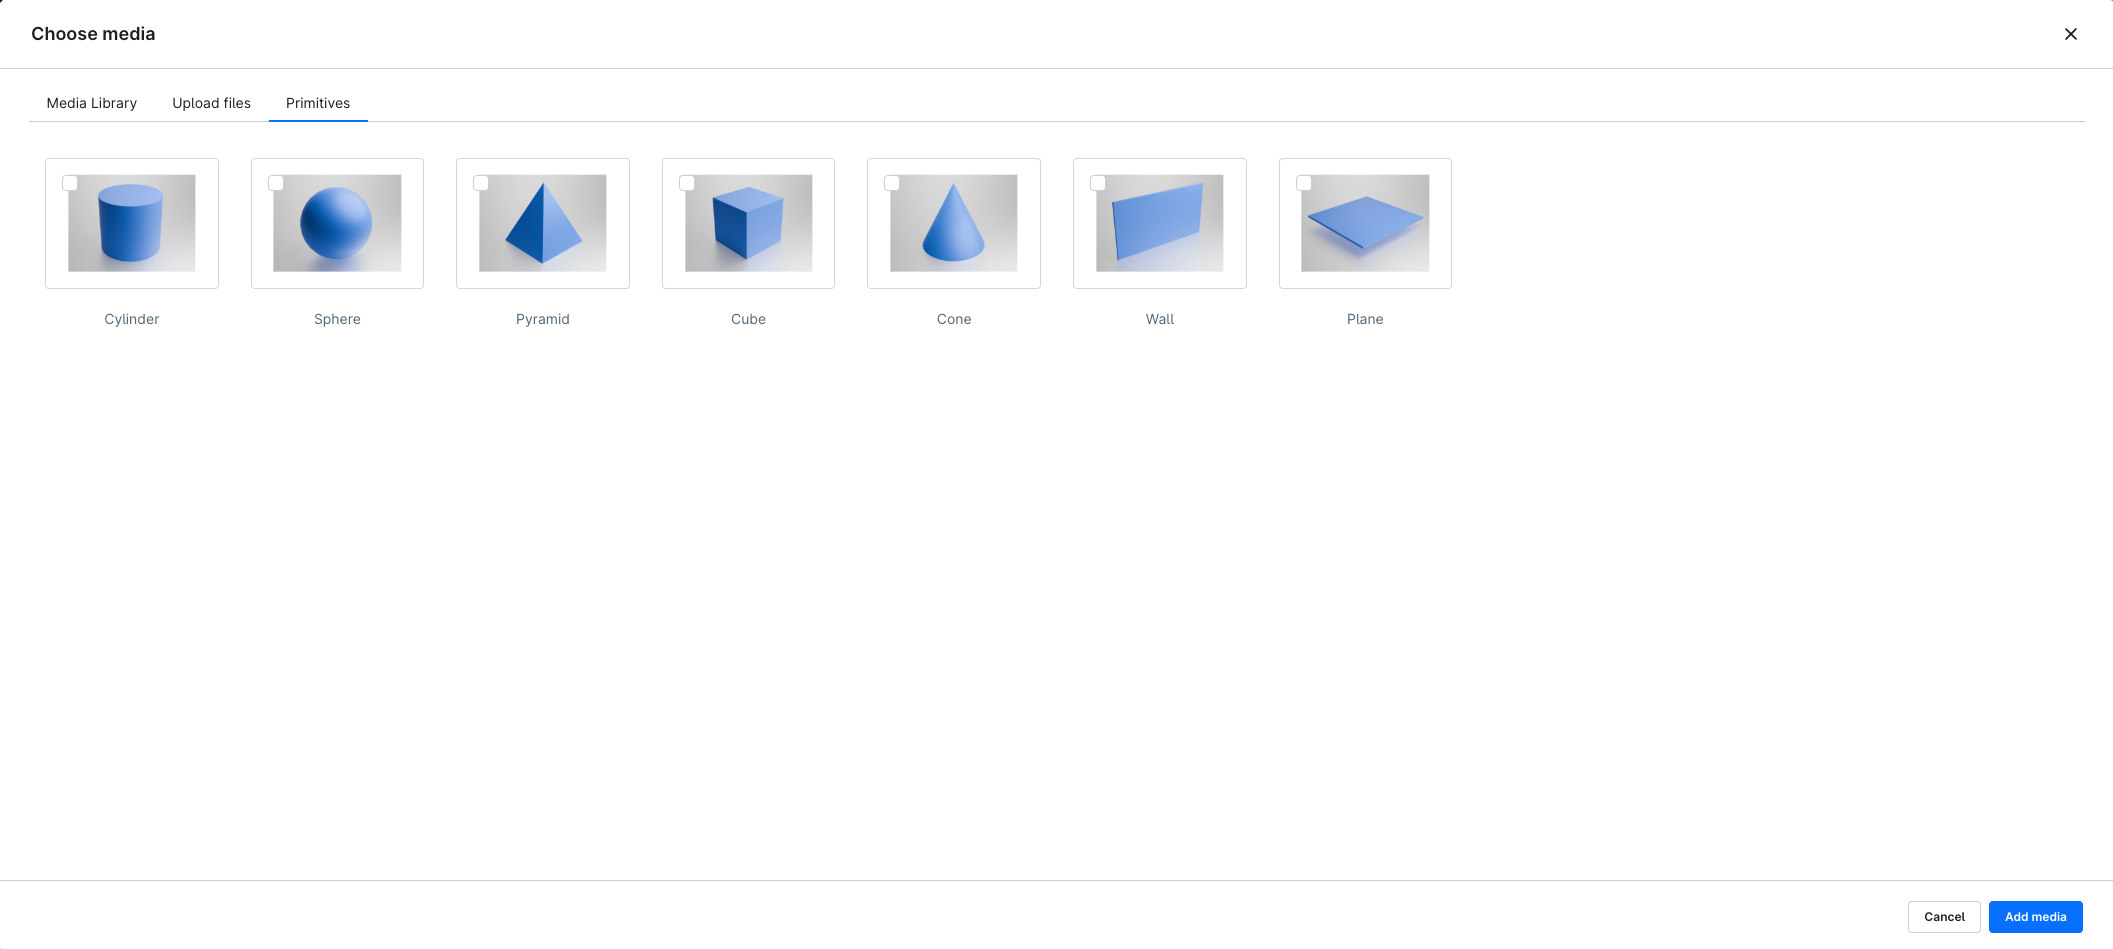
Once you have added a shape, you can change its material properties and color.

Want to dive deeper?
You’ll find an interactive learning path on this topic in the Community Hub. Explore it step by step, try out features directly, and grow your knowledge in a playful, hands-on way.