
Error resolution in the migration process
The Error Resolution step is a "smart pause" in the migration process. Instead of simply failing when it encounters inconsistent data, the Migration Assistant identifies the specific records causing trouble and allows you to fix them directly within the Administration interface. This ensures your data remains clean and valid without requiring you to restart the entire migration.
1. The Error Resolution Dashboard
When you reach this step, you are presented with an overview of all issues encountered during the "Reading" and "Converting" phases.

Grouping: Errors are grouped by their cause (e.g., "Required field missing"), their affected entity (e.g., "Product") and field (e.g., "price"). This allows you to fix multiple similar issues at once.
- Progress Tracking: The "Fixed / Total" column shows you exactly how many items in a group still need your attention. A green checkmark appears once a group is fully resolved.
- Filtering: Use the filters at the top to narrow down errors by Entity (like Orders or Customers), Error Status (Unresolved/Resolved), or specific Error Codes.
2. The Resolution Workspace
Clicking Edit on an error group opens a two-pane workspace for troubleshooting the issues.
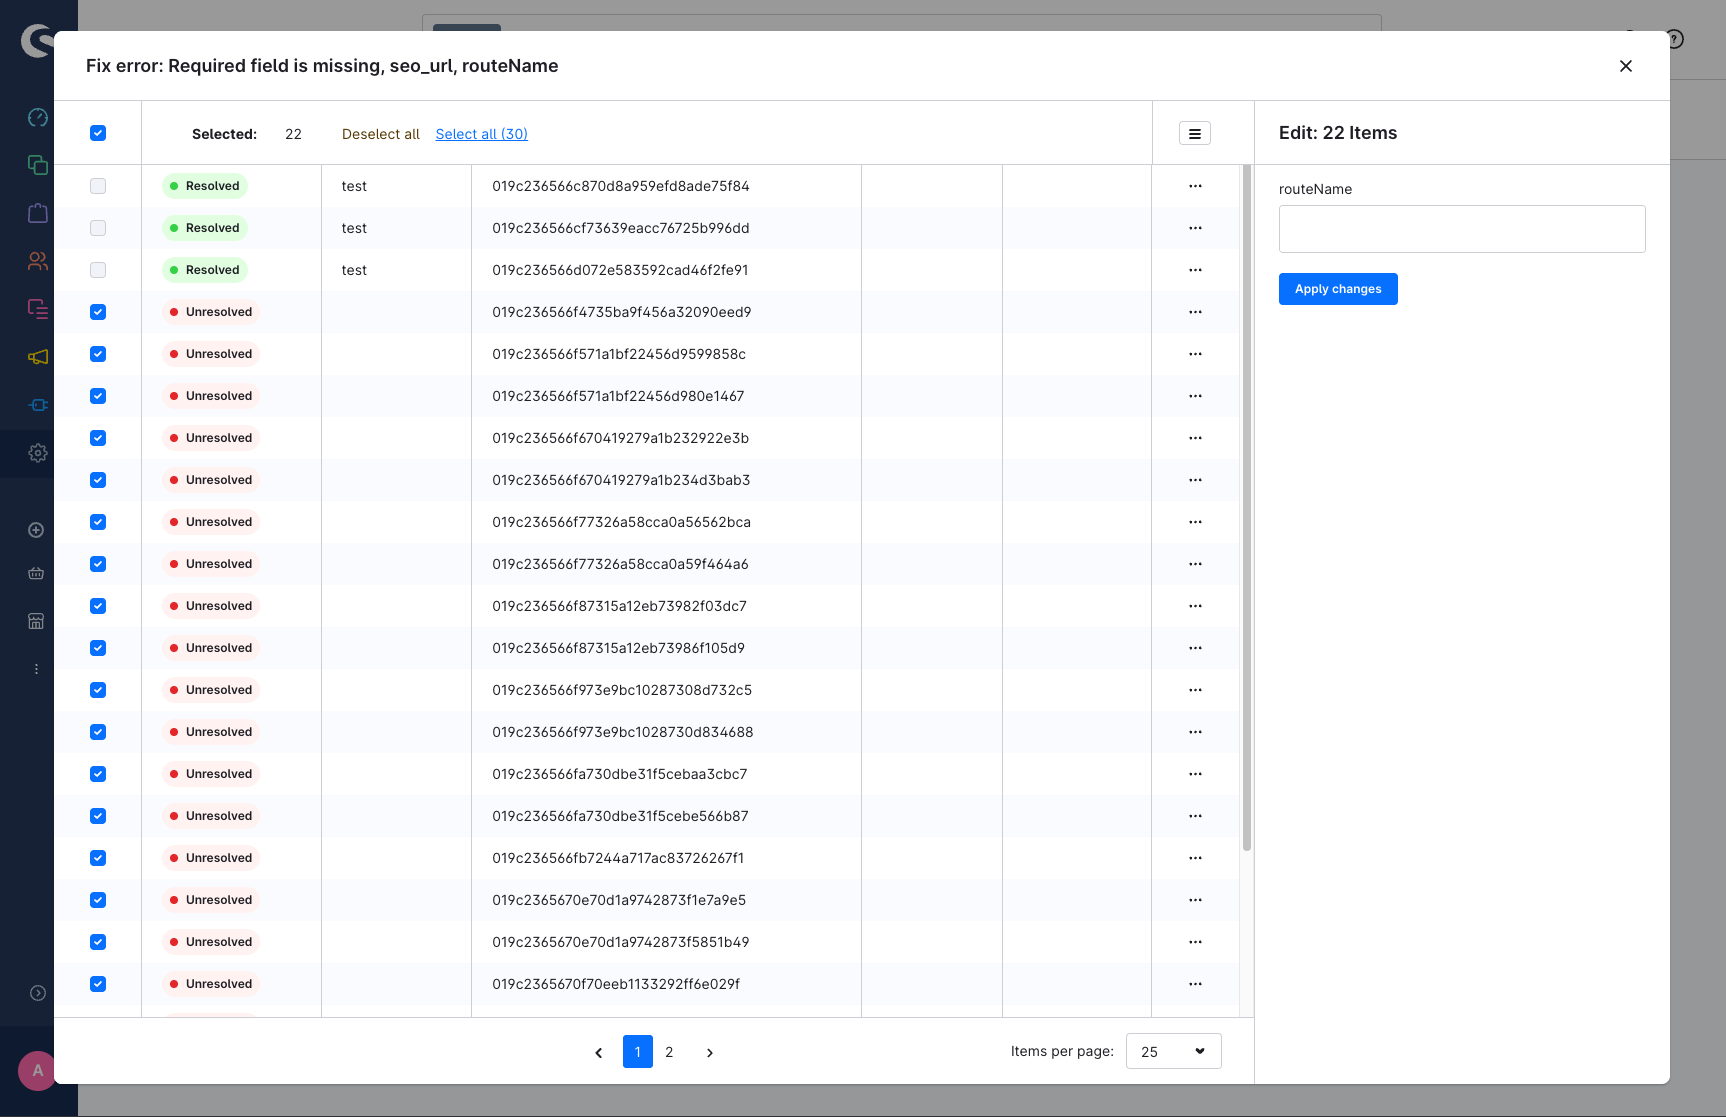
The Left Pane (Record Selection):
This lists every individual record (e.g., specific customers or products) that triggered the error.
Each item has a Status Pill: Unresolved (Red) or Resolved (Green).
Selection: You can select records individually or use Select all to perform a bulk update on the entire group.
The Right Pane (Solution Input):
Once you select one or more records on the left, the right side displays the input field needed to fix them.
3. Understanding the Input Types
The Migration Assistant provides different ways to fix data based on what is missing.
Mapped Relations (Dropdown)
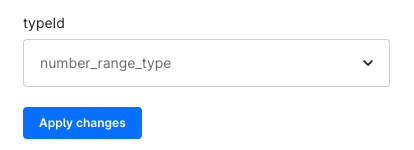
What it is: Used when a record in your old shop refers to a missing or invalid Association (e.g., a specific Tax Rate, Manufacturer, or Country).
How to fix: You will see a dropdown menu. Select the corresponding entry from your current Shopware 6 setup. By doing this, you are "mapping" the old value to a new, valid one.
Scalar Values (Text/Number/Date Input)
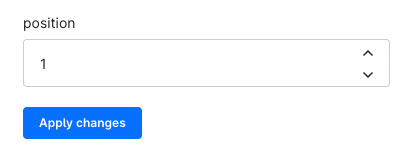
What it is: Used for simple data corrections, such as a missing product weight or an invalid format.
How to fix: Simply type the correct value into the text, number or date field provided.
Unhandled Data (Raw Correction)
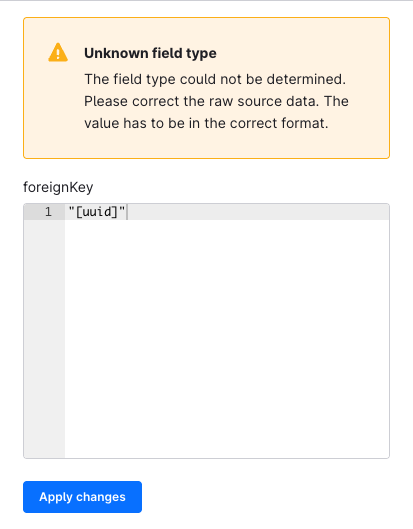
What it is: Occasionally, the Assistant encounters a data structure it doesn't recognize as a standard field.
How to fix: You will see a "Raw Data" view. You must manually edit the text to match the required format. If possible you will get an example of the expected structure.
4. Advanced Inspection
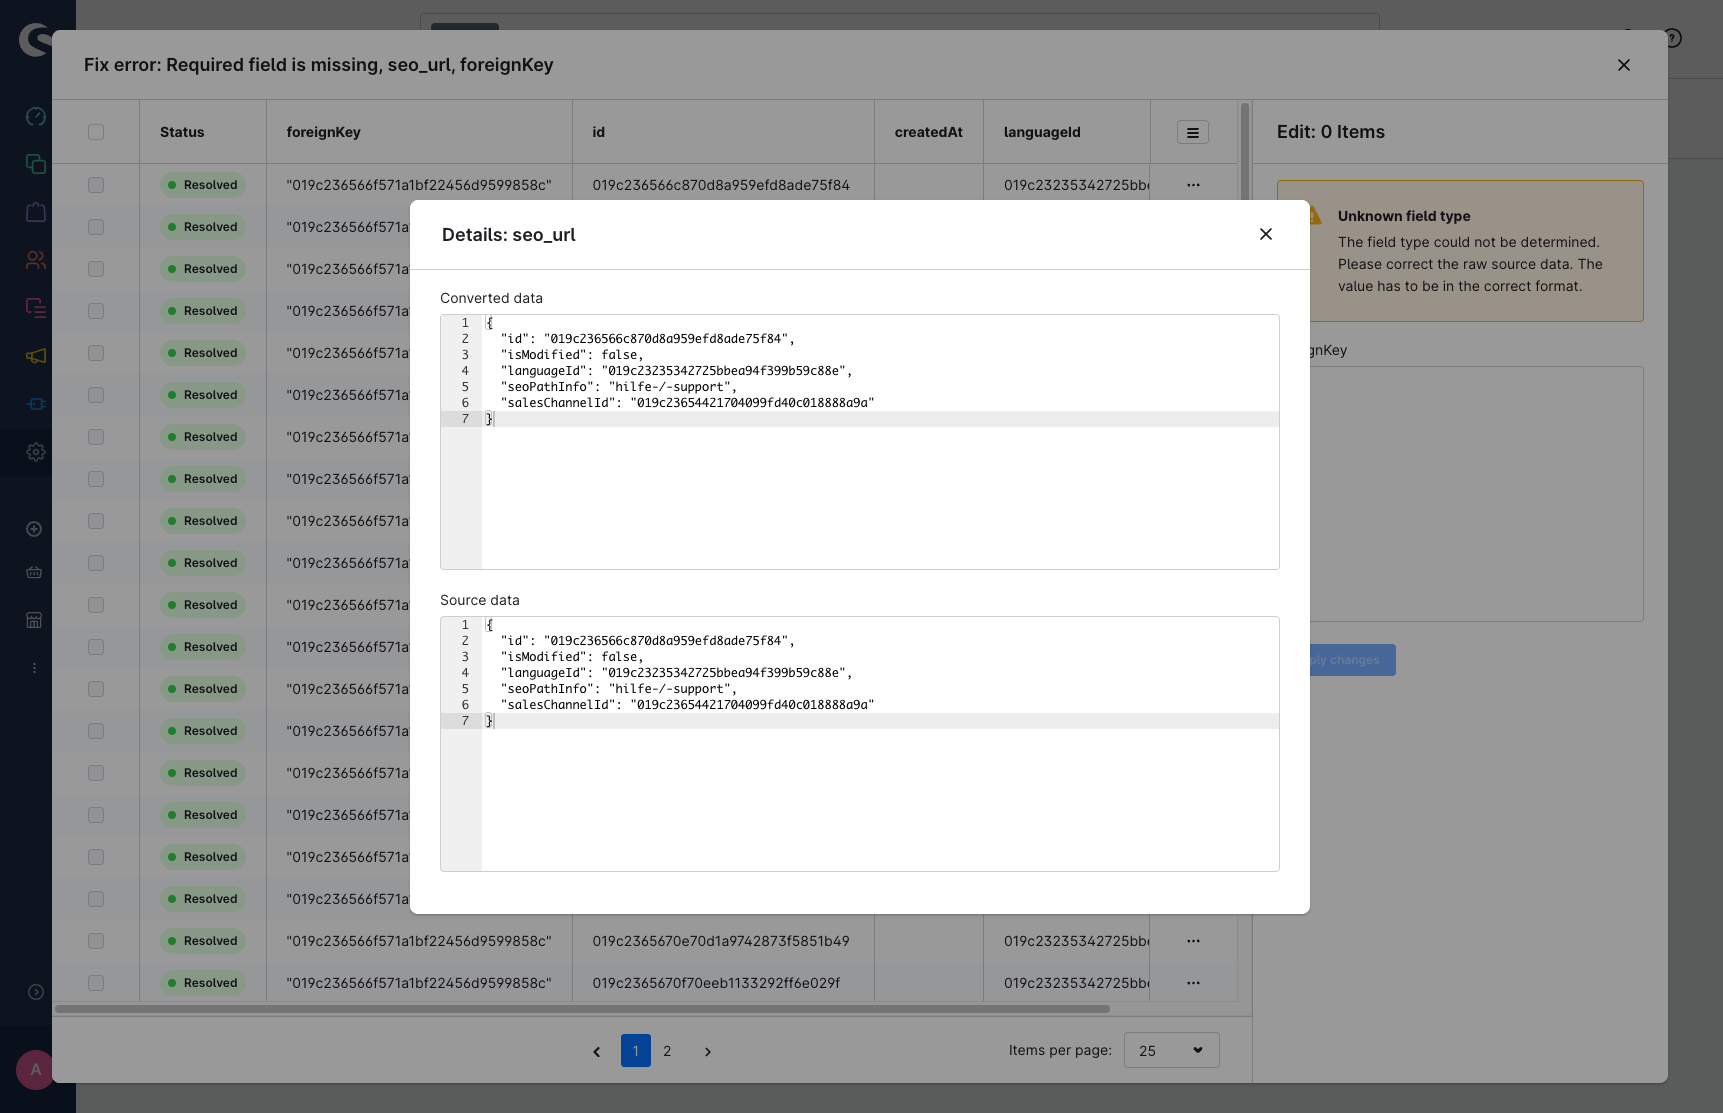
If you are unsure why a specific record is failing, use the Show Details option in the context menu of a record (on the left pane).
This opens a technical comparison:
Source Data: Exactly what was read from your old shop, if available.
Converted Data: How the Assistant tried to "translate" that data for Shopware 6. Comparing these two helps you identify exactly which piece of information (like a specific attribute or ID) is causing the conflict.
5. Handling Unfixable Errors & Resuming Migration
Unfixable Errors

Some errors cannot be solved within the interface (e.g., a corrupt image file or a deep database exception). These are marked with a red banner. For these, you must click Download log file to see the technical stack trace and fix the issue in your source system or server environment.
Resuming Migration
Once you have fixed all possible items, click Continue. The Assistant will attempt to resume the migration from where it left off. If you choose to continue while some errors / warnings are still unresolved, this can lead to new errors. You have to atleast resolved all fixable errors to proceed.