Create new order and payment status
In this article we describe how to create your own order or payment state and sending emails by using it.
Creating a status
At first you have to create the state, therefor open your phpMyAdmin and your database table "s_core_states":
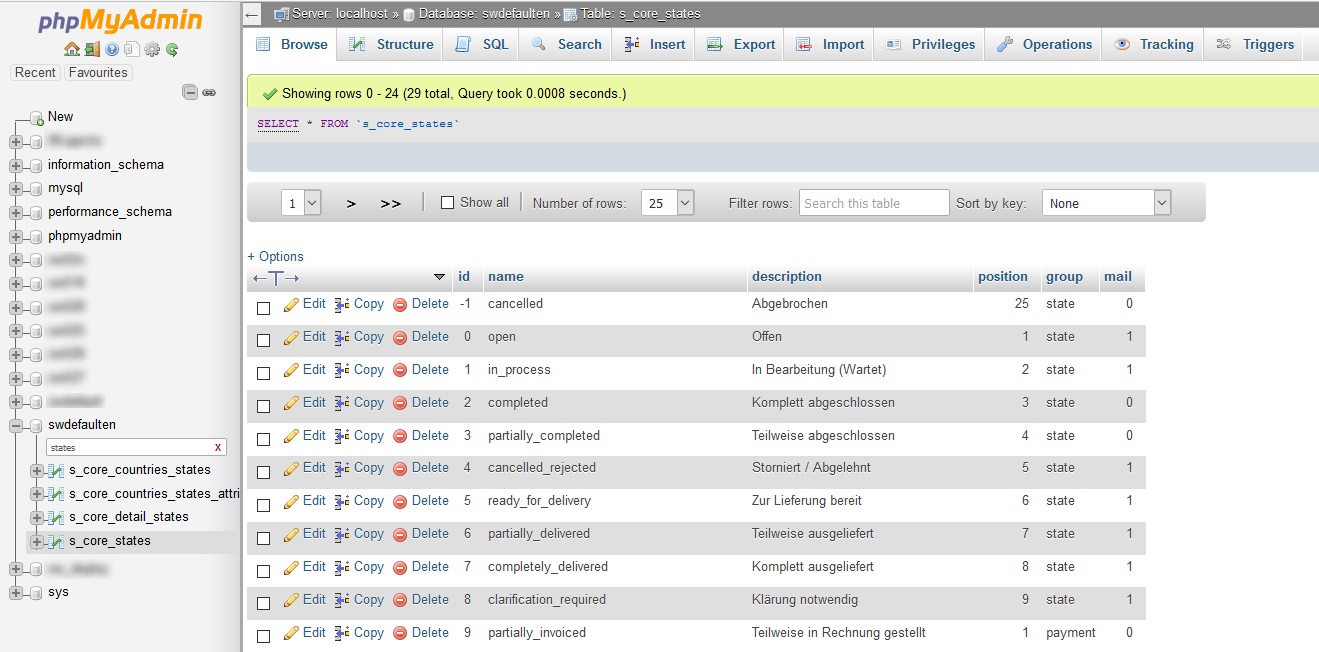
Now have a look, which ID you can use, by default "36" is the first free ID which you can use for your state and then input a new state:
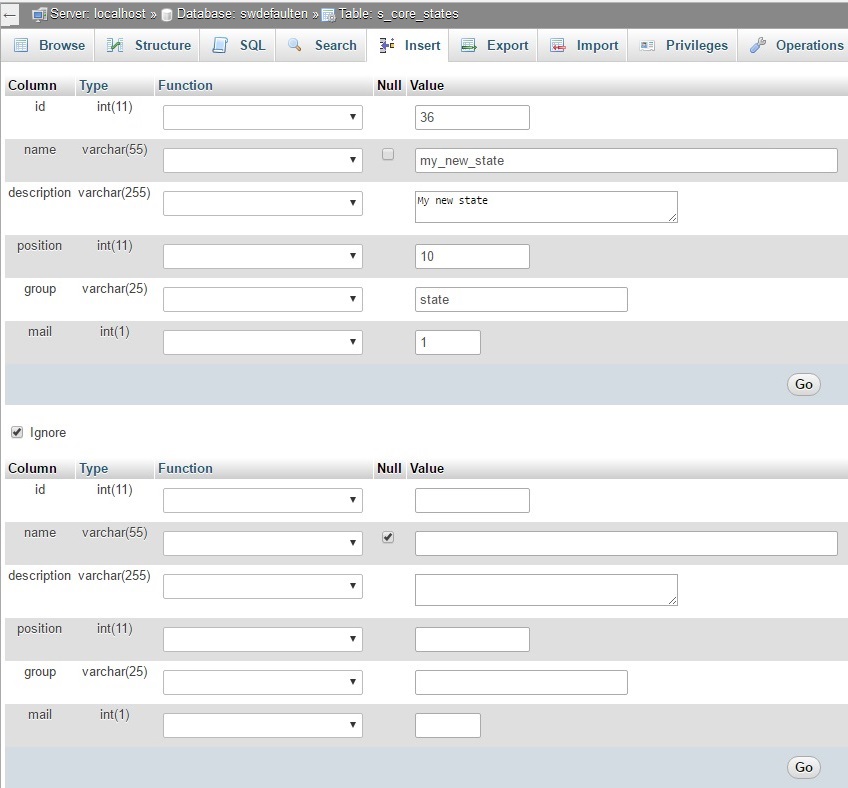
- name is an internal name
- description is the official name of the state which the user will also see.
- position describes the position of the state in the list of the backend module.
- group chooses the affinity of the state, "state" for an order state and "payment" for a payment state.
- mail defines, if a mail will be sent when this state will be used for an order (1) or not (0).
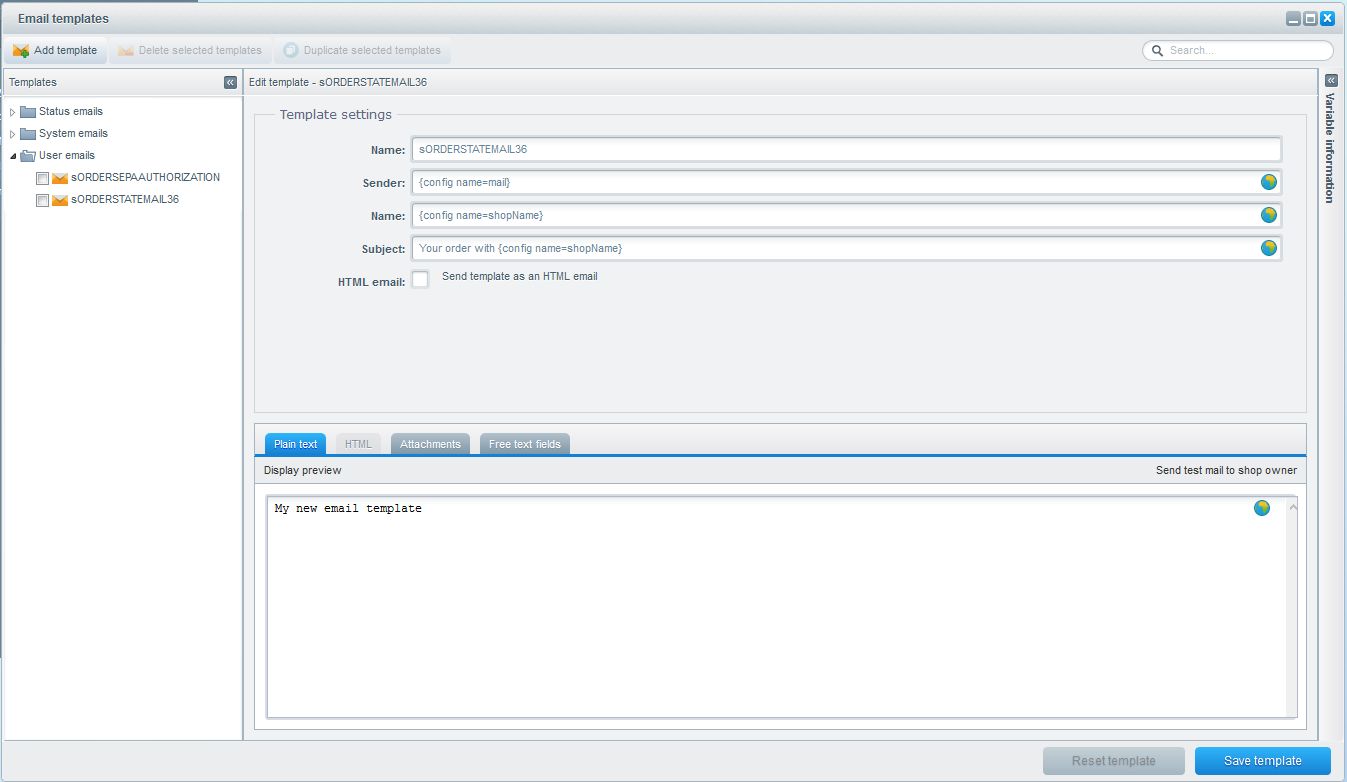
Creating email template
The status is created, now you just have to create the email template for it, To do this, open the email template module and create a new mail with the name "sORDERSTATEMAIL"+"ID", in our example "sORDERSTATEMAIL36" and fill the mail with the desired content:
Now clear the cache and reload the backend.
Provide status name in the backend
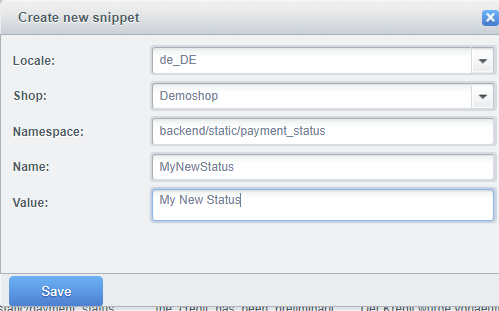
First you open the snippet management module and create a new snippet in the "namespace backend/static/payment_status" for payment status or "backend/static/order_status" for order status.
For example "MyNewStatus" as the tecnical name of the status in the database with your wanted name in the value:
Implement the state in the theme
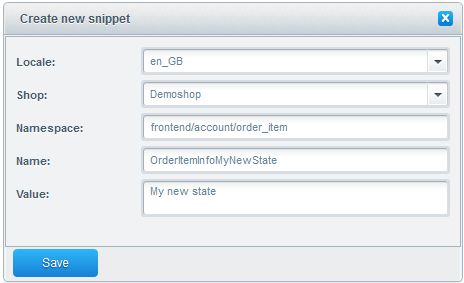
At first, open the snippet management module and create a new snippet in the namespace "frontend/account/order_item", e.g. "OrderItemInfoMyNewState" which you have to fill with your desired text:
Now you can provide the snippet in the frontend. To do this, create a template file named "order_item.tpl" in the directory /themes/Frontend/YOUROWNTHEMENAME/frontend/account/ on the server. Insert the following code to integrate your own state:
{extends file='parent:frontend/account/order_item.tpl'}

{block name="frontend_account_order_item_status_value"}
<div class="column--value">
	<span class="order--status-icon status--{$offerPosition.status}"></span>
	{if $offerPosition.status==0}
		{s name="OrderItemInfoNotProcessed"}{/s}
	{elseif $offerPosition.status==1}
		{s name="OrderItemInfoInProgress"}{/s}
	{elseif $offerPosition.status==2}
		{s name="OrderItemInfoCompleted"}{/s}
	{elseif $offerPosition.status==3}
		{s name="OrderItemInfoPartiallyCompleted"}{/s}
	{elseif $offerPosition.status==4}
		{s name="OrderItemInfoCanceled"}{/s}
	{elseif $offerPosition.status==5}
		{s name="OrderItemInfoReadyForShipping"}{/s}
	{elseif $offerPosition.status==6}
		{s name="OrderItemInfoPartiallyShipped"}{/s}
	{elseif $offerPosition.status==7}
		{s name="OrderItemInfoShipped"}{/s}
	{elseif $offerPosition.status==8}
		{s name="OrderItemInfoClarificationNeeded"}{/s}
	{elseif $offerPosition.status==36}
		{s name="OrderItemInfoMyNewState"}{/s}
	{/if}
</div>
{/block}
To display the corresponding icon next to the status it's necessary to create your own "all.less" file. The LESS code will be compiled into normal CSS by the LESS compiler. Create your all.less in the following directory: /themes/Frontend/EIGENERTHEMENAME/frontend/_public/src/less
Please enter the following code:
.order--status-icon {
  position: static;

  &.status--36 { //My New State
    background: @highlight-info;
  }
}
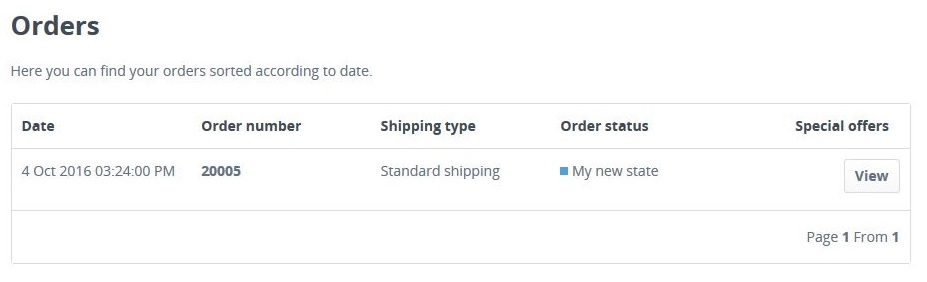
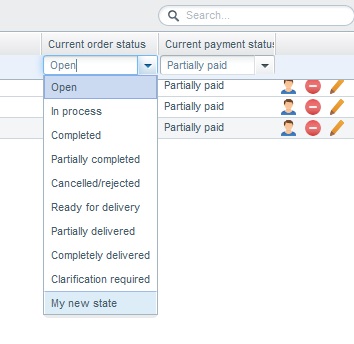
Testing
After this you can start testing your new state:
And also in the frontend: