Migration process - Shopware 6
Prepare migration
We strongly recommend that you complete the data migration first before you begin setting up or styling your new Shopware 6 shop.
Why? Migration is often an iterative process. If you discover corrupted data in your source system during the transfer, it may be necessary to reset the migration, clear the data in the target system, and restart the process to ensure data integrity.
If you have already invested time in configuring themes, payment methods, or shopping experiences, a required system reset could result in the loss of that work. Therefore, always start with a “clean slate” migration to ensure your data is valid before configuring the look and feel of your shop.
Install Migration assistant
For this connection between the source shop and the target shop, the Migration assistant extension is necessary. Install this extension in both the source shop and the target shop. A connection is only possible if the extension is installed in both shops and also activated.
Migration between Shopware 6 instances is currently only possible if both the source and the target system are running the same Shopware version. Make sure that both systems are on the identical version level before starting the migration.
The following description of the migration process refers to the migration assistant from version 16.0.0 of the extension.
The store setup should be completed only after the migration has been completed successfully. Errors during migration should not be ignored. If this is not observed, reinstallation of the store will be necessary.
Create integration
To access the data of the source shop with the target shop, it is necessary to provide an additional integration in the source shop. With integrations, you can give third-party applications access to various resources of your shop by the API. Detailed information about what integrations are and how to use them can be found here.
To create a new integration for migration, open Settings > System > Integrations in the source shop and click Create Integration in the upper right corner. Then save the following settings there:

Name (1): Enter a unique name here, such as Migration, so that you can distinguish this integration from the others.
Administrator (2): Enable this option so that the target shop can access all important resources in your source shop.
Access ID (3): The access ID is generated automatically. With the help of this ID the target shop can access the source shop. You should make a note of it, as you will need it in the next step.
Security key (4): The security key is also generated automatically and is needed to legitimize the access from the target shop. You will also need this key when establishing the connection. You should therefore also save it temporarily.
After you have created the integration via the Save integration button, you can now establish the connection between the target shop and the source shop in the next step.
create migraton connection
In order to migrate your data from the Shopware 6 source shop to your Shopware 6 target shop, it is necessary to establish a connection between these two shops.
After installing the extension, open the configurations in the admin of the target shop under the menu item Settings > Extensions > Migration assistant and establish the connection to the source shop there.
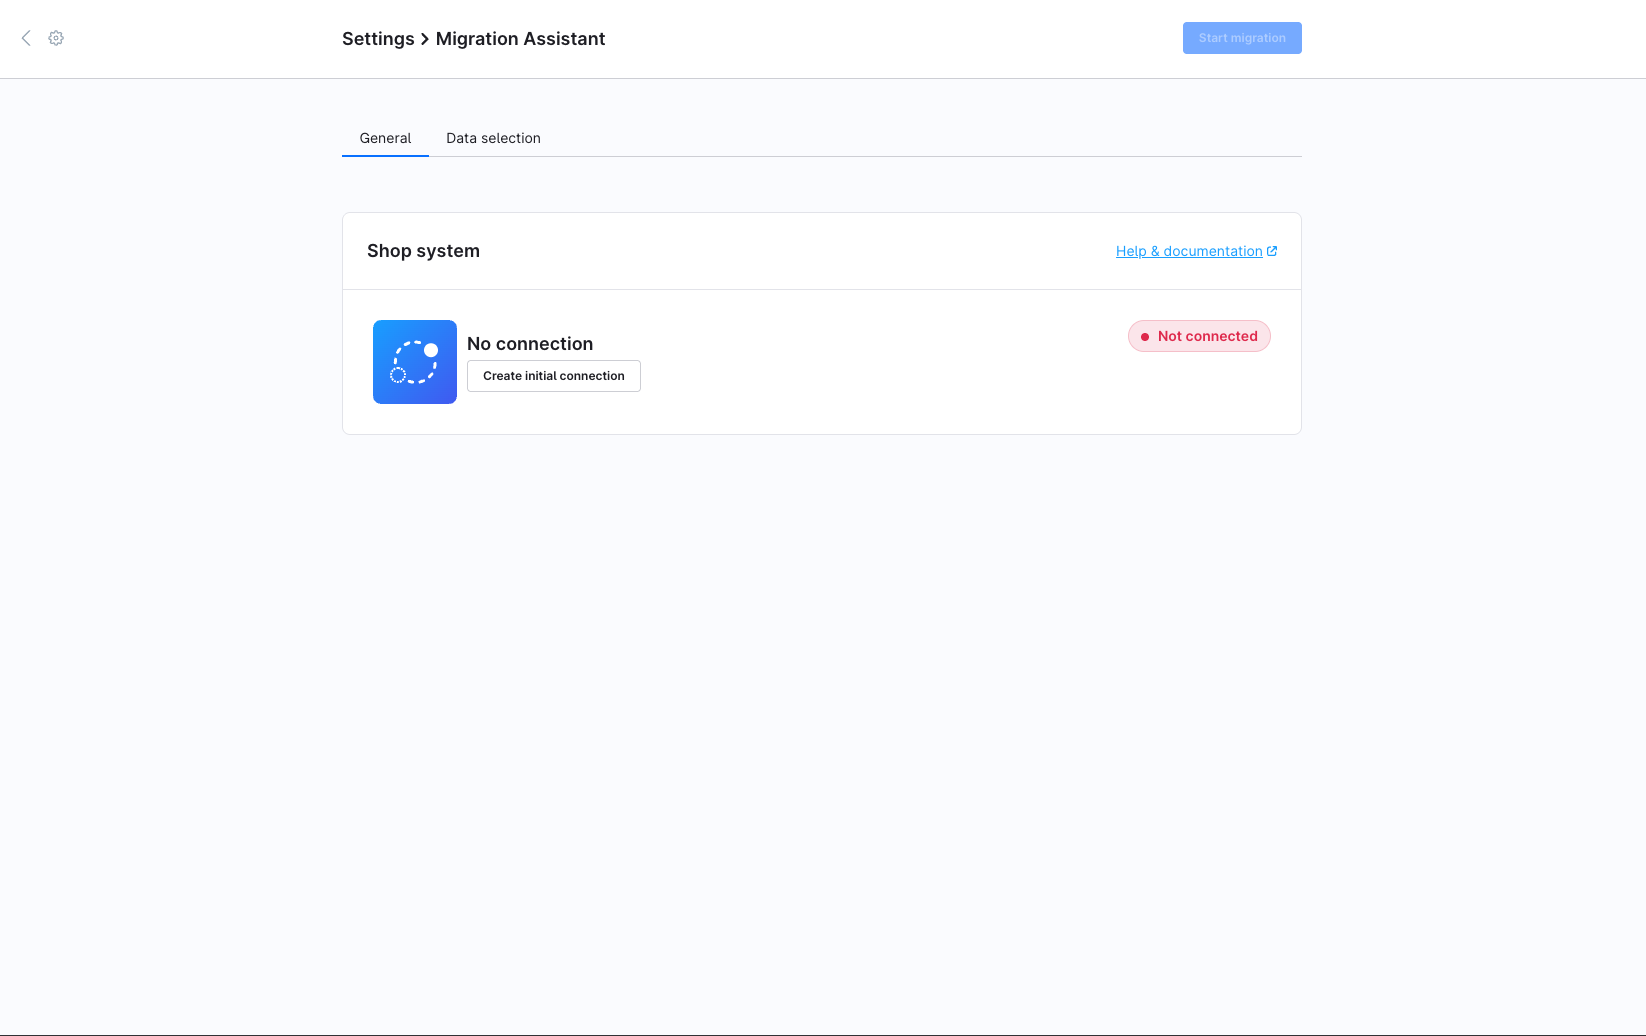
Click on Create initial connection to create a new connection.

Once you have installed the appropriate profile, click on ‘Continue’ and establish the connection.
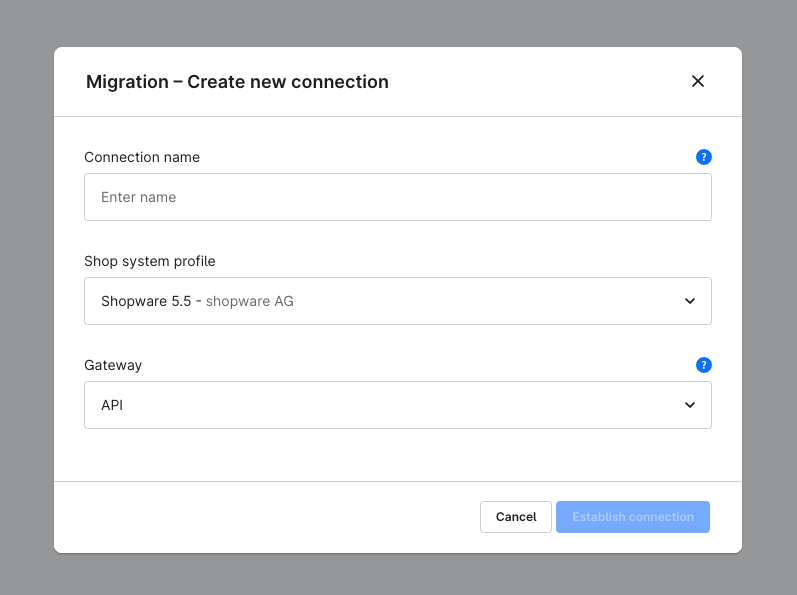
Name: Here you first enter a unique name for the connection. This is especially necessary if you want to establish a connection to several shops.
Profile: Indicates the type of source system. For a migration from a Shopware 6 shop choose Shopware 6.6.
Gateway: Indicates the type of connection between the two systems. For the Shopware 6 profile only API is available here.
Check Migration data
After you have entered all the necessary information about your connection, you will be redirected to the migration overview. Here you have an overview of the current connection, can choose which data will be migrated and track your previous migrations.
Overview

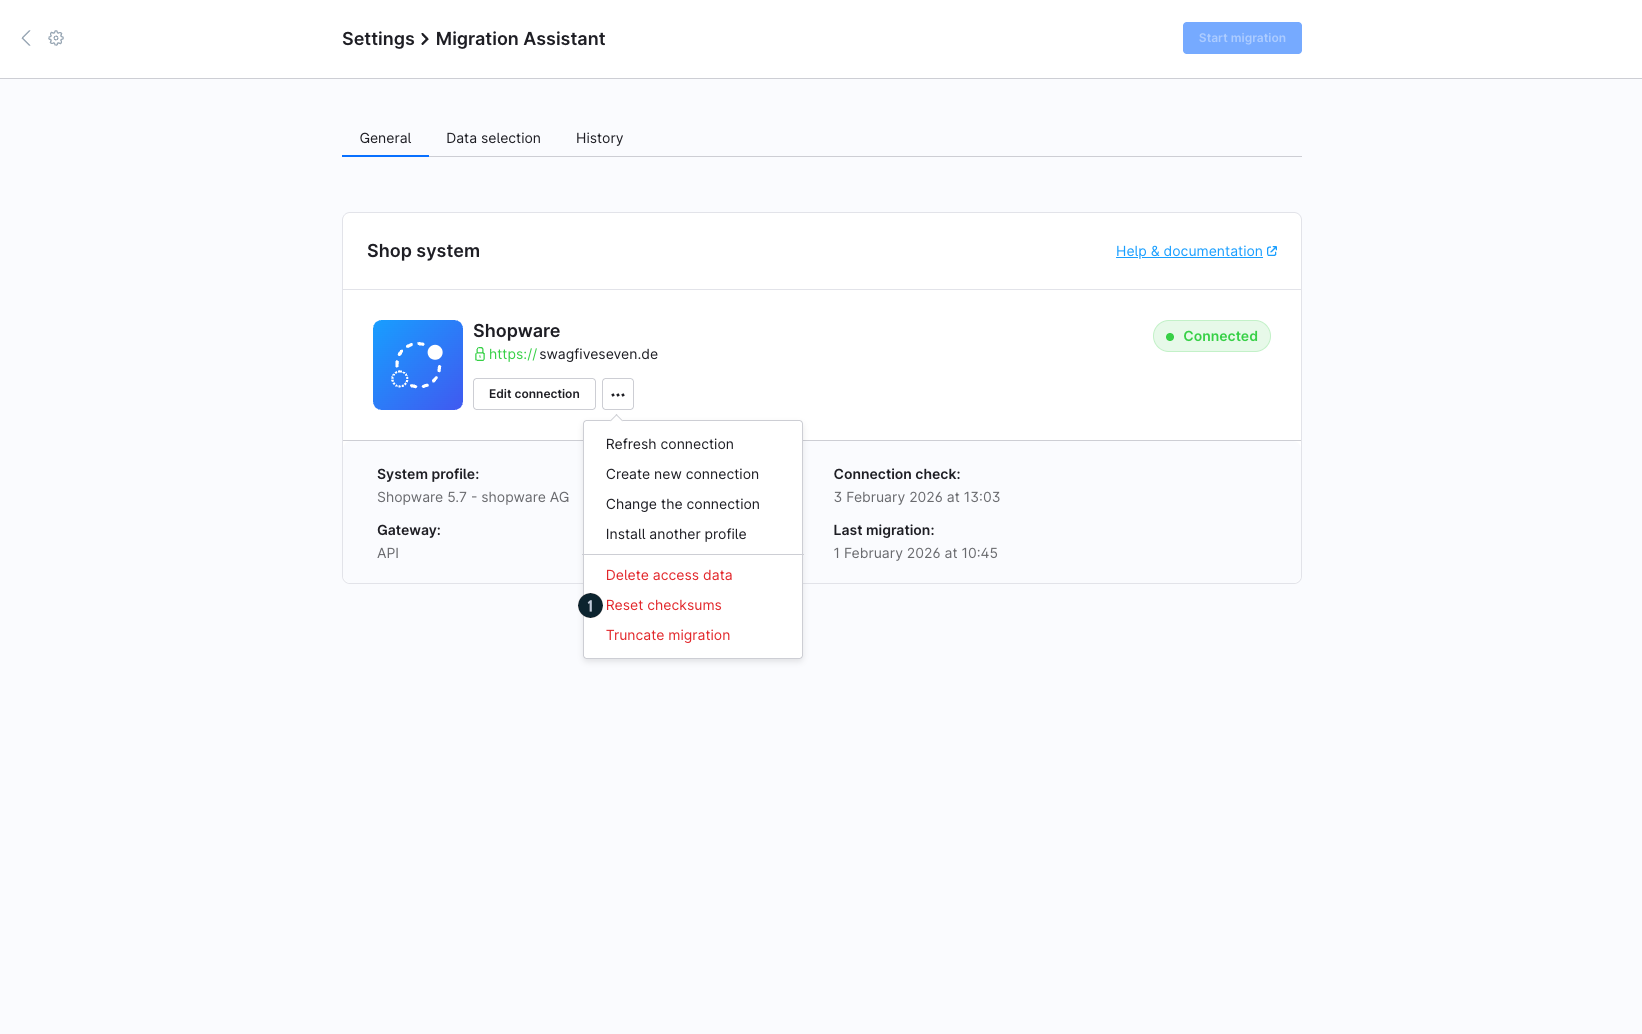
After you have successfully established the connection, you will automatically be taken to the migration overview. Here you can see to which shop system (1) you have currently established a connection. You can also see which system profile and which interface was used for the connection, when the last connection check was carried out and when the last migration was carried out with this connection. You can make changes to the current connection via the Edit connection button (2).
Via the context menu (3) you can create a new connection, delete the access data of the current connection or switch to another created connection. In addition, the checksums can be reset via this context menu in order to migrate existing data again.
Data selection
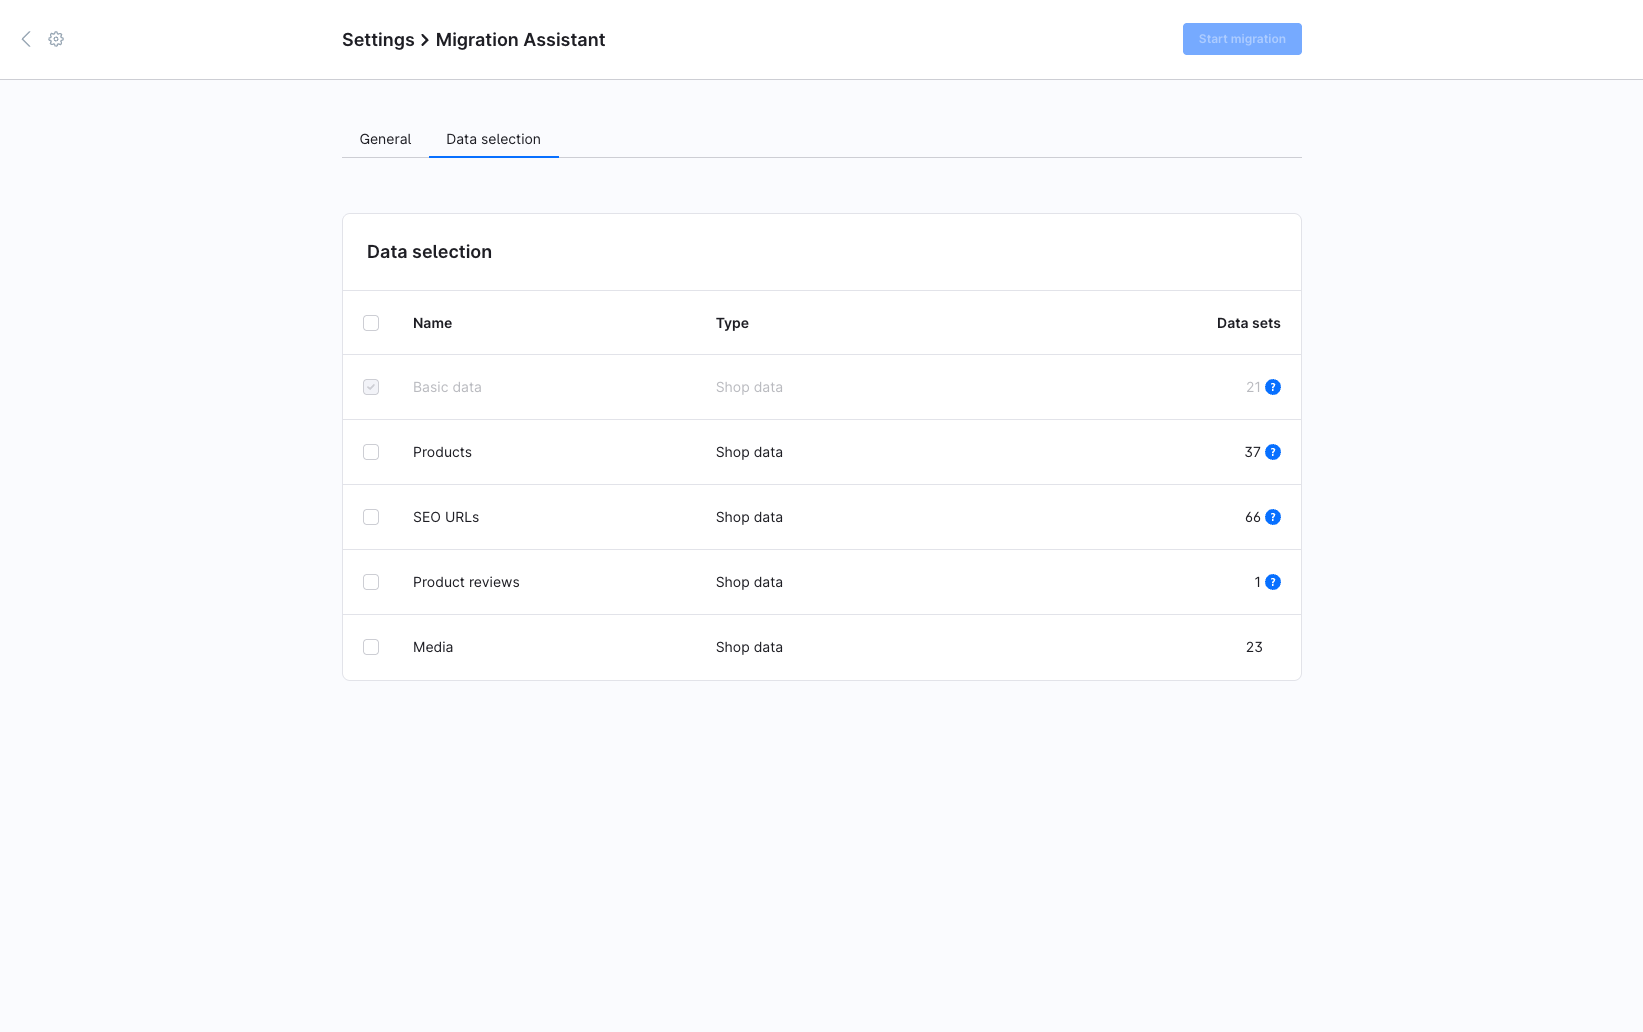
In the data selection you decide which data you want to migrate from your connection to the Shopware 6 shop. To do this, simply tick the corresponding data that is to be migrated. The list also shows you whether it is shop data or extension data and how many data sets will be migrated.
Extensions: Data that can be migrated from third-party extensions is shown in this list with the type plug-in data.
Data check
The migration now performs a data check. This checks whether data from the old shop can be assigned to the new shop.
Some third-party providers may also offer their own migration profile for your extension data, which must then be used for migration. In this case, you will receive all information about the migration from the relevant provider.
If data, such as the standard payment type, could not be assigned correctly, it is necessary to assign it manually. As soon as you have manually assigned all unassigned data, you can continue the migration by clicking the Continue button. If all data could be assigned without problems, manual assignment is no longer necessary. In this case you can continue the migration immediately. Processed assignments:
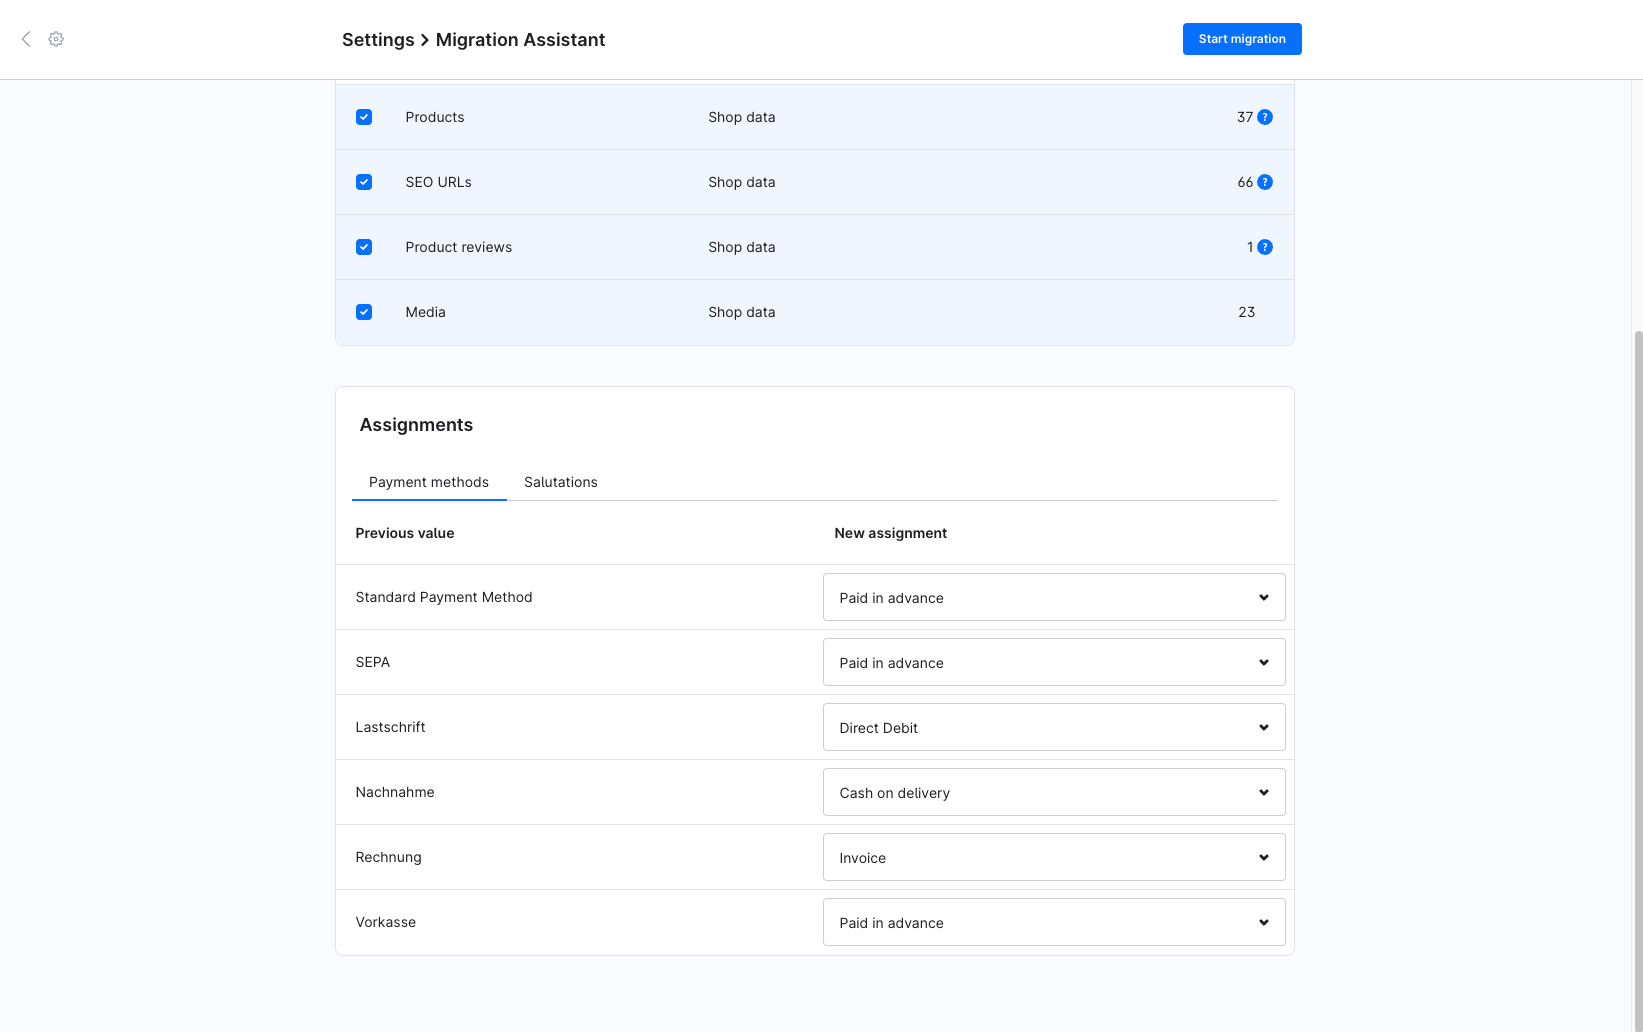
In the assignments made, you can check whether the automatically assigned data has been assigned correctly. Here you can also change your assignments or change the automatic assignments at a later date.
History
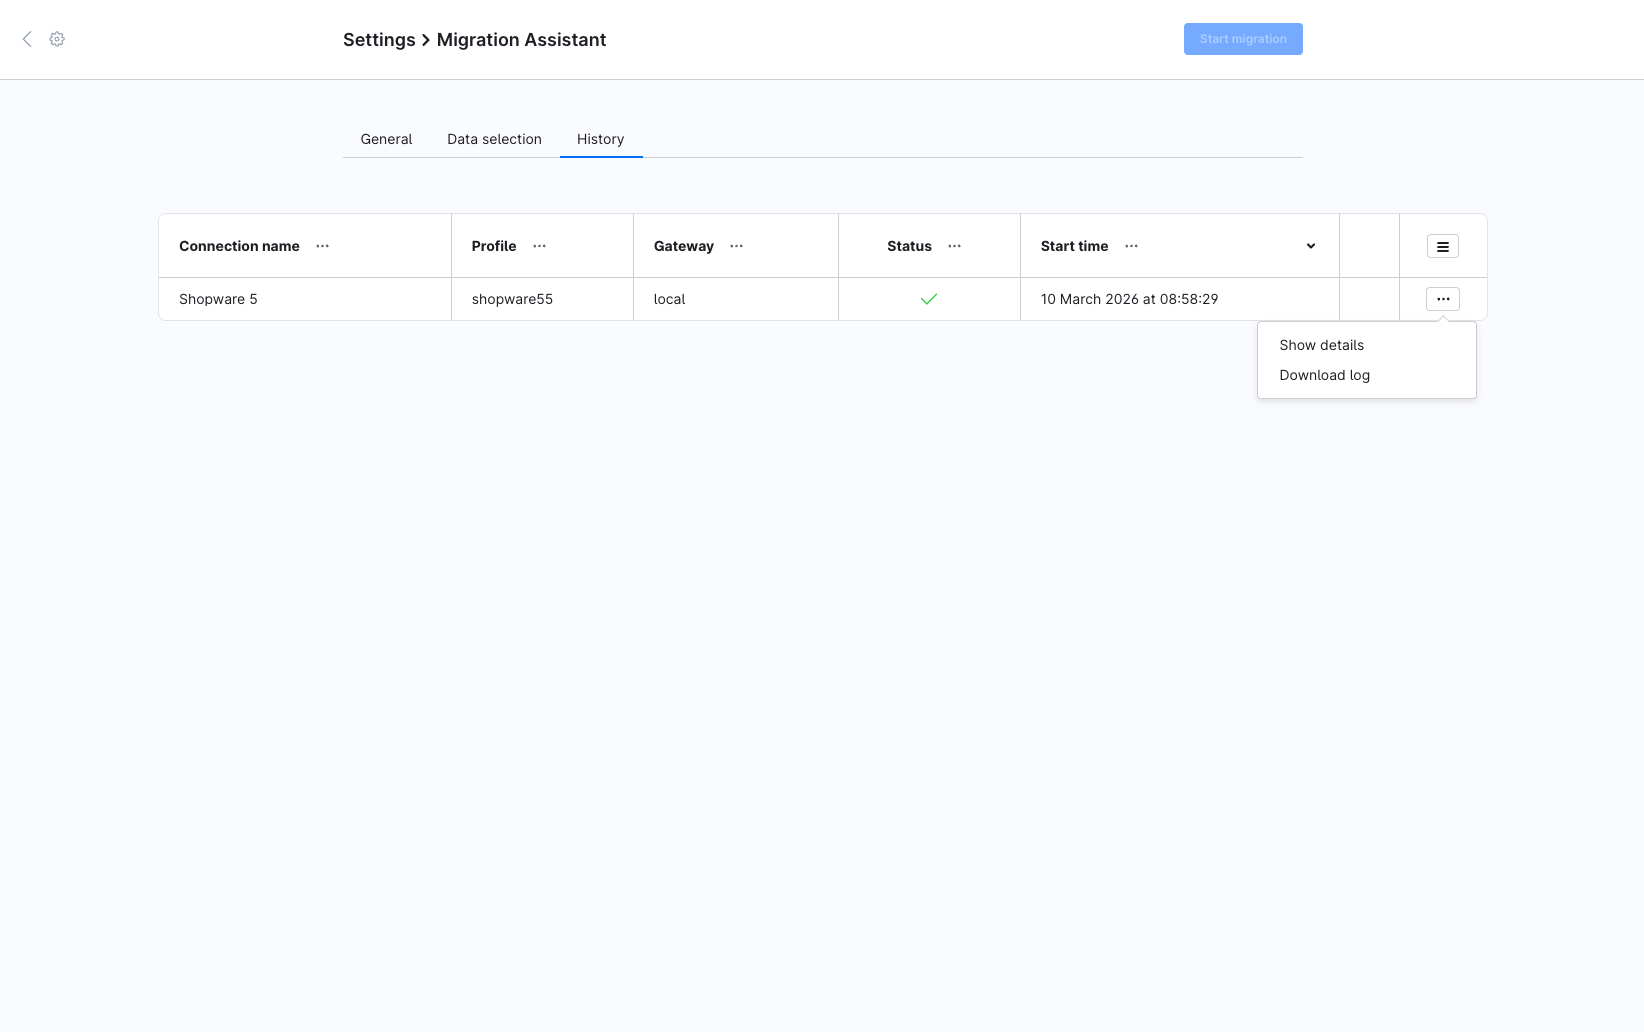
In the History section, you can view all previous migrations and migration attempts. All information relating to the migrations is displayed here.
If you click on ‘Show details’ in the context menu, the details of the migration will be displayed.

The ‘Download log’ option provides a .txt file containing information about the migration, including possible errors.
Start migration
After you have clicked on Start Migration, the migration is performed in six steps: Data reading, Error resolution, data writing, media download, cleanup and indexing.
Data reading
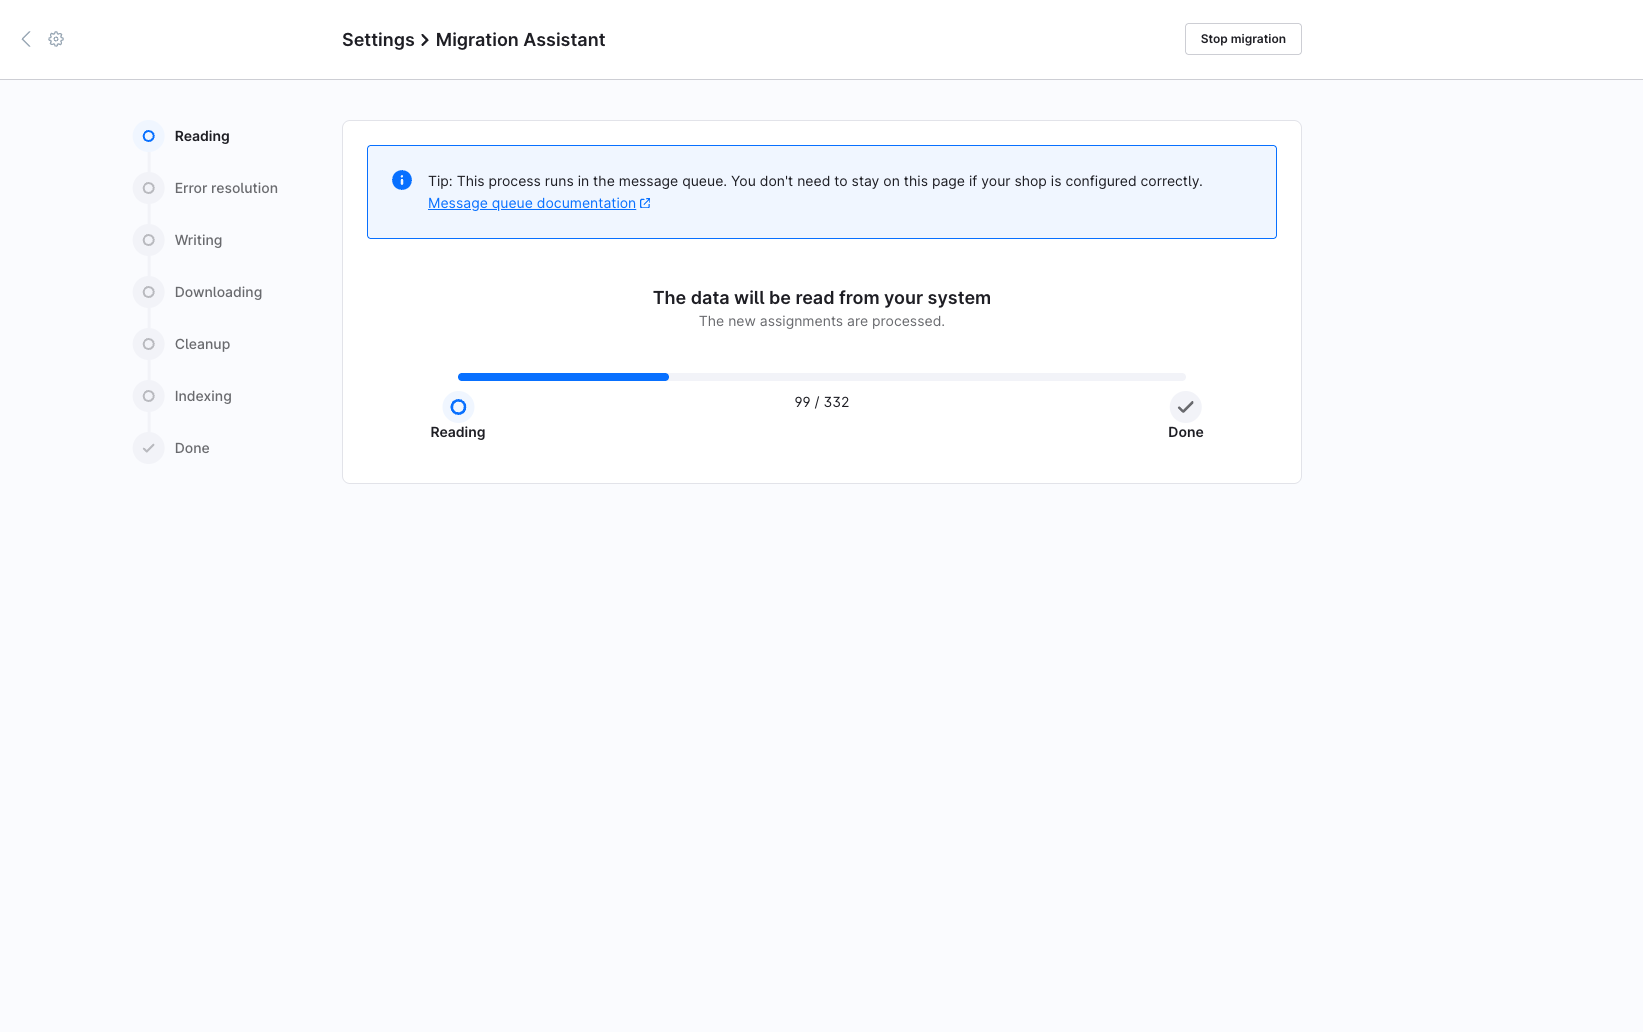
In this step, all data from the source shop that is to be migrated is read.
All data read is assigned a checksum, which is used in later migrations to check whether it has already been migrated. This means that any data that has not changed is not migrated again.
If it happens that data is not migrated although it has changed, the checksums can be reset. For more information, see the section Perform migration again.
Error resolution
The Error Resolution step is a "smart pause" in the migration process. Instead of simply failing when it encounters inconsistent data, the Migration Assistant identifies the specific records causing trouble and allows you to fix them directly within the Administration interface. This ensures your data remains clean and valid without requiring you to restart the entire migration.
In our tutorial on error resolution in the migration process, we describe the troubleshooting dashboard and its functions.
Writing
The read data is now written to Shopware 6. Customer groups, categories, languages, currencies and sales channels are automatically created in Shopware 6 in this step, if they do not already exist.
Downloading
In this step, all media files are downloaded from the source shop and loaded into the target shop media management.
Cleanup
In this step, the written records that were temporarily stored are deleted from the database table swag_migration_data.
Indexing
During this process, all indexers are triggered again so that the migrated data is also indexed by Shopware.
Logbook
Once the migration is complete, the logbook lets you quickly view any errors, warnings, and information. If you click on the ‘Download log’ link at the bottom, you can download the entire migration log.
If you return to the overview, you can also view the logbook via the History item.
Perform migration again
You can perform the migration as often as you like. During the first migration, all migrated data receives a checksum. The migration wizard uses this checksum to recognise whether data must be migrated or not. This prevents data from being migrated twice and possibly being overwritten.
If you want to carry out a migration completely again so that all data is overwritten in the target system, you can reset the checksums (1). You do this in the migration overview in the shop system area via the context menu.