
Shopware Nexus
Note: This feature is currently in Early Access.
Its functionality is still limited at this stage and may change or expand during further development. Behaviour, features, and availability may continue to evolve until the final release.
What is Nexus?
Nexus is a visual automation tool that allows you to connect your Shopware shop with other systems and services – for example ERP systems, Slack, or APIs.
You create workflows directly on a visual workspace (canvas). To do this, you drag and drop individual steps (called nodes) onto the interface, connect them, and define what should happen:
when a specific shop event occurs, for example a new order, or
at a scheduled time (time-based).
This allows automated processes to be configured without writing custom code.
Why should you use Nexus?
With Nexus, you can:
Automate routine tasks: For example, automatically send a Slack message as soon as an order is placed.
Integrate Shopware with external systems – without code: You configure connections and data flows visually.
Monitor workflow processing: Keep track of the status and basic processing metrics of your workflows.
Main features
The following features are currently available in the Early Access version:
Triggers
Shopware Event Trigger: React to events in your shop, for example when an order is created.
Schedule Trigger (Cron-style): Run workflows on a scheduled basis.
Connectors and actions
Business Central Connector: Create, Read, Update, Delete (CRUD) for many Business Central entities.
Shopware API Calls: Call any Shopware API endpoint.
Slack Notifications: Send notifications to Slack.
Logic and data processing
Conditional Logic (If / Else): Add conditional branches to your workflows.
Data Transformation: Map and filter data within your workflows.
Expression Placeholders
{{ }}: Use placeholders to insert event data into templates, for example in Slack messages.
Monitoring
Workflow monitoring: Show the processing history and basic metrics of your workflows.
With Nexus, you can automate recurring processes in a structured way and connect your shop flexibly with other systems – visually, transparently, and without additional development.
Requirements & Quick Start
Requirements
Shopware 6.7.1.0 or newer
a Shopware shop you want to use with Nexus
an active Shopware account linked to an active company
administrator access to the shop
Connect your shop to Nexus
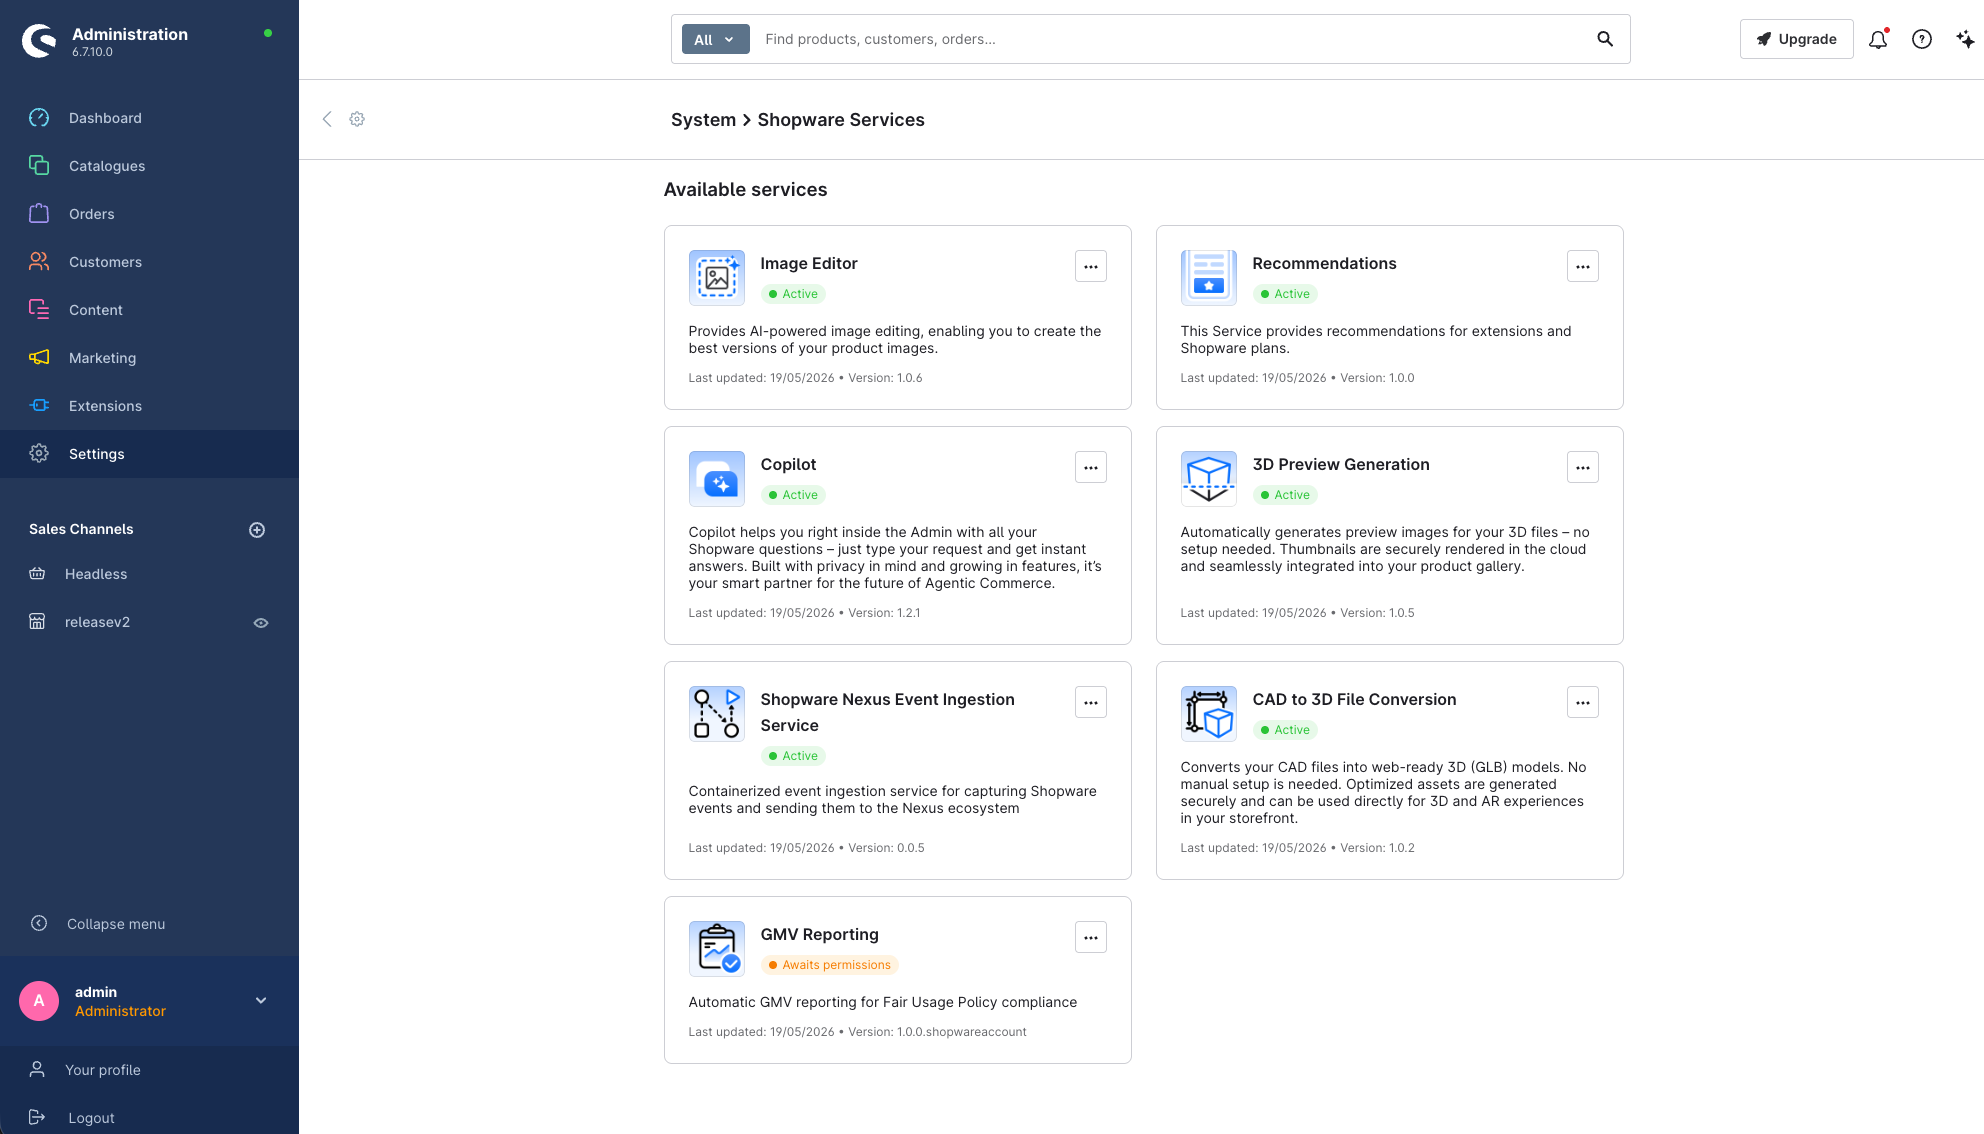
Activate the Nexus Ingestion Service: In the Shopware Administration, open Settings > Shopware Services and enable the Shopware Nexus Event-Ingestion Service toggle. This service allows Nexus to receive events from your shop.
Sign in to Nexus: Open nexus.shopware.com and sign in with your Shopware account.
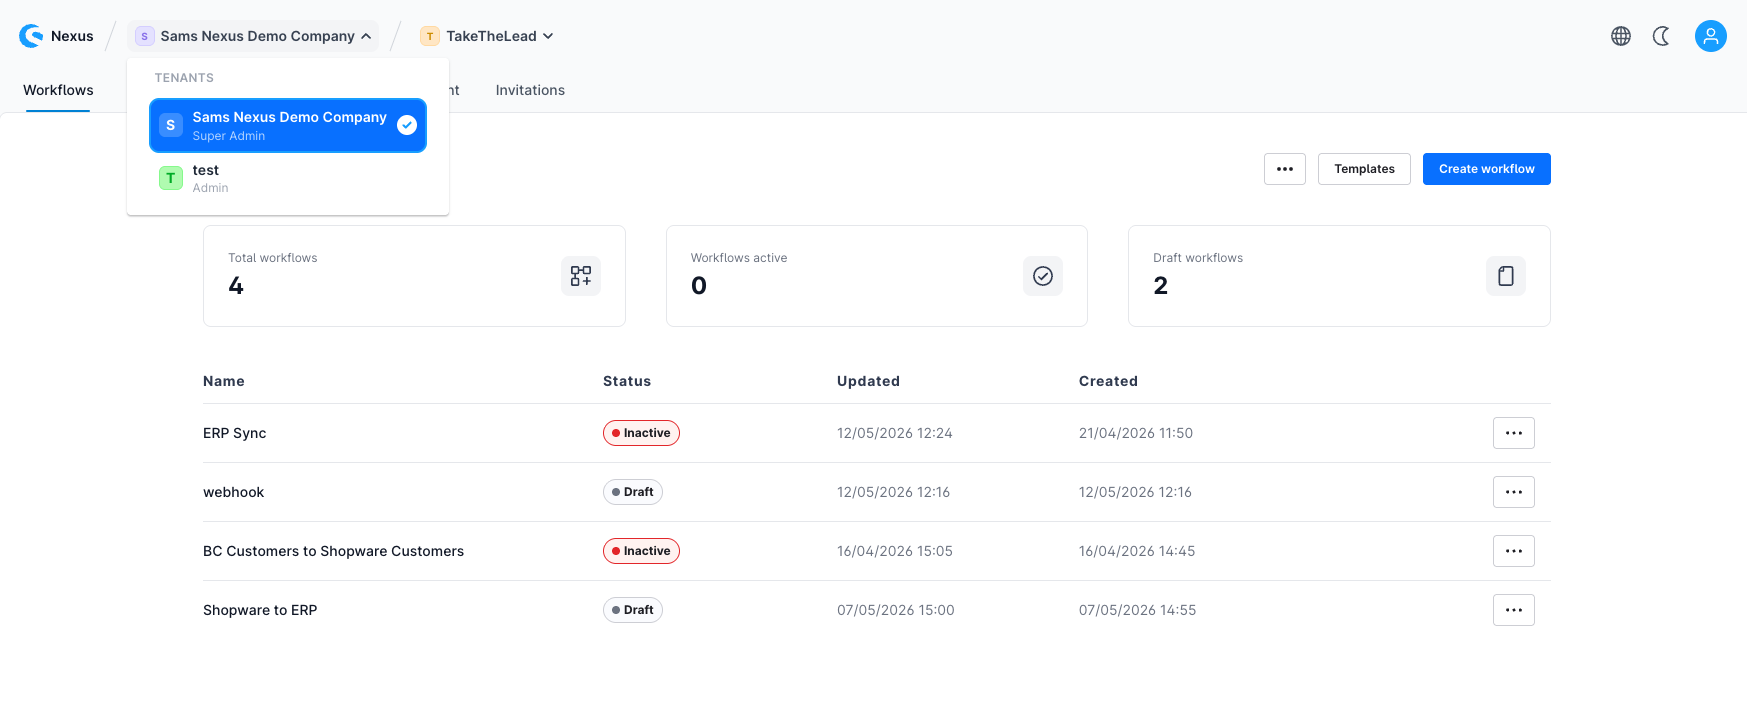
Company notice: After logging in, Nexus automatically selects one of the companies linked to your Shopware account.
Use the organisation switcher at the top of the Nexus interface to select the correct company. The shops for which you have enabled the Nexus Ingestion Service will appear there.
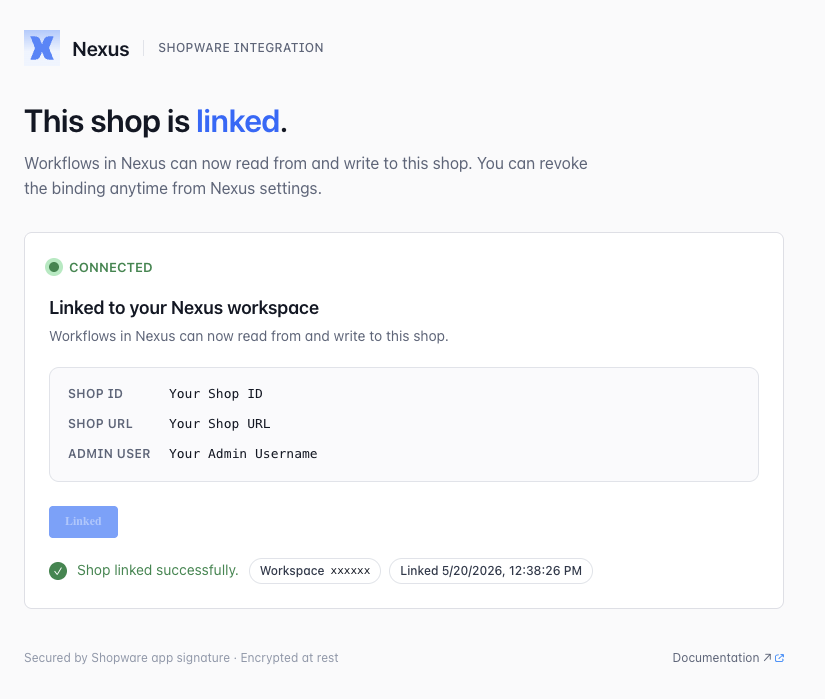
Link your shop to Nexus: In the Shopware Administration, go to Settings > Nexus. You will first see a notice that the shop is not yet connected. Start the linking process using the corresponding button.
After the process is completed successfully, the view in the Administration should look like this:
Check the connection
To check whether your shop is correctly connected to Nexus, create a new workflow and drag the Shopware Event Trigger onto the canvas. Under Shopware Shops, the domain of the intended shop should be displayed.
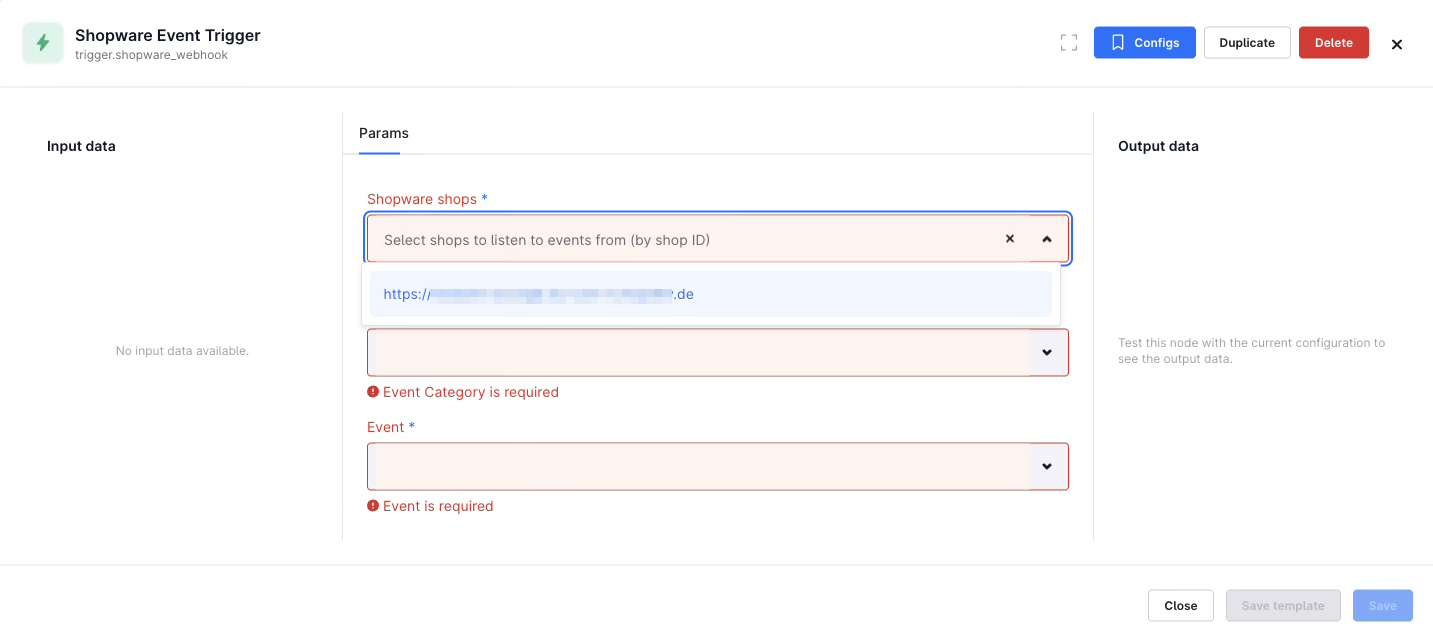
Such a trigger can contain multiple shops if they have been activated via the Nexus Ingestion Service and belong to the same Shopware company.
If your shop does not appear, please check:
whether the shop is assigned to the currently selected company
whether the Nexus Ingestion Service has actually been enabled in the shop
More information about Shopware Nexus can be found here in our developer documentation.
Integrations

Before you can use connectors such as Slack or Microsoft Dynamics Business Central in your workflows, you need to authenticate with these services.
Go to Integrations in the top bar.
- Click the service you want to connect (for example Slack or Microsoft Dynamics Business Central).
- Follow the authentication process to grant Nexus access.
Security: Your authentication data is stored securely and encrypted. It is not visible to anyone — not even to the development team.
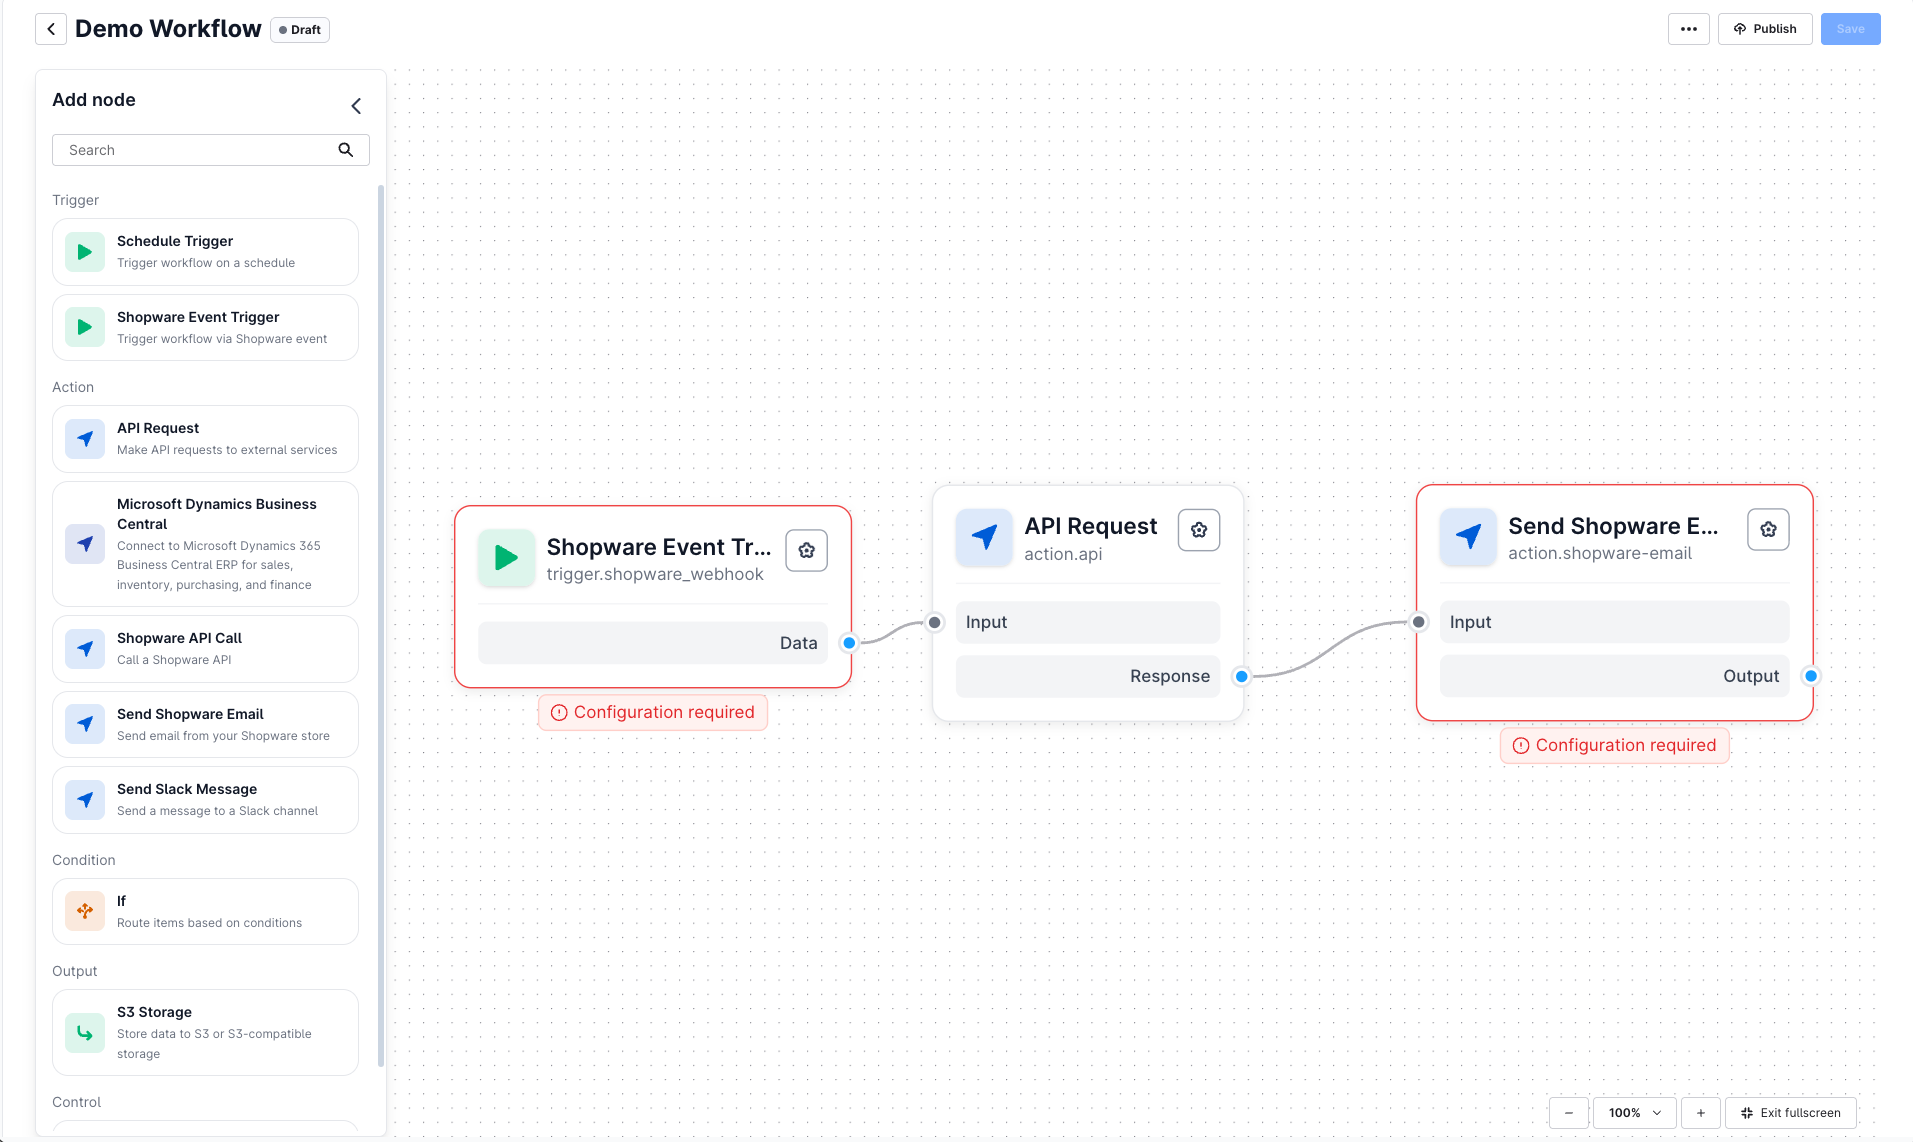
Create a simple workflow
Click Create workflow > enter a name >Create workflow.
Add a trigger: Drag the Shopware Event Trigger onto the canvas > select your shop and an event (for example
order.placed).Add an action: Drag Send Slack Message or Microsoft Dynamics Business Central onto the canvas.
Connect the trigger output to the action input.
Configure the action (for example the Slack channel and message template, or the Business Central entity and operation).
Save the workflow, click Publish, and then Start to activate it.
Builder – Overview
- Canvas: Your visual workspace where you create workflows and connect nodes.
Node panel: Overview of all available nodes, for example triggers, actions, and conditions.
Node configuration: Here you configure parameters, credentials, templates, and debug hints for the selected node.
Toolbar: Contains the most important actions: Save, Publish, Start, and Undo.
Node types
Trigger nodes
Shopware Event Trigger: Reacts to shop events, for example when an order is placed.
Schedule Trigger: Runs a workflow on a schedule (Cron).
Action nodes
Microsoft Dynamics Business Central: CRUD operations on Business Central entities.
Shopware API Call: REST call to Shopware.
Send Slack Message: Sends a message to Slack.
Send Shopware email: Sends an email from your Shopware shop.
API request: Sends API requests to external services.
Condition nodes
If: Enables conditional branches in the workflow.
Output nodes
S3 storage: Stores data in S3 or S3-compatible storage.
Control nodes
Delay: Adds a delay before continuing.
Expressions
Nexus automatically maps event data to the available fields. In any text input field, you can type @ to display a list of available properties from previous nodes.
After a Shopware Event Trigger, for example, you can type @ to access fields such as payload.order.orderNumber.
Use {{ }} to insert data from the event, for example: {{payload.order.orderNumber}}.
Workflow status
Draft: Workflow is being edited. (available buttons: Save, Publish)
Published: Workflow is ready. (available button: Start)
Active: Workflow is ready and processing data. (available button: Revert)
Being deployed: Workflow is being created.
Typical use cases
Synchronize order
Shopware → Microsoft Dynamics Business Central
- Trigger:
order.placed Retrieve Microsoft Dynamics Business Central customers by email address.
Check:
If the customer exists → use the existing customer.
If the customer does not exist → create a new customer.
Create a sales order in Microsoft Dynamics Business Central.
Update the Shopware order with the Business Central reference.
Send a Slack notification.
Low stock alert
Two approaches:
1. Scheduled (daily)
Schedule Trigger (daily).
Query Microsoft Dynamics Business Central for items with stock below the defined threshold.
If items are found → send a Slack message.
2. Event-based (immediate)
Listen for
order.placed.Check the stock of the affected items in Microsoft Dynamics Business Central.
If stock is below the threshold → send a Slack message.
Troubleshooting
| Problem | Solution |
|---|---|
| Workflow gets stuck in the “being deployed” status | Publish the workflow again |
| Unauthorized error | Authenticate again via SSO |
| Missing event data | Add a log node to inspect the payload |
| BC filter returns no results | Check the OData filter syntax |
| Slack message is not sent | Reauthorize Slack credentials |
| Shop does not appear in Nexus | Check whether the Nexus Ingestion Service is enabled and whether the correct company is selected in Nexus |