
Image Editor
Transform your product images in the blink of an eye with the image editor. Cut out products precisely and merge them seamlessly into backgrounds with matching light and shadow effects.
Note: This feature is currently in beta status.
The range of functions is still limited in this version and may be expanded in future updates. Its behavior and scope may still change.
We look forward to your feedback so that we can continue to develop the function in a targeted manner.
The image editor is available from Shopware 6.7.1.0 in conjunction with a Shopware Rise plan (or higher).
Operation
You can find the Image Editor in the admin under Content > Image Editor (1).
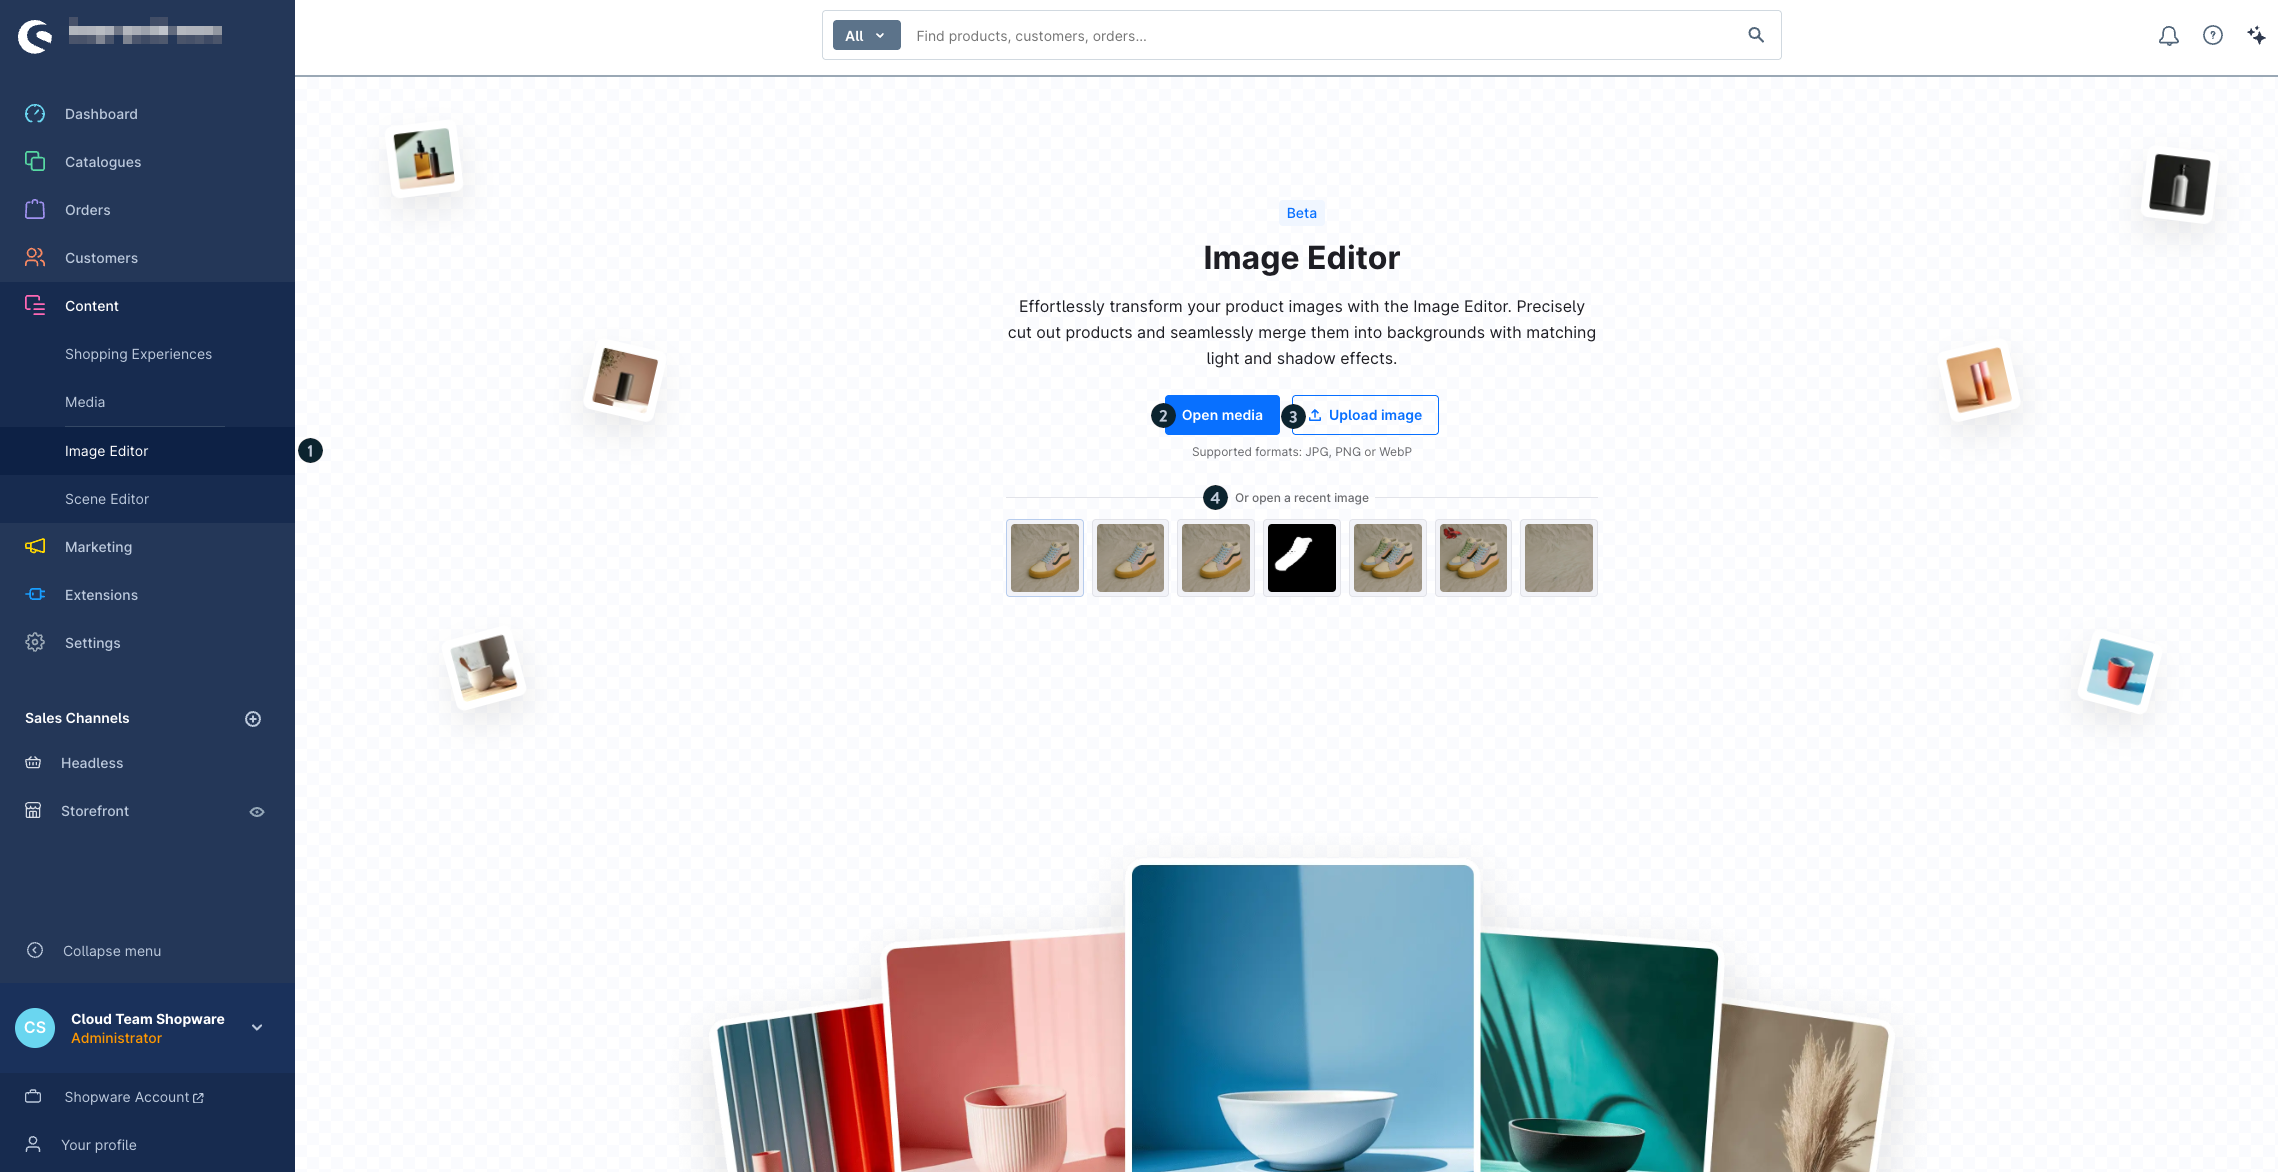
Click on Image Editor (1) to add an image for editing. You now have two options:
Open media (2): Select an already uploaded image from your media management.
Upload image (3): Upload a new image directly from your computer.
You can then edit the image in the editor.
Supported file formats: JPG, PNG, WebP
Once you have selected an image and it has been successfully added to the image editor, you can use the editing tools at the top right of the window.
The or open a recent image (4) section shows you the images you most recently opened and edited. Click on an image in the list to reopen it and continue editing.
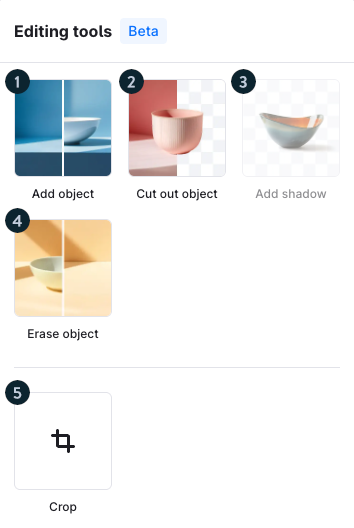
You can choose between four different tools:
Add object (1): You can place a cut-out object on a background. This function works best if your object has already been cropped.
Crop object (2): Use this tool to remove the background of an image. This function is ideal if you want to crop an object and use it as a PNG without a background.
Add shadow (3): You add a natural shadow to your cropped object. This makes it look more realistic and stands out better against the background - ideal for a professional look.
Ersase object (4): This function allows you to remove an object from an existing image.
Crop (5): With this option, you can crop your image to a specific size or a fixed aspect ratio. This allows you to quickly bring it into the desired format.
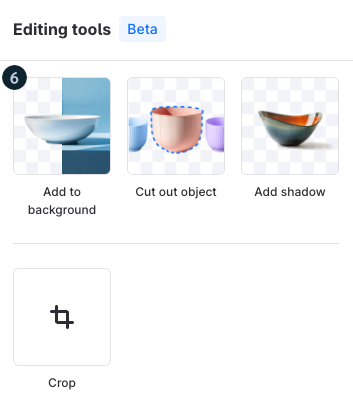
Add to background (6): This tool is only available for image files with an alpha channel (transparency).
You have two options for the background:
Single color: Select a background color. Your object is automatically inserted and given a slight shadow - similar to a photo studio with a colored background.
Image: Upload your own image or select one from your media management. You can then position your object freely in the image.
View Settings
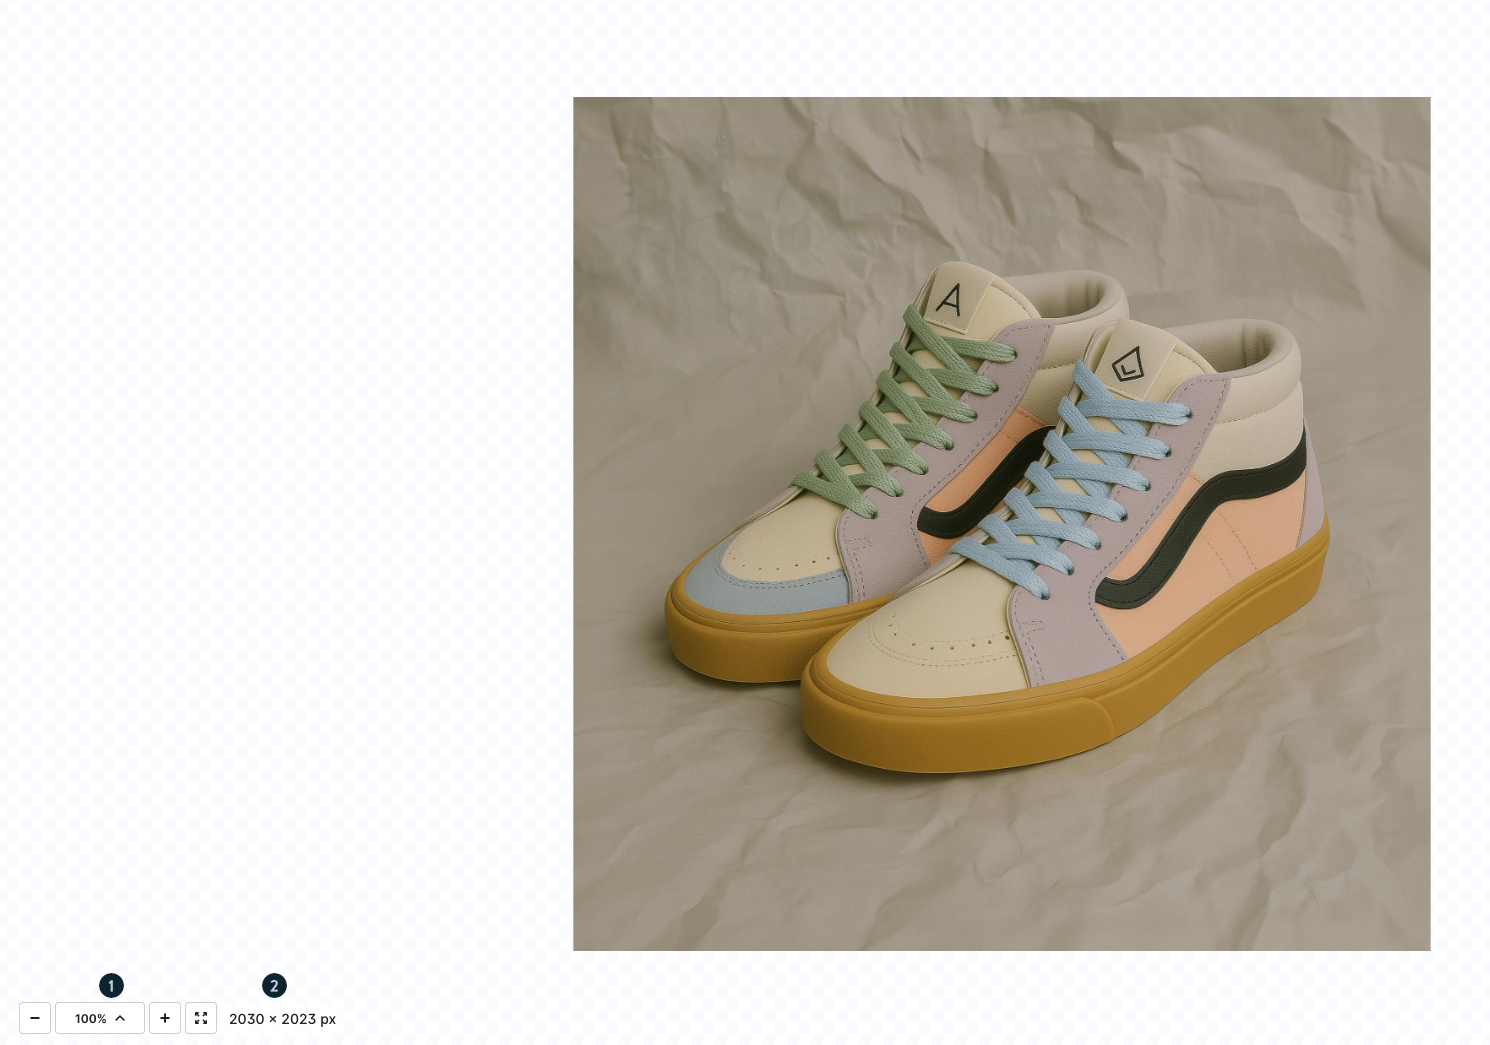
In the lower left area of the image editing window, you will find the zoom options (1) and the current image dimensions in pixels (2).
Zoom option (1): This option allows you to enlarge or reduce the view of the image. The plus symbol (+) enlarges the image, while the minus symbol (–) reduces it.
Pixels (2): This function displays the current dimensions of the image in pixels. It provides information about the width and height of the image in pixels.
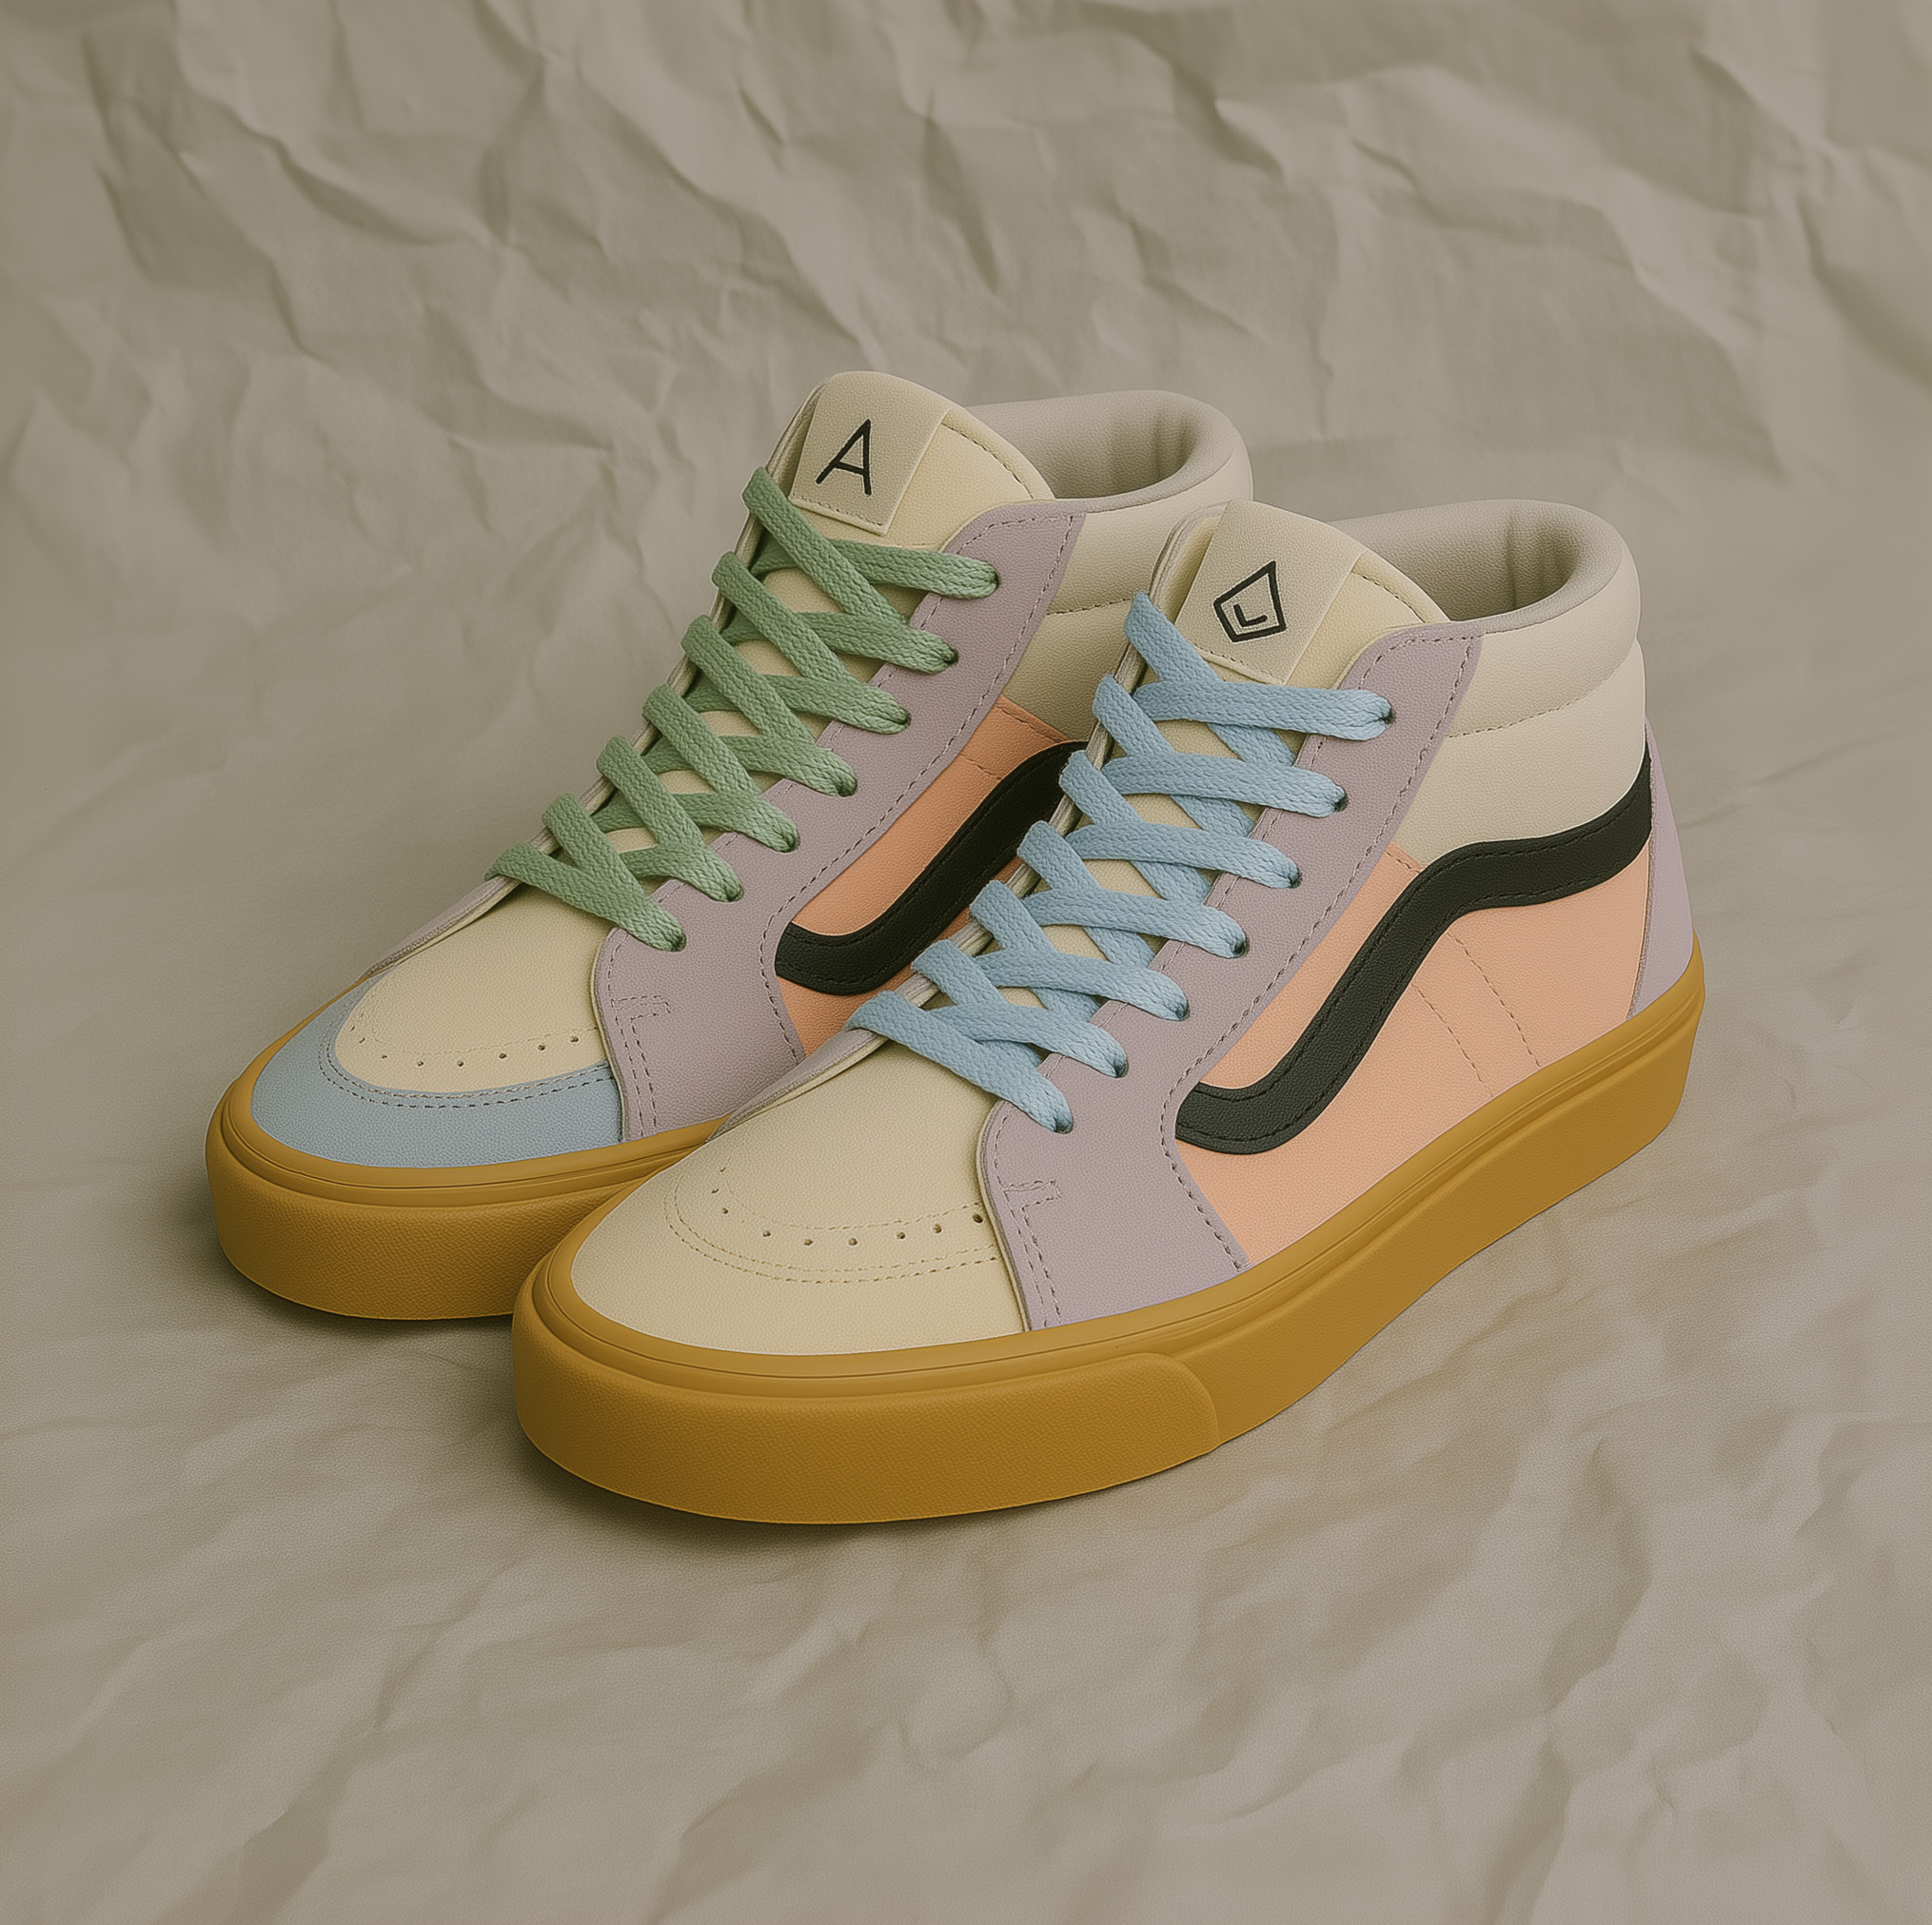
Example
We would like to present our shoes in a more appealing way and insert them into a more attractive background.
To do this, we upload the original image of the shoes in the image editor and select the first tool, Cut object, to remove the shoes from the current background.
Source image:
We then place the cropped shoes on the desired new background.
To do this, we use the Add object tool in Image mode to insert the cropped object into the new scene.
Background image:

After a short time, we get the result. The shoes have been given a natural shade and blend seamlessly into the background.
Result:

Notes and FAQ on the image editor
Note on AI support
This function uses the Finegrain API in the background, which is based on artificial intelligence (AI).
Please note: Even if the AI works very precisely in most cases, errors may occasionally occur. The results are not checked manually - therefore, if necessary, check the result yourself before using it further.
Are there any restrictions on use?
There are no usage restrictions in the first version of the image editor. In later phases, we will add paid options and plan-related restrictions.