


Domains
Please note that this article is intended only for users of a Shopware 6 SaaS environment. This is not relevant for users of a self-hosted shop.
Default domain
Every Shopware 6 SaaS shop has a default domain, sometimes also referred to as the canonical domain. It consists of the shop name and the base domain, for example my-shop.shopware.store.
After the shop has been created, the default sales channel is initially assigned to this default domain. Email sending is also configured to use the default domain as the sender address, e.g. store+12345678@mail.shopware.store.
Custom domains
In addition to the default domain, you can also use your own domain, for example to assign it to your sales channels or to change the default sender address for emails.
Shopware SaaS provides a self-service function in the settings module that allows you to manage your domains in the Shopware Administration.
Overview
Navigate to Settings > System > Domains to get an overview of the domains connected to your shop.
Please note that the default domain cannot be removed or changed. This also ensures that your shop can always be accessed via at least one domain.
Connecting a domain
Enter domain
Click one of the Connect domain buttons on the overview page.
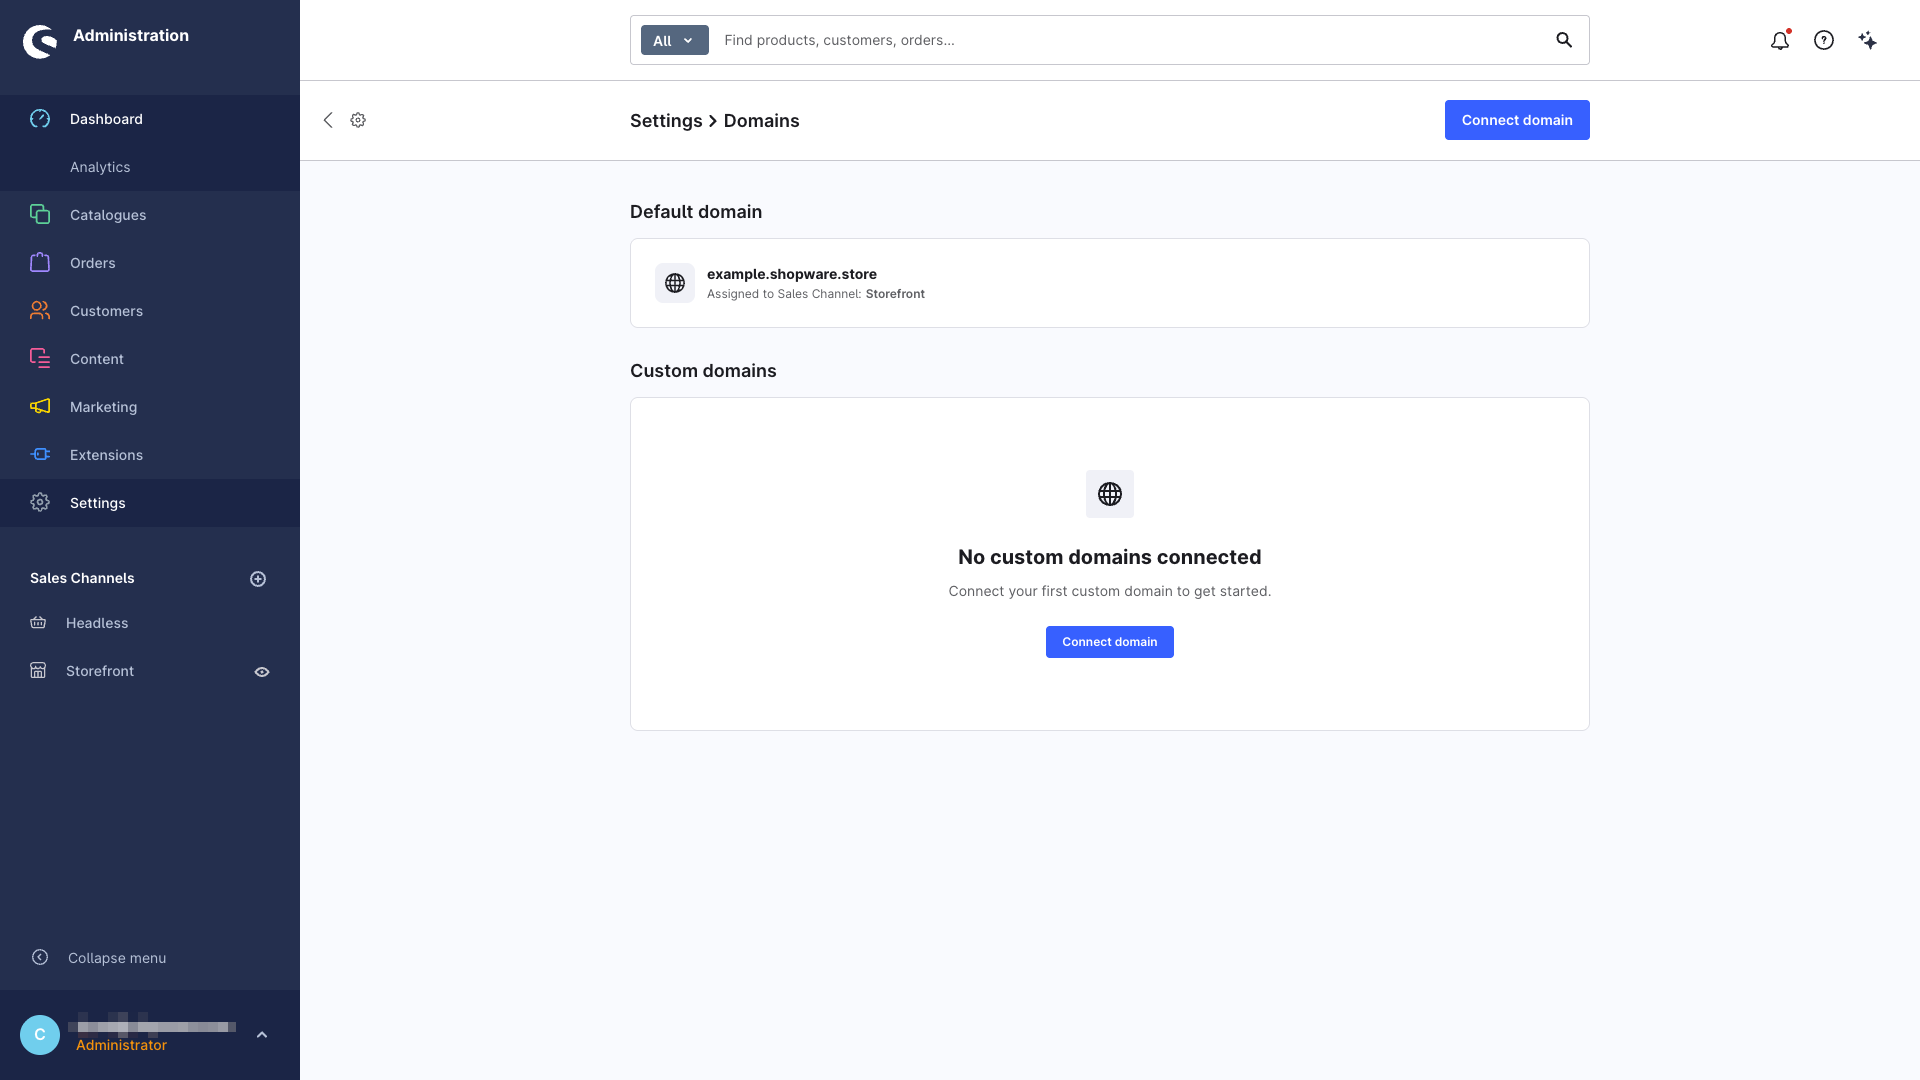
First, enter the domain you want to connect in the modal that opens.
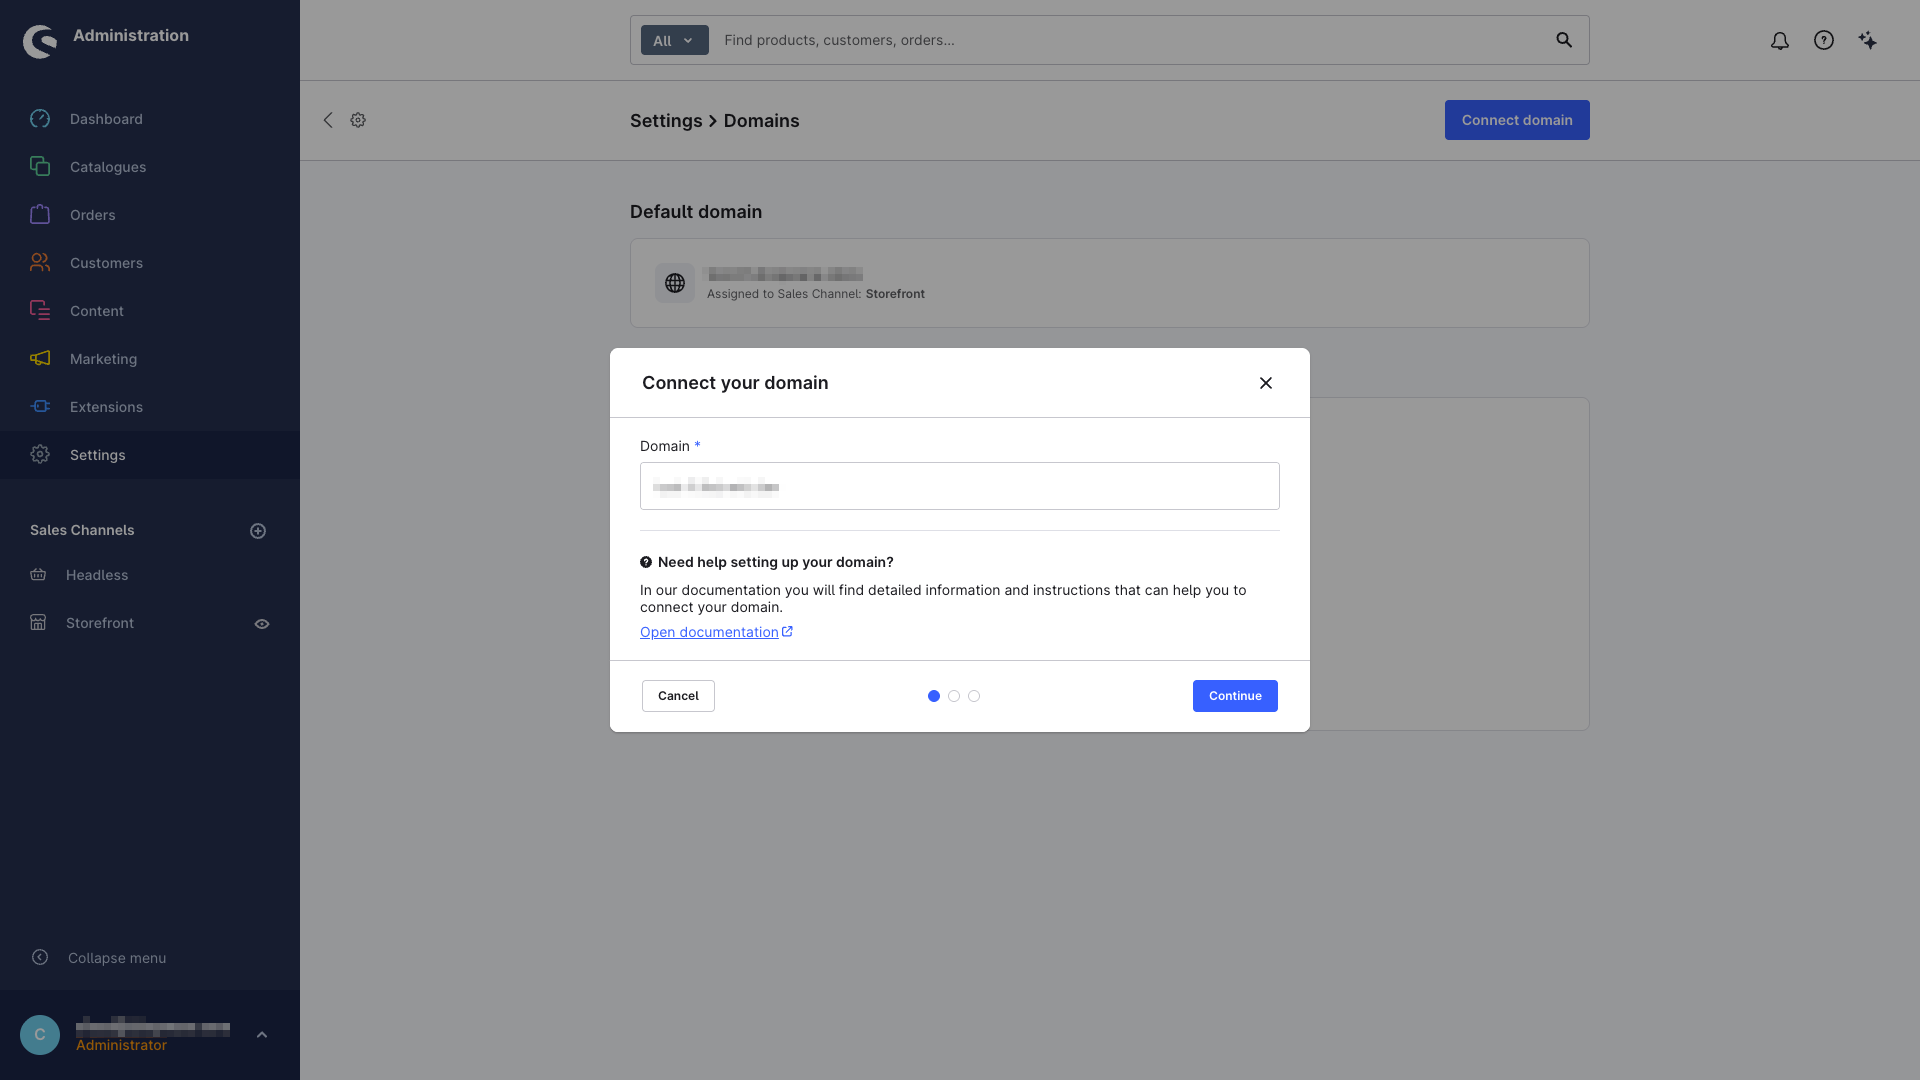
Verify ownership
You can only connect a domain if you can verify its ownership. To prove that you own the domain, you need to create a DNS record with a verification value.
Tip: It can take up to 48 hours until DNS records have been applied everywhere. The verification value does not change, so you can come back later at any time to verify ownership.
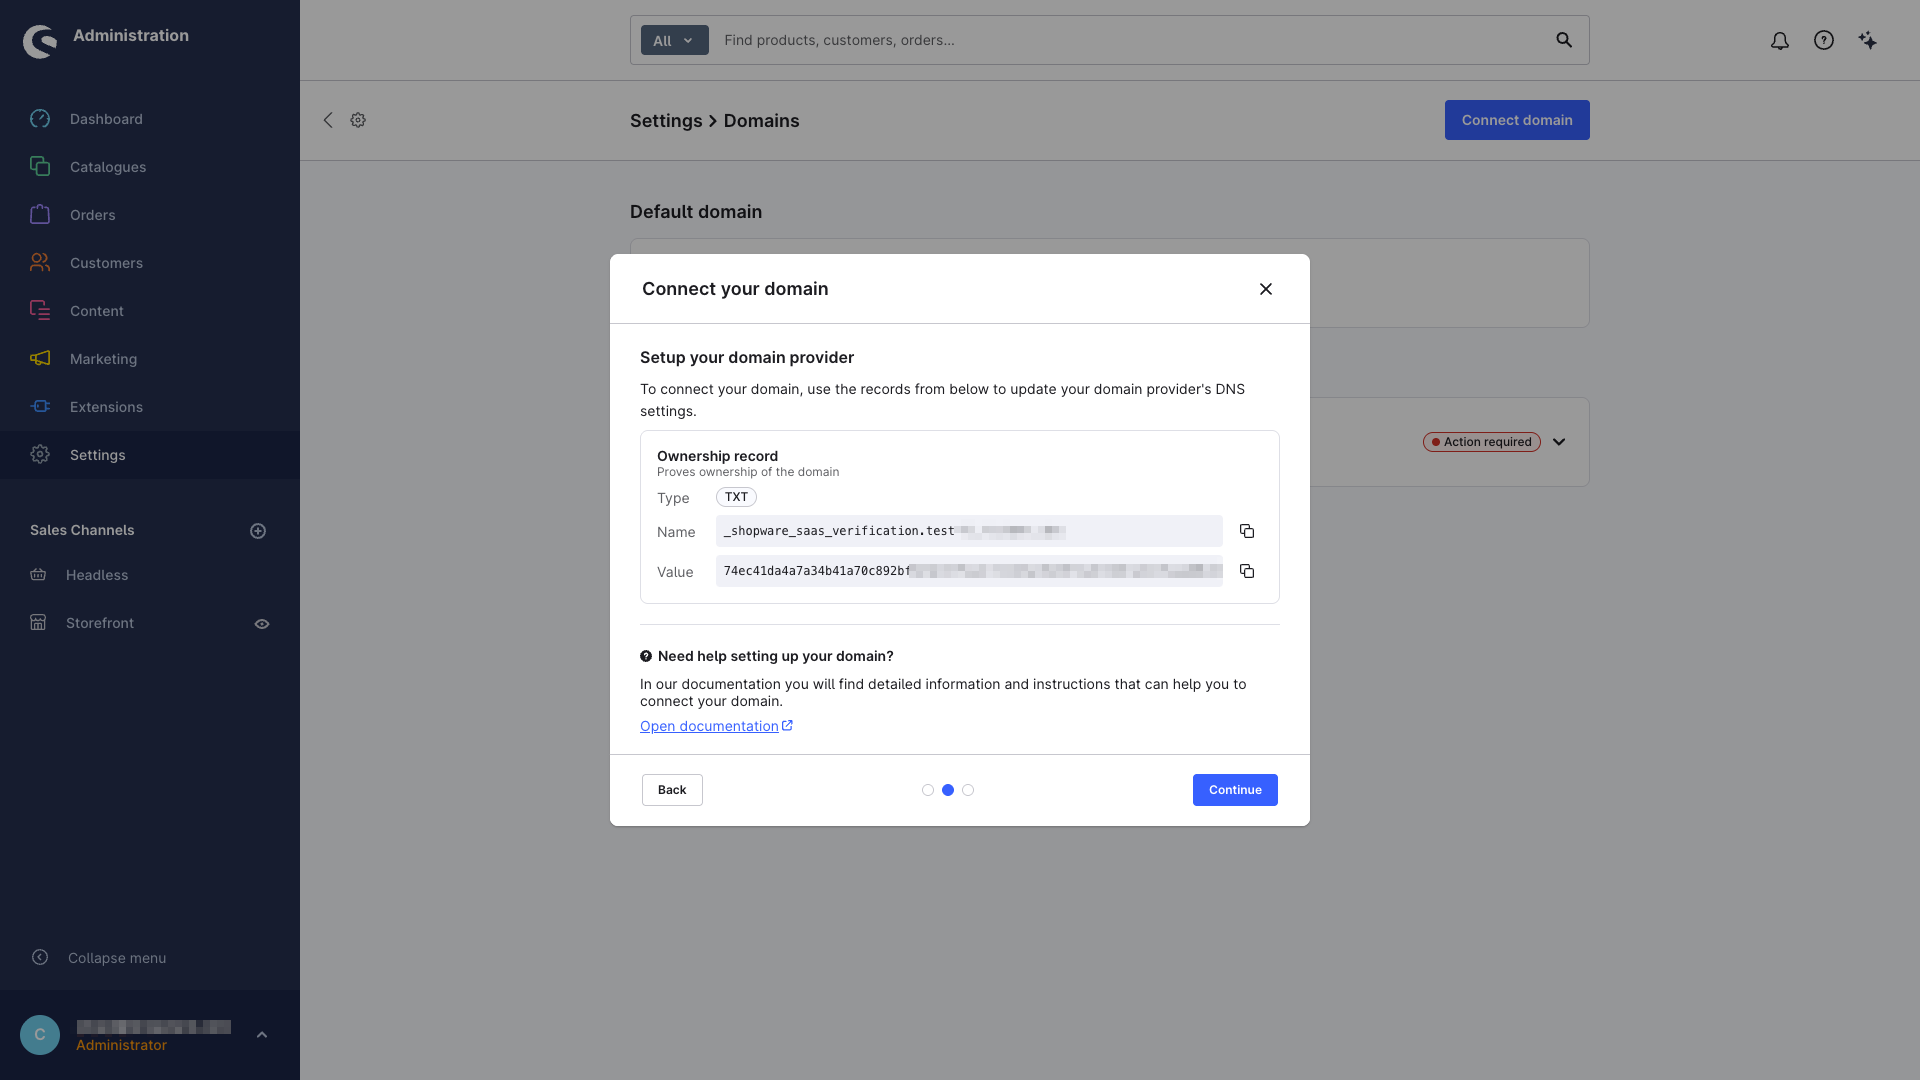
Keep the DNS record in place, as we regularly recheck ownership of the domain.
Managing your domain
Click the card of the domain you want to manage and navigate to the corresponding tab.
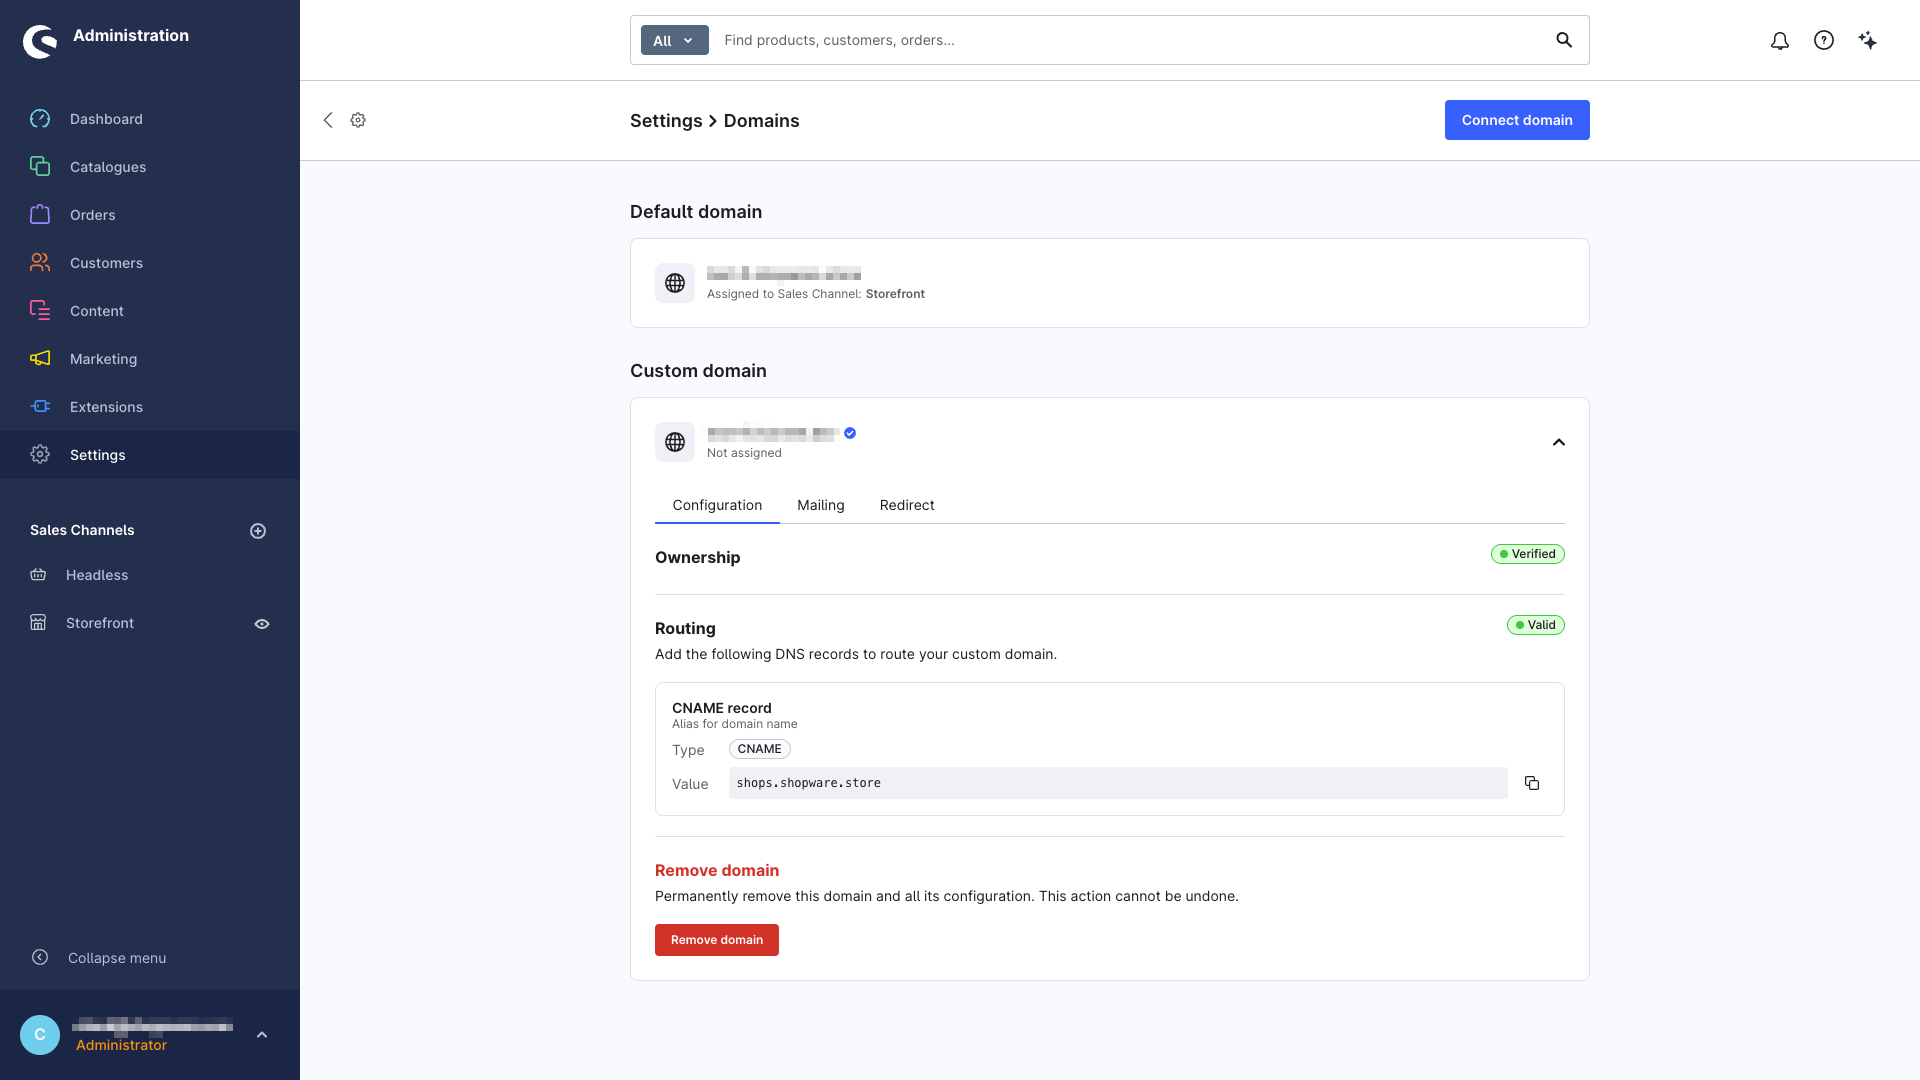
Routing
If you want to assign your domain to a Storefront sales channel, you need to set it up for routing. This is done by creating the corresponding routing records.
If you want to assign the domain to a Headless sales channel to use it with Shopware Frontends, setting up routing DNS is not required.
Email sending
To use your domain for sending emails to your customers, go to the Email sending tab and click the Enable email sending button.
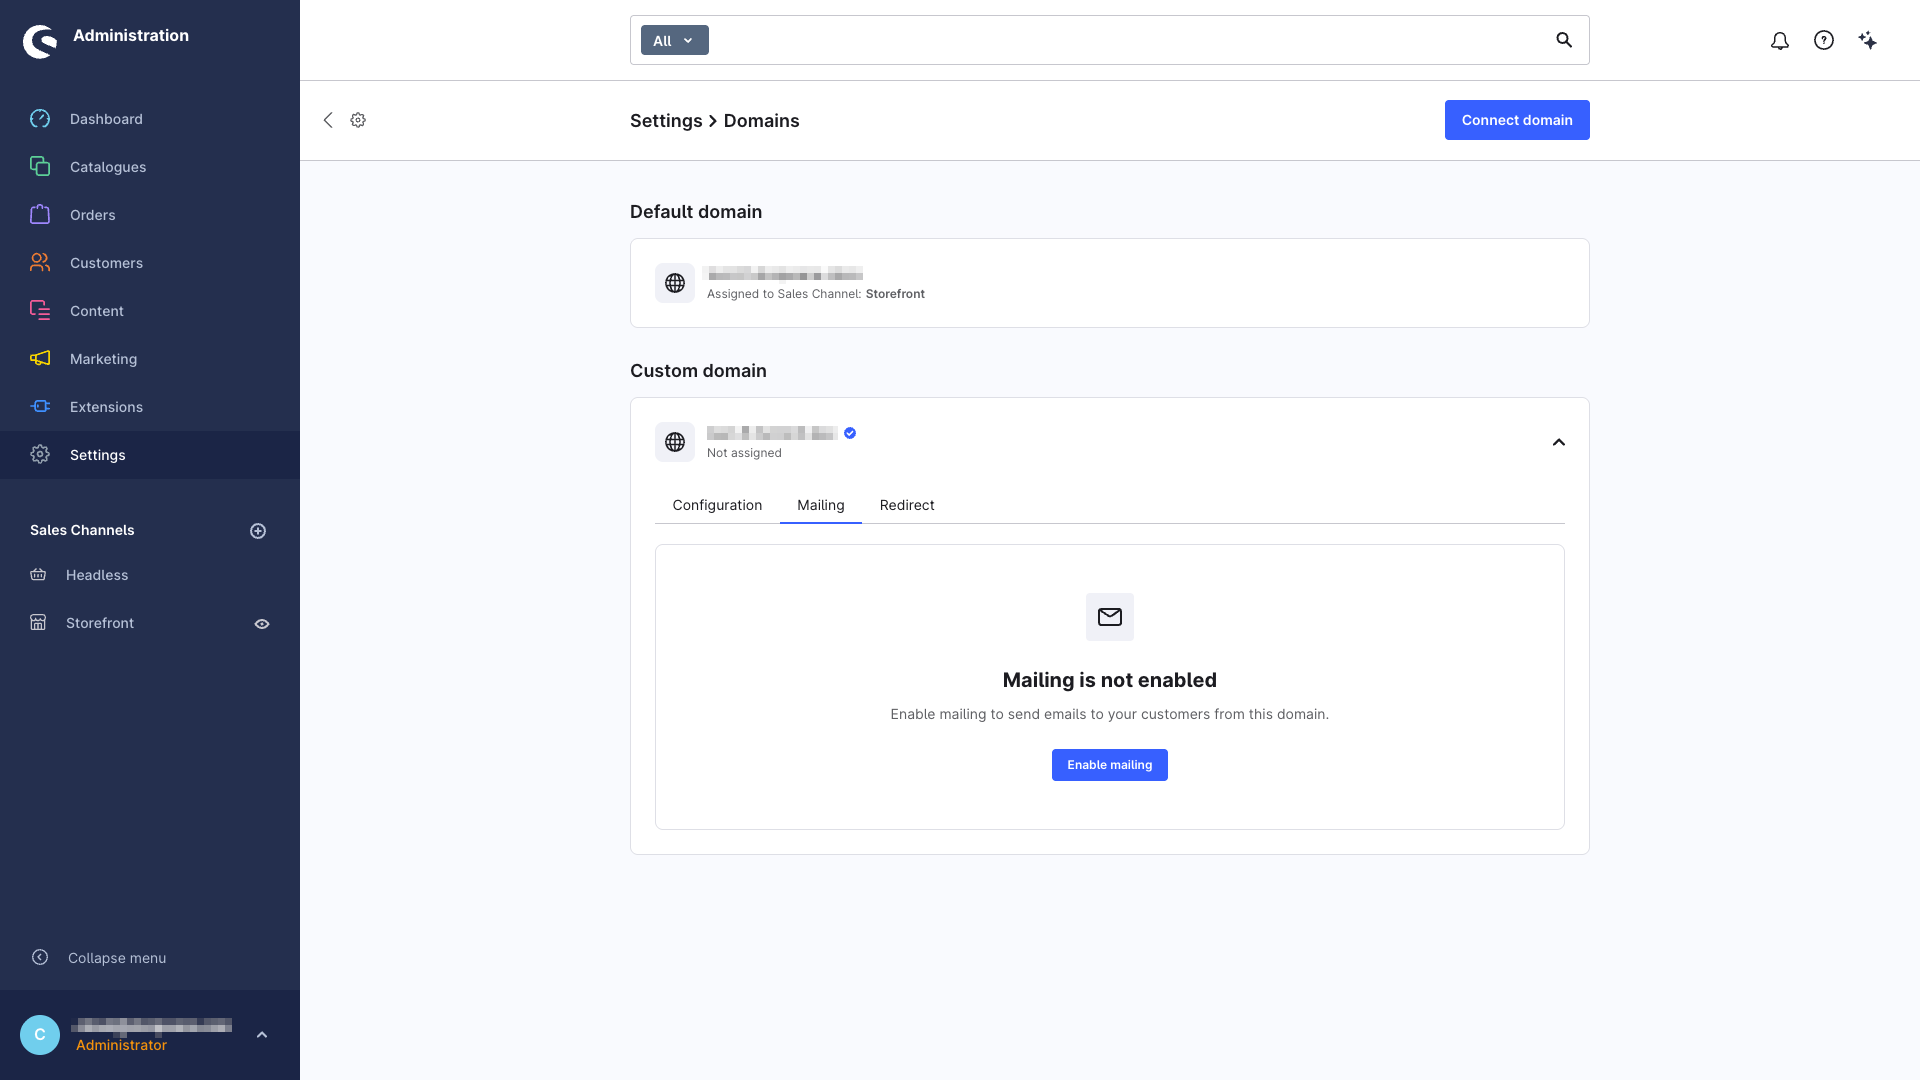
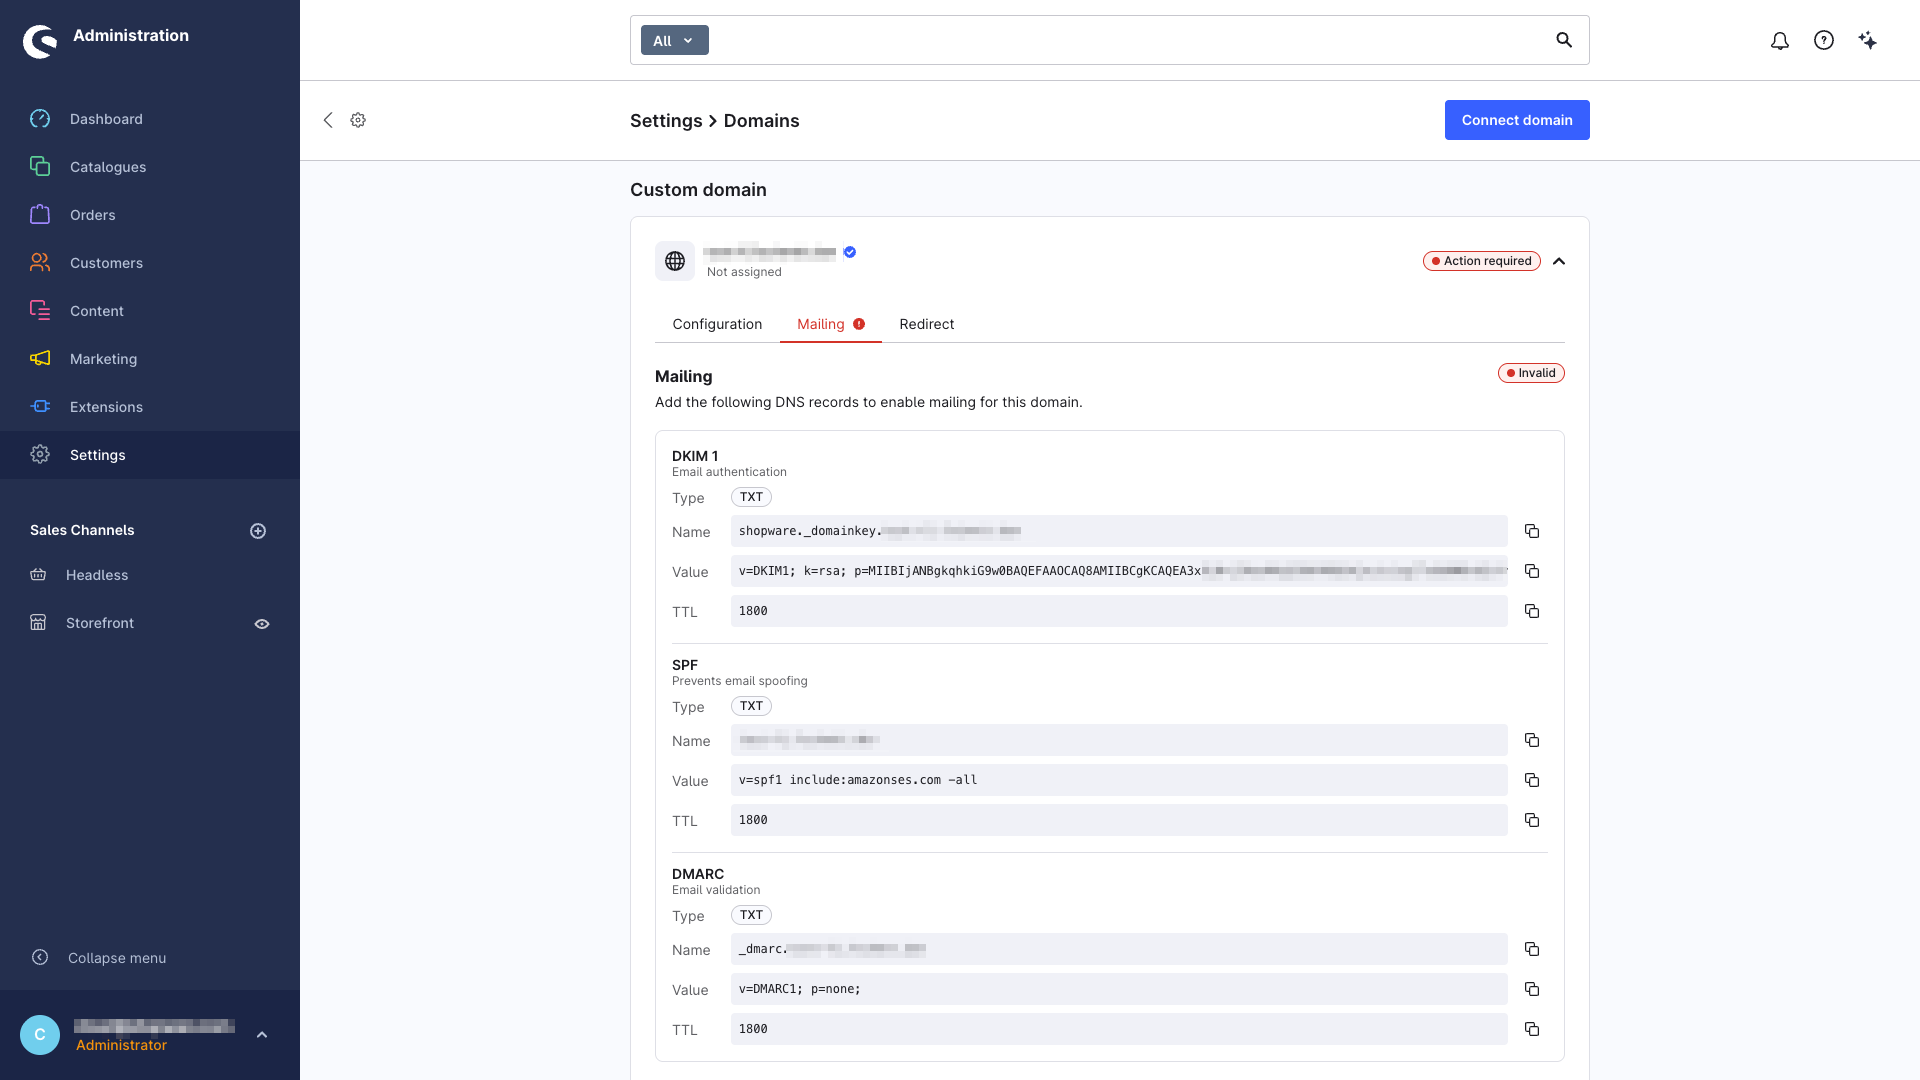
After you have enabled email sending, set up the required DNS records. The DNS records are checked automatically in the background. It can take up to 24 hours until your configuration is shown as Valid.
Once your DNS configuration is valid, go to Settings > Basic information and under Sender email, select the domain you want to use on the right-hand side. On the left-hand side, enter the username, meaning the local part, e.g. no-reply or info.
Redirect
You can redirect all traffic to another domain that is also connected to your shop. This is especially useful, for example, for redirects from www to non-www or the other way around.
When configuring the redirect, you can choose between a temporary redirect (307) and a permanent redirect (308).
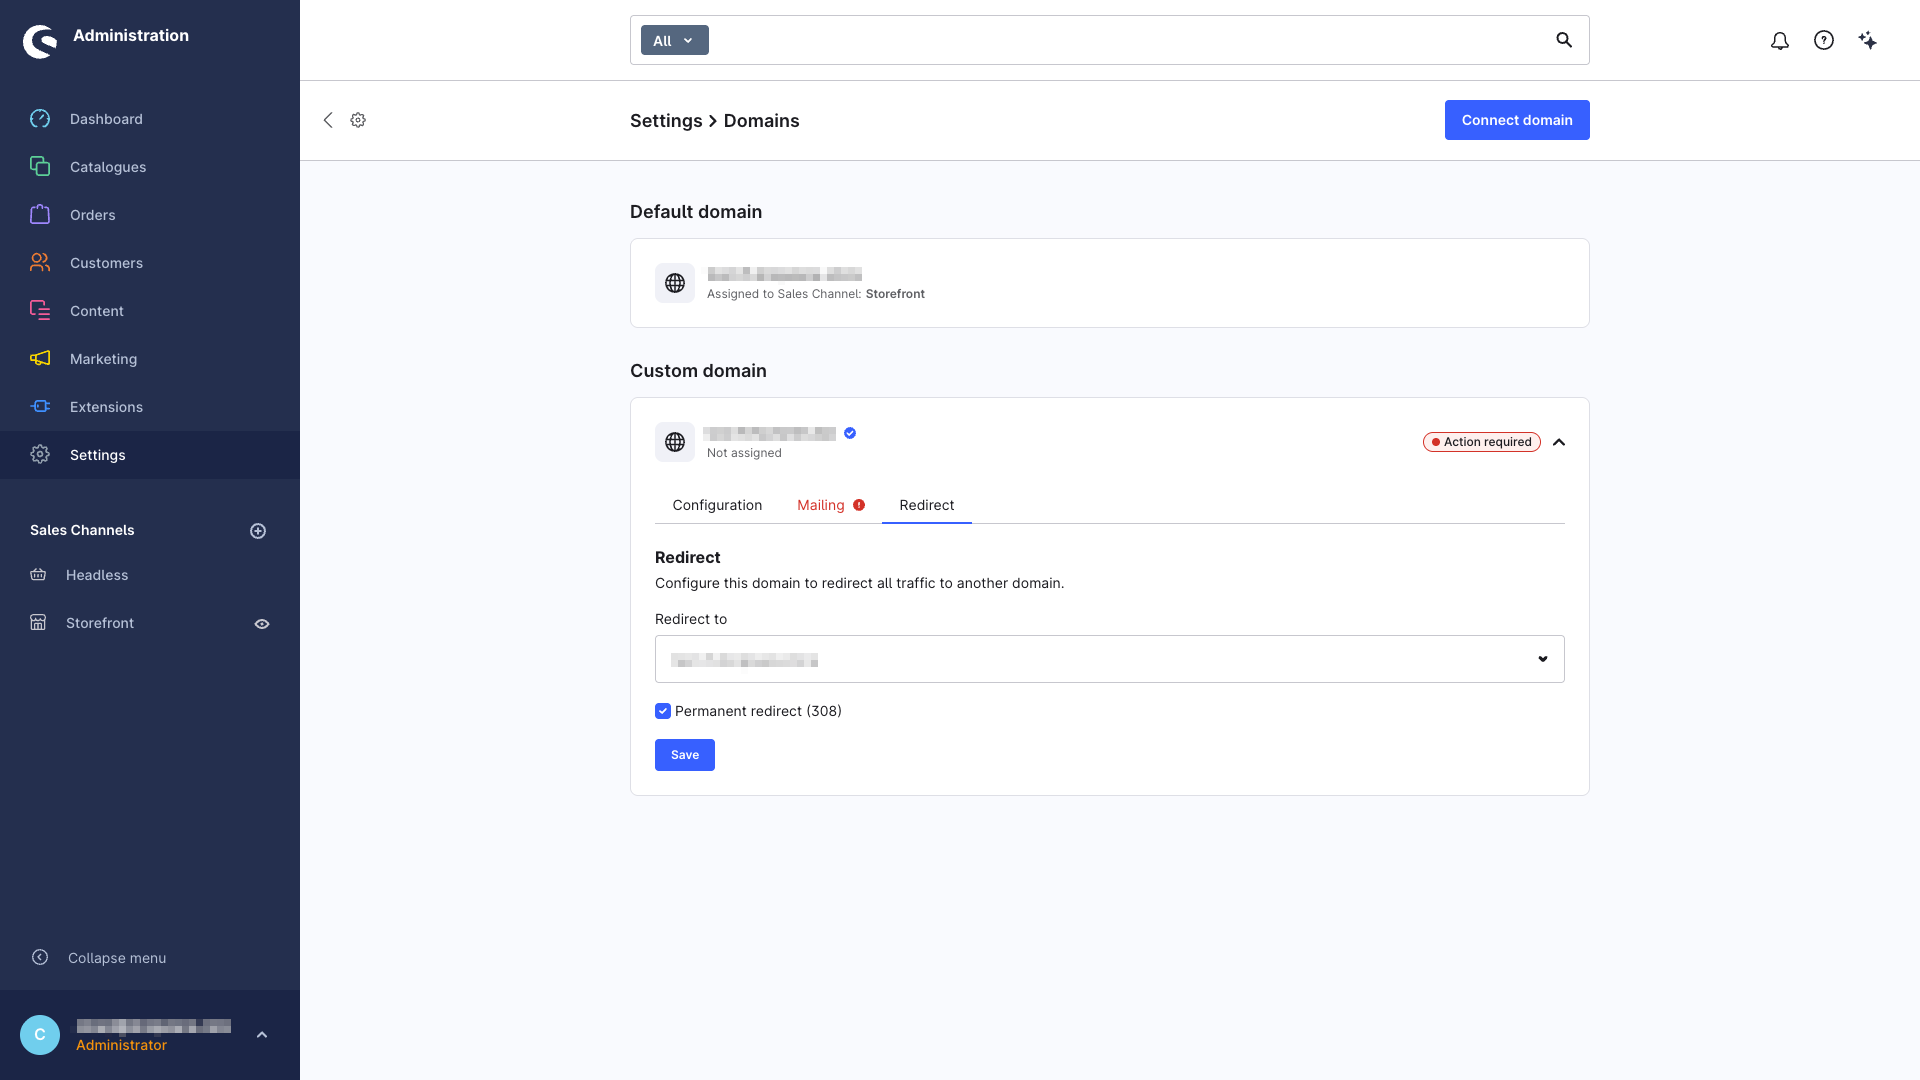
Please note the following restrictions:
A domain that is already the redirect target of another domain cannot be redirected.
Path redirects are not supported.
Removing your domain
You can remove your domain via the Configuration tab if all of the following conditions are met:
The domain is not assigned to any sales channel.
The domain is not the redirect target of another domain.
The domain is not used for email sending.
Explanation of the DNS configuration for some hosters
Profihost
In the customer center of Profihost you will find the configuration under My Products > Webhosting & Domains
For the A-Record configuration you choose as type "A" and as value you enter the respective IP-addresses, which are shown in the configuration window in the Shopware-Admin.
If you want to enter more than one IP address, please enter each one as a separate line.
For the (optional) CNAME record select "CNAME" as type
More information can be found in the documentation of Profihost at
https://wissen.profihost.com/wissen/artikel/wo-verwalte-ich-die-dns-eintraege-meiner-domains/
Mittwald
In Mittwald'sCustomerCenter you will find the configuration under Domains the DNS-Editor.
There you will find the tab Host Address / Alias and can enter the A-record(s) as well as the (optional) CNAME-record.
More information can be found in the documentation of Mitwaldt at
https://www.mittwald.de/faq/domains-ssl/dns/was-ist-der-dns-editor
and
https://www.mittwald.de/blog/arbeitsalltag/tools/domainverwaltung-und-dns-editor
Strato
In the Strato customer login you will find the configuration in the package overview in the "..." menu under Manage Domains.
Alternatively, you can also find the settings under Domains > Domain Administration.
More information can be found in the documentation of Strato at
https://www.strato.de/faq/domains/welche-einstellungen-kann-ich-im-konfigurationsdialog-a-record-vornehmen/
und
https://www.strato.de/faq/domains/so-aendern-sie-den-cname-eintrag-fuer-ihre-subdomain/
All-inkl
IIn the CustomerAdministrationSystem (KAS) of All-inkl you will find the DNS configuration under Tools > DNS Settings.
More information can be found in the documentation of All-inkl at
https://all-inkl.com/wichtig/anleitungen/kas/tools/dns-werkzeuge/a-record-fuer-subdomain-aendern_174.html
and
https://all-inkl.com/wichtig/anleitungen/kas/tools/dns-werkzeuge/cname_178.html
1&1 / IONOS
With 1&1 / IONOS you can do the configuration in the control center.
More information can be found in the documentation of 1&1 / IONOS at
https://www.ionos.de/hilfe/domains/domain-verwenden/
and
https://www.ionos.de/hilfe/domains/cname-records-fuer-subdomains-konfigurieren/cname-record-fuer-eine-bestehende-subdomain-konfigurieren/
Hostpoint
At Hostpoint.ch, you can configure the DNS in the Control Panel. To do this, you must log in to the Control Panel with your Hostpoint ID. Then click on the menu item Domains > Edit DNS Zone to access the DNS administration.
You can find further information in the Hostpoint documentation at https://support.hostpoint.ch/en/technical/dns/dns-changes/manually-making-changes-to-the-dns-zone
Troubleshooting
Various errors can occur in connection with your own domains. Here we show you how to fix the most common errors.
DNS records are set but domain is not connected
The browser reports a NET::ERR_CERT_COMMON_NAME_INVALID or SSL_ERROR_BAD_CERT_DOMAIN


How to fix it:
Log into the administration, navigate to Settings→System→Domains and add the custom domain.
DNS records are set, domain is connected but not assigned to a sales channel
An error page is shown which states that "The shop domain is not available at the moment."

How to fix it:
Log into the administration and open the respective sales channel detail page (e.g. for the storefront) in the Sales Channels section. In the Domains section, select Add Domain and choose the domain from the dropdown menu. Then configure the language, the currency and the snippets and click on Add Domain.
Other errors
If you are still unable to access your own domain, the following troubleshooting may help.
- Go to https://toolbox.googleapps.com/apps/dig/#A/
- Enter the customer domain (without https or path so shopware.com is correct, https://shopware.com or shopware.com/de is wrong)
- The result must contain at least one of these four IP addresses: 151.101.2.196, 151.101.66.196, 151.101.130.196, 151.101.194.196 or the CNAME shops.shopware.store
- The result must not contain any other IP address or CNAME
The result should look something like this:

- Go to https://toolbox.googleapps.com/apps/dig/#AAAA/
- Enter the customer domain (without https or path so shopware.com is correct, https://shopware.com or shopware.com/de is wrong)
- The result can contain at least one of these four IP addresses: 2a04:4e42::708, 2a04:4e42:200::708, 2a04:4e42:400::708, 2a04:4e42:600::708 or the CNAME shops.shopware.store
- The result must not contain any other IP address or CNAME
The result should look something like this:
