
You are currently viewing the article on an older Shopware version!
Making changes in the template
Goal
Goal of this tutorial is to learn how to make small changes in your template, we describe this on a few examples to show you the precedure. The first examples are described step-by-step, the following examples won't show each step seperately, because the procedure is always the same.
Procedure
As procedure we take the following steps as a basis:
- Definition of the adjustment
- Searching the template file, which is responsible for the needed feature by default
- Deduce the adjustment in the own template
- Testing
The Bare Theme and the Responsive Theme are either default templates, which never should be changed, because adjustments could be deleted when this file will be updated in Shopware! Because of this you have to deduce the template correctly.
If not yet made, create a new theme in the Theme Manager which inherits from the default Responsive Theme. Shopware creates the complete directory structure for adjusting your template in the /themes directory, but don't create any files, because these are adopted from the default template, if no file exists. (More Informations here.)
Size chart on detail page
Goal is to display a size chart below the ordernumber on the item detail page.
Create / manage free text field
Because the link should appear only at defined items, it makes sense to use free text fields for this. So create a new item free text field of the type "checkbox", for example we use "attr4":

The free text field is now available in the backend and can be set for each desired item.
Adjust the template
To spot the place, where the default template build the ordernumber, you have to open the theme directory of the Bare Theme, because the Bare Theme builds the whole structure of Shopware. Because our desired change should be made on the detail page, navigate to the directory /themes/Frontend/Bare/frontend/detail, here you find all template files, which are responsible for the detail page.
Because our adjustment should be made below the ordernumber, we need the code, which builds the ordernumber, you can search e.g. by IDE or editors like "Notepad++" this filed for keyowrds to find the right place, so you should search the "detail"-directory for the string "ordernumber".
Because "ordernumber" is contained in multiple files, you have to navigate through the results and find the right one, which accomplishes the task, in this case it's the index.tpl because here the ordernumber blocks and the attribute 1 and 2 blocks are standing among themselves. The block for the ordernumber is named frontend_detail_data_ordernumber here. Now we know, that the index.tpl and the block frontend_detail_data_ordernumber is responsible for the function we want to adjust.
Inherit adjustments correctly
Now create in /themes/Frontend/YOURTHEME/frontend/detail a new file named index.tpl. At first we have to deduce from the default theme, the first line must be:
{extends file="parent:frontend/detail/index.tpl"}Now we extend the block. Becuase the size chart should appear under the ordernumber, the block has to be extended with smarty.block.parent (Explanation). The extended block now looks like this:
{* Append Article SKU with link to size chart *}
{block name='frontend_detail_data_ordernumber'}
    {$smarty.block.parent}
    {if $sArticle.attr4 == true}
        <li class="base-info--entry entry--sku">

            {* Size chart - Label *}
            {block name='frontend_detail_data_sizechart_label'}
                <strong class="entry--label">
                    {s name="SizeChartLabel" namespace="frontend/detail/data"}{/s}
                </strong>
            {/block}

            {* Size chart - Link *}
            {block name='frontend_detail_data_sizechart_link'}
                <strong class="entry--content">
                    {s name="SizeChartLink" namespace="frontend/detail/data"}{/s}
                </strong>
            {/block}
        </li>
    {/if}
{/block}
If your theme gets compiled now, the new code will be applied and it should be displayed in the template, but the defined snippets are still empty.
Filling snippets
The snippets "SiteChartLabel" and "SizeChartLink" are currently empty and must be filled by using the Snippet management, just open the snippet manager and search for the snippets by name or open the defined namespace "frontend/detail/data". As example we set the snippets to "Size advice?" and a link to the size chart itself with the following HTML code:
<a href="/size-chart" title="Size chart" target="_blank">Size chart</a>
The link to /size-chart expects, that you defined this page yet. This can be done e.g. by using Shop pages.
Further description below the item listing
In some cases it may be helpful to display another description text below the category listing, goal of this tutorial is to display this description. which should look like the category description, if the description is filled.
Create / manage free text field
Because the description should appear only in categories which have the description filled, it makes sense to use free text fields for this. So create a new text field of the type "HTML" for the categories, in this example we use "attribute1":

The free text field is available now in the backend and can be filled.
Adjust the template
To spot the place, where the default template builds the listing, you have to open the theme directory of the Bare Theme, because the Bare Theme builds the whole structure of Shopware. Because our desired change should be made on the listing, navigate to the directory /themes/Frontend/Bare/frontend/listing, here you find all template files, which are responsible for the listing.
IN this case we don't know where to start, so we take a look in the index.tpl first, which is the basic structure of each component, there we see the included listing and below the tag could. So we know that the index.tpl is the file we need to deduce, the Block is called frontend_listing_index_listing.
Spot the variables
To spot the attribute, you can use the default template naming for search:
First take a look which variables are used in the file you are working on, in the listing this is $sCategoryContent, so you can use your deduced template file to get all available variables by using
<pre>{$sCategoryContent|print_r}</pre>This shows you all available variables, so you can search for your attributes variable.
Inherit adjustments correctly
Then create a new file called index.tpl in the directory /themes/Frontend/YOURTHEME/frontend/listing. At first we have to deduce from the default theme, the first line must be:
{extends file="parent:frontend/listing/index.tpl"}The block "frontend_listing_index_listing" will be extended by using smarty.block.parent to give the content in the template after the listing is shown:
{* Listing *}
{* Extend listing with additional description *}
{block name="frontend_listing_index_listing"}
    {$smarty.block.parent}
    {if $sCategoryContent.attribute.attribute1}
        {$sCategoryContent.attribute.attribute1}
    {/if}
{/block}
Because this only displays the attribute itself, this don't look nice:

So we change it another time and get the styling of the category description to use it for our additional description too, that it looks the same. As described in "Find the place which is responsible for the function", we search for the category description, which is built in the text.tpl and adopt this to our description box:
{block name="frontend_listing_index_listing"}
{$smarty.block.parent}
<div class="hero-unit category--teaser panel has--border is--rounded">
<div class="hero--text panel--body is--wide">
{if $sCategoryContent.attribute.attribute1}
<div class="teaser--text-long">
{$sCategoryContent.attribute.attribute1}
</div>
<div class="teaser--text-short is--hidden">
{$sCategoryContent.attribute.attribute1|strip_tags|truncate:200}
<a href="#" title="{"{s namespace="frontend/listing/listing" name="ListingActionsOpenOffCanvas"}{/s}"|escape}" class="text--offcanvas-link">
{s namespace="frontend/listing/listing" name="ListingActionsOpenOffCanvas"}{/s} »
</a>
</div>
<div class="teaser--text-offcanvas is--hidden">
<a href="#" title="{"{s namespace="frontend/listing/listing" name="ListingActionsCloseOffCanvas"}{/s}"|escape}" class="close--off-canvas">
<i class="icon--arrow-left"></i> {s namespace="frontend/listing/listing" name="ListingActionsCloseOffCanvas"}{/s}
</a>
<div class="offcanvas--content">
<div class="content--title">{$sCategoryContent.cmsheadline}</div>
{$sCategoryContent.attribute.attribute1}
</div>
</div>
{/if}
</div>
</div>
{/block}
The result looks like this:
Desktop:

Mobile with opened OffCanvas box:

Mark defined items as always deliverable
Goal of this tutorial is, that defined items are displayed as "Ready to ship today" no matter what the stock the item in Shopware has.
Create / manage free text field
Because this feature should also be usable for every item itself, we use free text fields also here. Create a new free text field of the type "Checkbox" for items, in our example we use "attr5":

The free text field now is available for use.
Adjust the template
The availability is displayed at multiple places in Shopware, because of this we search the whole Bare Theme folder for keywords using our IDE or "Notepad++" to find their usage. Trying this we see that "delivery" is used in the delivery_informations.tpl which again is used at the relevant places in the frontend, so we seem to be right. Now we know, which file is responsible for the availability, because this file has only 1 block, this is clear.
Inherit adjustments correctly
Now create a new file named delivery_informations.tpl in /themes/Frontend/DEINTHEME/frontend/plugins. At first we have to deduce from the default theme, the first line must be:
{extends file="parent:frontend/plugins/delivery_informations.tpl"}Now we change the block this way, that we retrieve our defined attribute and then display the right deliverablity status. The "Ready to ship today" state can be deduced by its name: "DetailDataInfoInstock" - Alternatively you also can search the snippets by name, this also works fine. Now we change the file:
{block name='frontend_widgets_delivery_infos'}
    {if $sArticle.attr5 == true || $sBasketItem.additional_details.attr5 == true}
        <div class="product--delivery">
            <link href="http://schema.org/InStock" itemprop="availability">
            <p class="delivery--information">
				<span class="delivery--text delivery--text-available">
					<i class="delivery--status-icon delivery--status-available"></i>
                    {s name="DetailDataInfoInstock"}{/s}
				</span>
            </p>
        </div>
    {else}
        {$smarty.block.parent}
    {/if}
{/block}
This way the item will look like "Ready to ship today" no matter what stock it is.
Deleting something from the theme
If you want to delete something from the frontend, you can do this easily by overwriting the desired block empty, this deletes the content in the frontend. An example:
{extends file="parent:PARENT"}

{block name='NAME'}
{/block}
Keep in mind, that this requires the same steps as described before, only deduce the theme in your own one, never change the default theme!
Changing the robots.txt
Because Shopware generates the robots.txt also over the theme, you can also change this easily. The path to the template file, which is responsible for generating the robots.txt, is /frontend/robots_txt/index.tpl.
Here you can deduce this file in your own theme like described before to individualize your robots.txt file.
Display divergent shipping address on the invoice
Documents are also template files which can also be individualized. The default document template files can be found in /Bare/documents, the files have the following responsibilities:
| File | Responsible for |
|---|---|
| index.tpl | Invoice |
| index_gs.tpl | Credit |
| index_ls.tpl | Delivery note |
| index_sr.tpl | Cancellation |
For example we add the divergent shipping address to the invoice, when it differs to the billing address.
{block name="document_index_info_dispatch"}
    {if $Order._dispatch.name}
        <div style="font-size:11px;color:#333;">
            {s name="DocumentIndexSelectedDispatch"}{/s}
            {$Order._dispatch.name}

        </div>
    {/if}
    {assign var="shippingaddress" value="shipping"}
    {assign var="shippingArr" value=$User.$shippingaddress}
    {assign var="billingArr" value=$User.$address}

    {$billingString = $billingArr['salutation']|cat:$billingArr['title']|cat:$billingArr["firstname"]|cat:$billingArr['lastname']|cat:$billingArr['street']|cat:$billingArr['street']|cat:$billingArr['city']}
    {$shippingString = $shippingArr['salutation']|cat:$shippingArr['title']|cat:$shippingArr["firstname"]|cat:$shippingArr['lastname']|cat:$shippingArr['street']|cat:$shippingArr['street']|cat:$shippingArr['city']}

    {if $shippingString != $billingString}
        {s name="DocumentIndexSelectedShippingaddress"}{/s}

        <div style="margin-left: 20px;">
            {if $User.$shippingaddress}
                {$User.$shippingaddress.salutation|salutation}
                {if {config name="displayprofiletitle"}}
                    {$User.$shippingaddress.title}<br/>
                {/if}
                {$User.$shippingaddress.firstname} {$User.$shippingaddress.lastname}

                {$User.$shippingaddress.street}

                {if {config name=showAdditionAddressLine1}}
                    {$User.$shippingaddress.additional_address_line1}

                {/if}
                {if {config name=showAdditionAddressLine2}}
                    {$User.$shippingaddress.additional_address_line2}

                {/if}
                {if {config name=showZipBeforeCity}}
                    {$User.$shippingaddress.zipcode} {$User.$shippingaddress.city}

                {else}
                    {$User.$shippingaddress.city} {$User.$shippingaddress.zipcode}

                {/if}
            {/if}
        </div>

    {/if}
{/block}
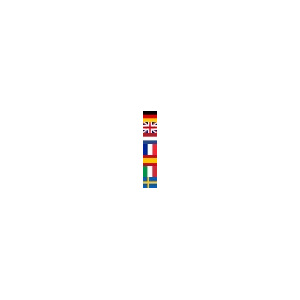
Add further country flags for the language change
In Shopware the flags for Germany, the UK, the Netherlands, France, Spain and Italy are stored for the language change. To provide additional flags for the selection, 2 theme adjustments are necessary.
Adjustments
ico-flags.png
This file contains the individual flags and is located in the directory "/themes/Frontend/Responsive/frontend/_public/src/img". The individual flags have a size of 14 x 11 px. With an image processing program one or more flag(s) can be added below the existing flags.
The adapted file can then be inserted directly into your theme at this directory: /themes/Frontend/YOURTHEME/frontend/_public/src/img/ico-flags.png
flags.less
The flags.less file contains the information on which coordinates each country flag is positioned within the ico-flags.png. The file is located in the "/themes/Frontend/Responsive/frontend/_public/src/less/_components" directory and is now supplemented by the information for the flags added before in the ico-flags.png. The ISO code for the respective countries can be found in the backend "Configuration > Basic settings > Shop settings > Localizations". It is important, that the ISO code, which is specified under Localization, is equally stored in the flags.less because the flag is assigned via the localization.
In your theme, save the customized file at: themes/Frontend/YOURTHEME/frontend/_public/src/less/_components/flags.less
Example
The expansion for Sweden is listed here as an example
ico-flags.png:
flags.less:
/*
Language Flags
==================================================
Displays a country flag the size of 14px x 11px used for language selections purposes.
*/

.language--flag {
    .unitize-height(11);
    .unitize-width(14);
    background: url("../../img/ico-flags.png") no-repeat 0 0;
    display: inline-block;
    text-indent: 100%;
    white-space: nowrap;
    overflow: hidden;

    // We need to work with pixels here
    &.de_DE { background-position: 0 0; }
    &.en_GB { background-position: 0 -11px; }
    &.nl_NL { background-position: 0 -22px; }
    &.fr_FR { background-position: 0 -33px; }
    &.es_ES { background-position: 0 -44px; }
    &.it_IT { background-position: 0 -55px; }
    &.sv_SE { background-position: 0 -66px; }
}
Display the payment status of orders in the frontend
Here we describe how to add the paymendstatus to your own order or payment state and sending emails by using it.
Implement the status in the theme
The easiest way to provide the paymendstatus in the frontend is to add it below the orderstatus. To do this, add the "order_item.tpl" in your own theme in the following path: /themes/Frontend/YOURTHEMENAME/frontend/account/.
There you can extend the following block with the payment status:
{extends file="parent:frontend/account/order_item.tpl"}

{block name="frontend_account_order_item_status_value"}
	{$smarty.block.parent}
	<div class="column--value">
		<span class="order--status-icon status--{$offerPosition.cleared}"></span>
		{if $offerPosition.cleared==9}
			{s name="partially_invoiced"}Partially invoiced{/s}
		{elseif $offerPosition.cleared==10}
			{s name="completely_invoiced"}Completely invoiced{/s}
		{elseif $offerPosition.cleared==11}
			{s name="partially_paid"}Partially paid{/s}
		{elseif $offerPosition.cleared==12}
			{s name="completely_paid"}Completely paid{/s}
		{elseif $offerPosition.cleared==13}
			{s name="1st_reminder"}1st Reminder{/s}
		{elseif $offerPosition.cleared==14}
			{s name="2nd_reminder"}2nd Reminder{/s}
		{elseif $offerPosition.cleared==15}
			{s name="3nd_reminder"}3nd Reminder{/s}
		{elseif $offerPosition.cleared==16}
			{s name="encashment"}Encashment{/s}
		{elseif $offerPosition.cleared==17}
			{s name="open"}Open{/s}
		{elseif $offerPosition.cleared==18}
			{s name="reserved"}Reserved{/s}
		{elseif $offerPosition.cleared==19}
			{s name="delayed"}Delayed{/s}
		{elseif $offerPosition.cleared==20}
			{s name="re_crediting"}Re-Crediting{/s}
		{elseif $offerPosition.cleared==21}
			{s name="review_necessary"}Review necessary{/s}
		{/if}
	</div>
{/block}
Add the correct Icon
To display the corresponding icon next to the status and you already know about LESS-Styling you could add the following code. If you're not so good with LESS at this moment you could create your own "all.less" file. The LESS code will be compiled into normal CSS by the LESS compiler. Create your all.less in the following directory: /themes/Frontend/YOURTHEMENAME/frontend/_public/src/less Please enter the following code:
.order--status-icon {
	&.status--9, //partially_invoiced
	&.status--10, //completely_invoiced
	&.status--11, //partially_paid
	&.status--13, //1st_reminder
	&.status--14, //2nd_reminder
	&.status--15, //3nd Reminder
	&.status--17, //open
	&.status--18, //reserved
	&.status--19{ //delayed
		background: @highlight-info;
	}

	&.status--12, //completely_paid
	&.status--20{ //re_crediting
		background: @highlight-success;
	}

	&.status--16, //encashment
	&.status--21{ //review_necessary
		background: @highlight-error;
	}
}
If you clear the cache after your adjustment and re-compile your theme, the paymendstatus is displayed as shown in the frontend:

Remove Shopware logo and lettering from the footer
Remove logo
You can remove the Shopware logo from the footer via a template adjustment.

Example
First you have to connect to your FTP server. In the Shopware directory under "themes > Frontend > YOUR THEME > frontend > index" you have the option of including a file that removes the logo.
To do this, create the file "footer.tpl" with the following content in the named path:
{extends file="parent:frontend/index/footer.tpl"}{block name="frontend_index_shopware_footer_logo"}{/block}Please note that this is an example and that you may have to make further changes to the code. You should also make sure to create your own theme, which is derived from the original theme, so that your changes are update-safe.
After you have created the file, recompiled the theme and cleared the cache, the logo should be removed.
Remove lettering
If you want to change or remove the text "Realised with Shopware", you can do this in the snippet management under Settings > Snippets in the backend. Here you can simply search for the text module "IndexCopyright" and remove the value.